RADIUS Policy Enforcement Configuration Guide
A Remote Authentication Dial-In User Service (RADIUS) is an authentication server for network access control and policy enforcement. It can use various user attributes, such as credentials or anything you can include on a certificate template, to control who or what has access to your network.
When you use a digital certificate with RADIUS authentication, you suddenly have more diverse attributes to base network access control on, such as the operating system, managed or BYOD status, location, and more. However, this requires setting up a RADIUS with specific policies to enforce. This guide will show you how to use services like Cloud RADIUS to enforce network policies and access control.
How Does RADIUS Authentication Work with Digital Certificates
A RADIUS server employs various modes to authenticate a user or device to a network. Some standard methods of RADIUS authentication are passwords and digital certificates. RADIUS authentication and authorization start with a RADIUS client trying to establish a connection with the network by:
- A RADIUS client sends an authentication request to the RADIUS server through their credentials.
- The client sends an Access-Request message to the RADIUS server that contains a shared secret.
- The RADIUS server ensures that the Access-Request message originates from an authorized user, or else the message is ignored.
- Once the client gains authorization, the RADIUS server accesses the authentication method as requested.
- If the authentication method is accepted, the server gets the credentials from the message and sees if they match against the user database. Once matched, the RADIUS server takes the required information from the user database.
- Now, the RADIUS server checks for an access policy or a profile to match the user credentials.
- In case of a matching policy, the RADIUS server sends Access-Accept RADIUS messages. The server sends an Access-Reject message without a matching policy and denies access.
- Once the user gains access to the network, the function of RADIUS accounting starts. RADIUS accounting messages (Accept-Accept) and (Accept-Reject) messages not only give access but are also used for statistical and accounting purposes to see the number of successful connects to the RADIUS server.
RADIUS Server Policy Overview
SecureW2’s Cloud RADIUS server and PKI empower administrators to set the following policies for users and devices on your network. These policies provide complete network control to network administrators for an 802.1x solid network.
- Authentication Policy: Helps Unmanaged and BYODs enroll for certificates.
- Role Policy: Creates specific groups to define the certificate an end user or device will receive before placing them in a specific VLAN.
- Enrollment Policy: Ties role policies to custom certificate settings to define the certificate template and issuing CA.
- Network Policy: Network policy is the final policy that determines user access based on the attributes set in a user or device certificate. The RADIUS server assigns clients to the respective VLANs based on these attributes.
RADIUS Policy Examples
Organizations use standard network policies to segment their users and devices into groups based on roles, locations, types of devices, attributes, etc. This article will give you a basic understanding of why and how these network policies are made and how they further protect your network.
Here are some common examples of RADIUS client policies we see our customers create based on certificate attributes:
- Segmenting trusted devices vs BYOD
- Segmenting people from different locations
- Segmenting people from different groups (students and staff)
- Segmenting devices from different MDMs
- Segmenting MAC Authenticated devices
- Segmenting devices based on VLAN grouping through tunnel ID
Network Segmentation of Trusted Devices Vs BYODs
Unmanaged devices and BYODs can pose a risk to network security since administrators don’t have as much control over them. For that reason, many organizations choose to segment managed devices from unmanaged ones on their networks.
Here’s how to set it up in the SecureW2 management portal:
Prerequisites
- Create a Role Policy through an Identity Provider for BYODs and an API gateway for Managed Devices certificate enrollment. You can create role policies for BYOD and Managed Devices using our Policy Engine workflow and map these role policies to Network Policies.
- You can also segregate Managed devices and BYODs by creating an Intermediate CA and mapping the users and devices according to the attributes in the certificates assigned.
Configuration Steps
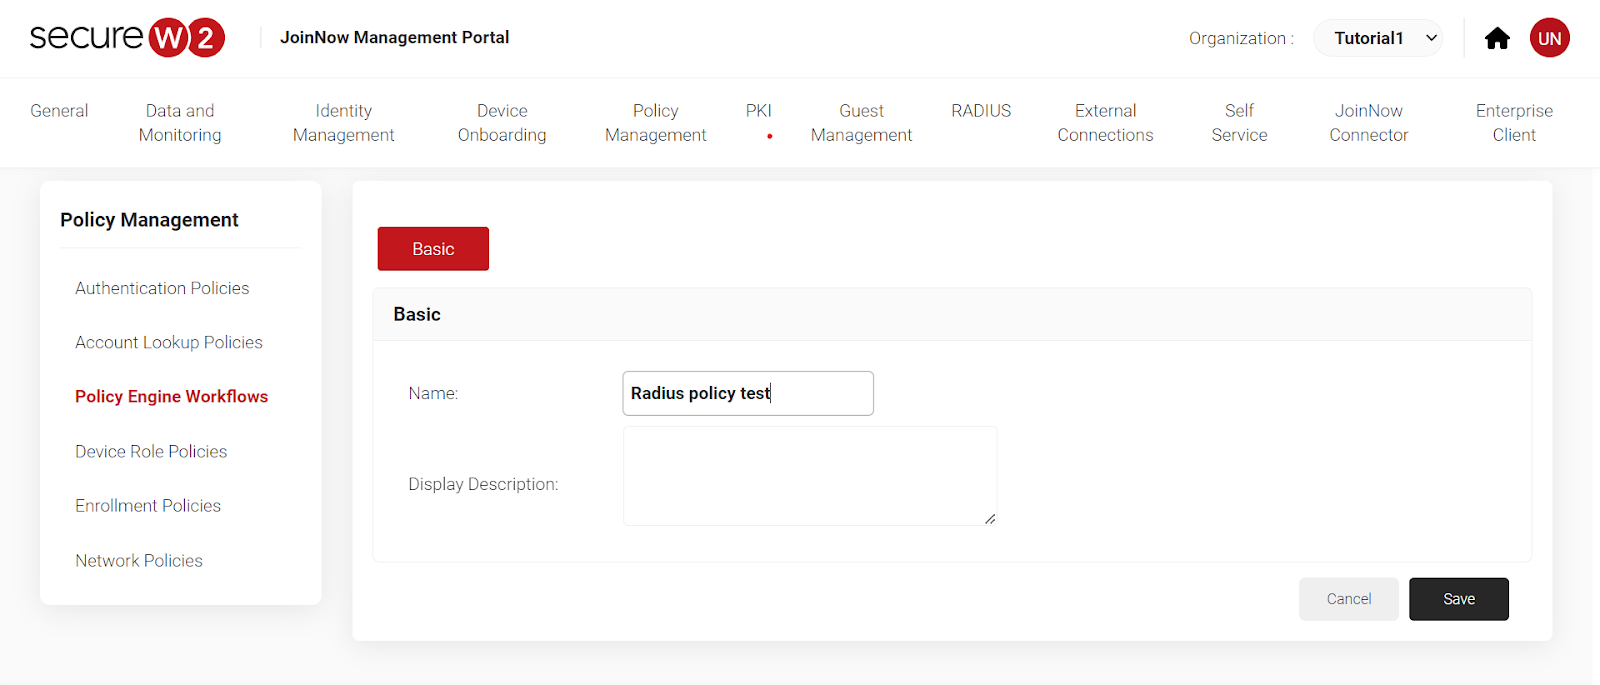
- Go to “Policy Management” then “Policy Engine Workflows”.
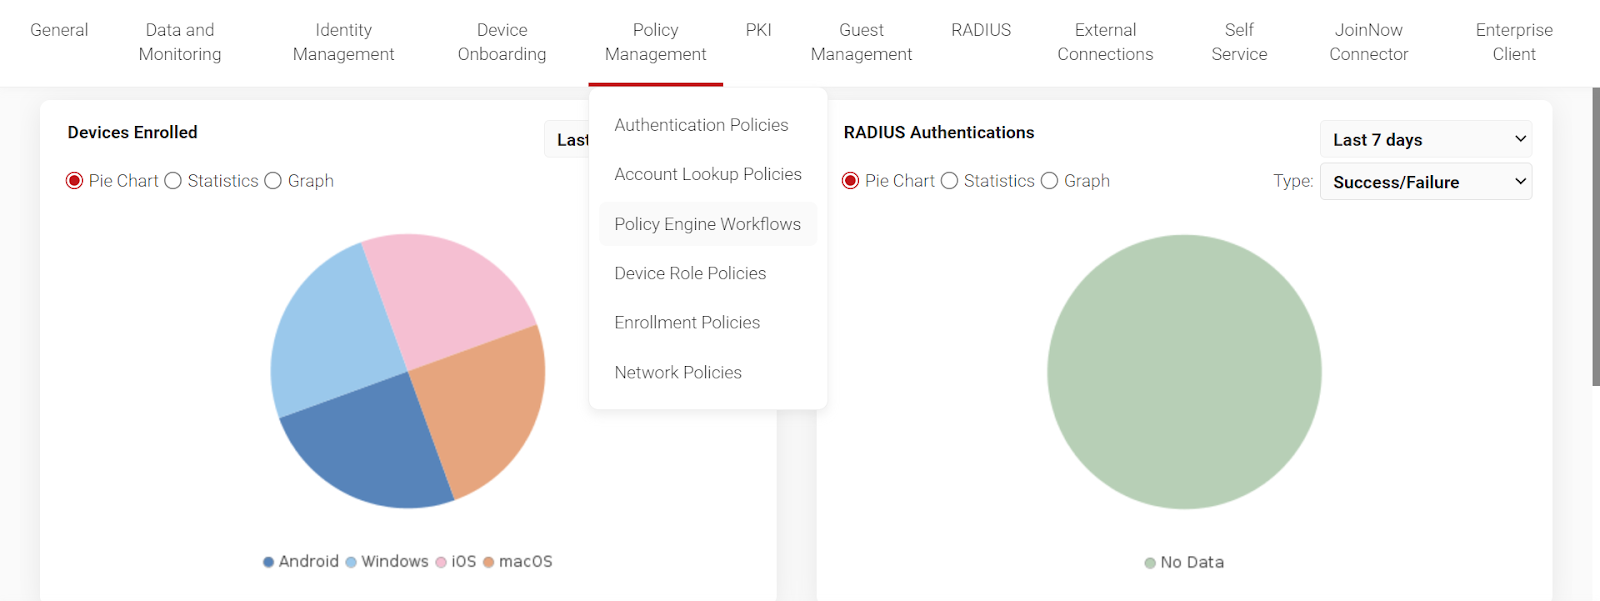
- Select“Policy Engine Workflows”. Add a name and description. Click “Save”.
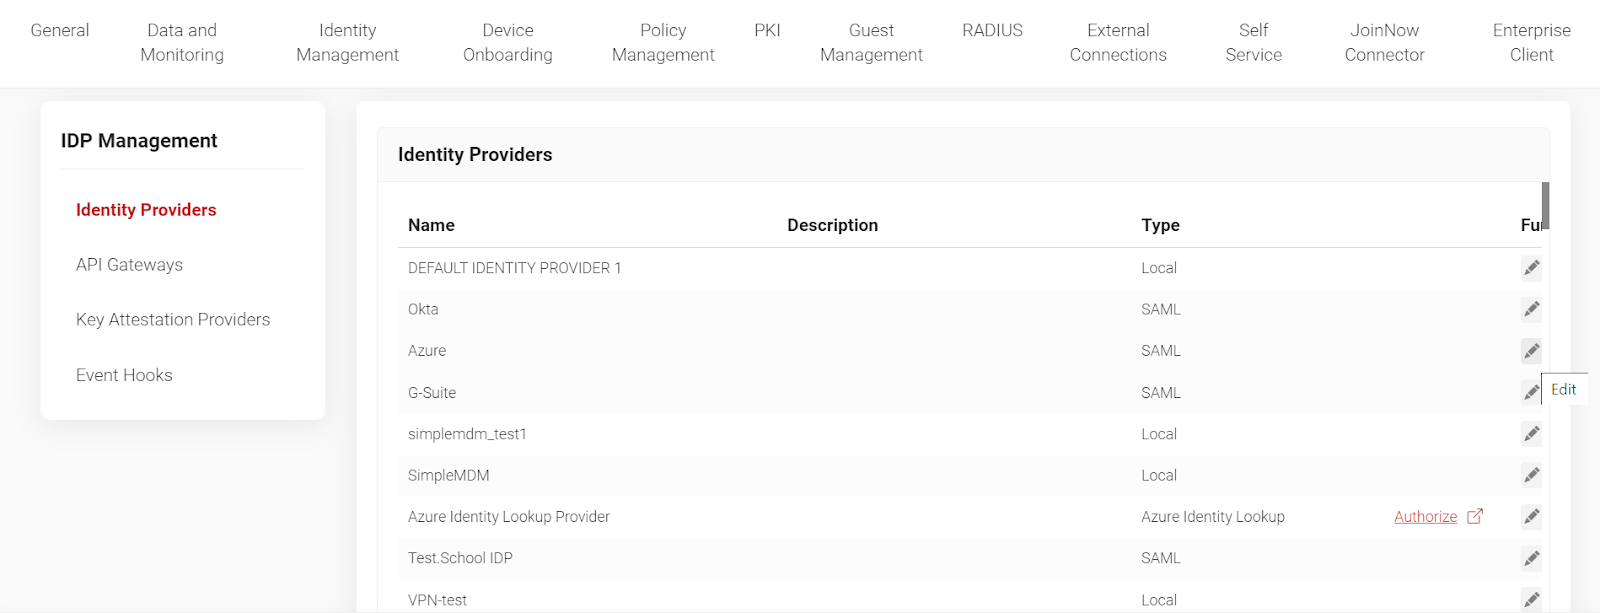
3. Click on “Identity Management” then “Identity Providers”.
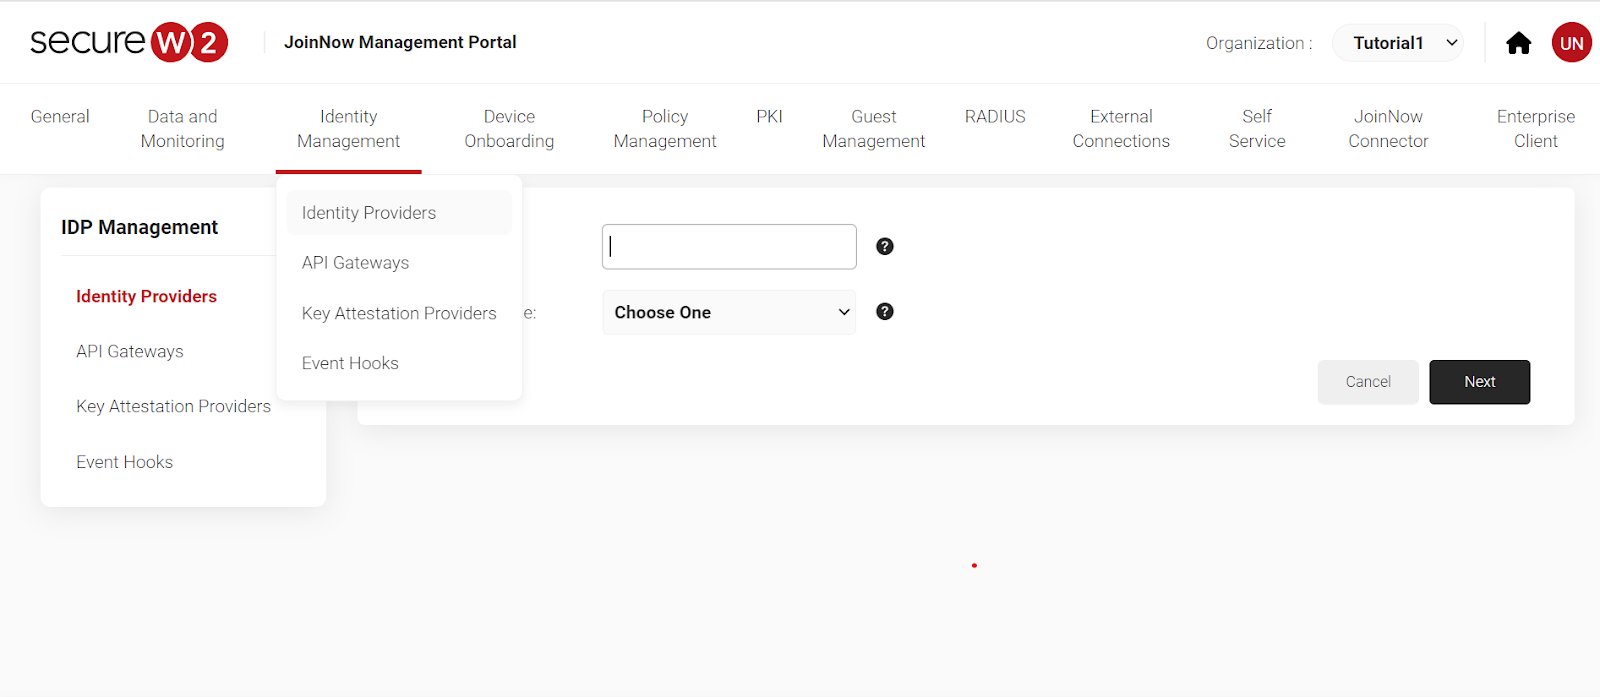
4. Select your identity provider from the drop-down list.
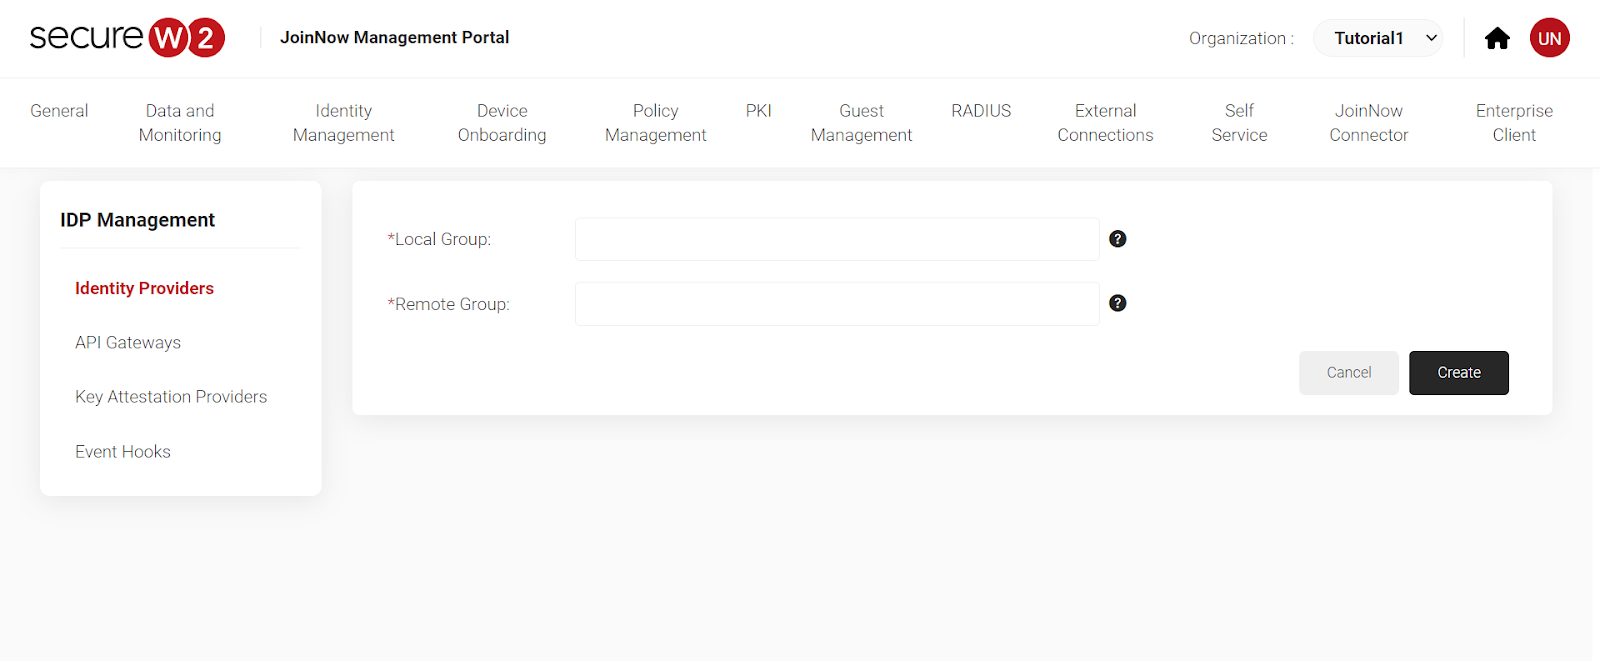
5. Click on “Groups”. Click on “Add” to add a new user-based group.
6. To identify BYOD users, we have given them the name BYOD.

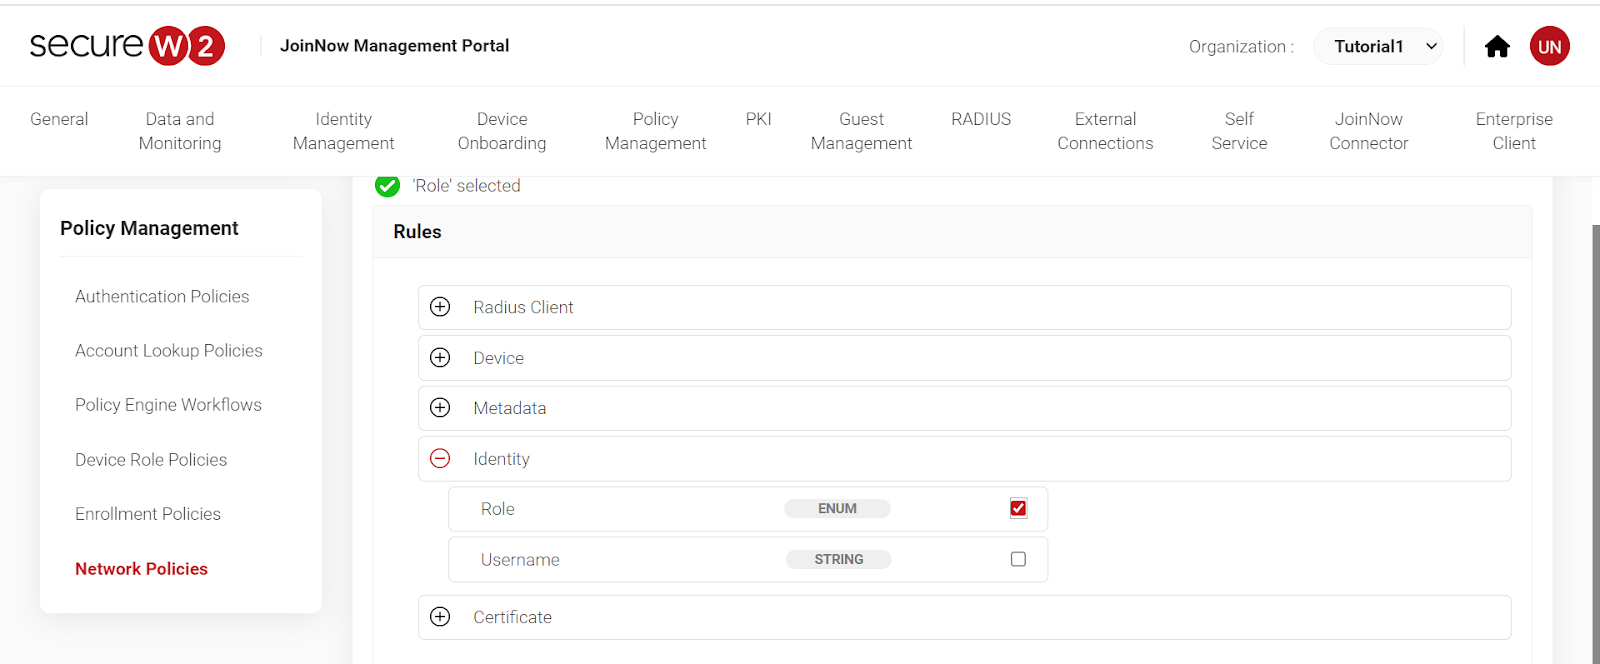
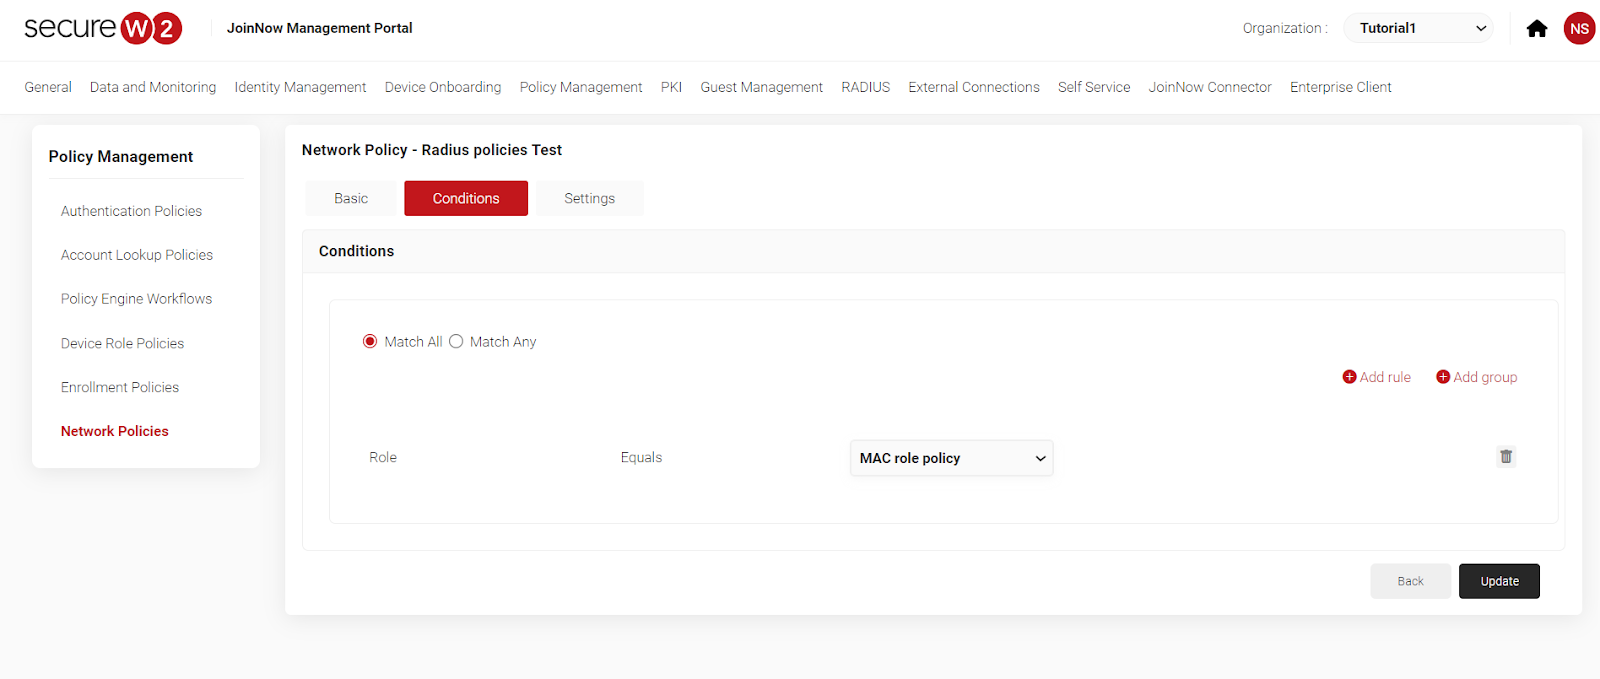
7. Click on “Network Policies”. Select your network by name. “Add Rule” and click on “Roles.” Click “Save”.

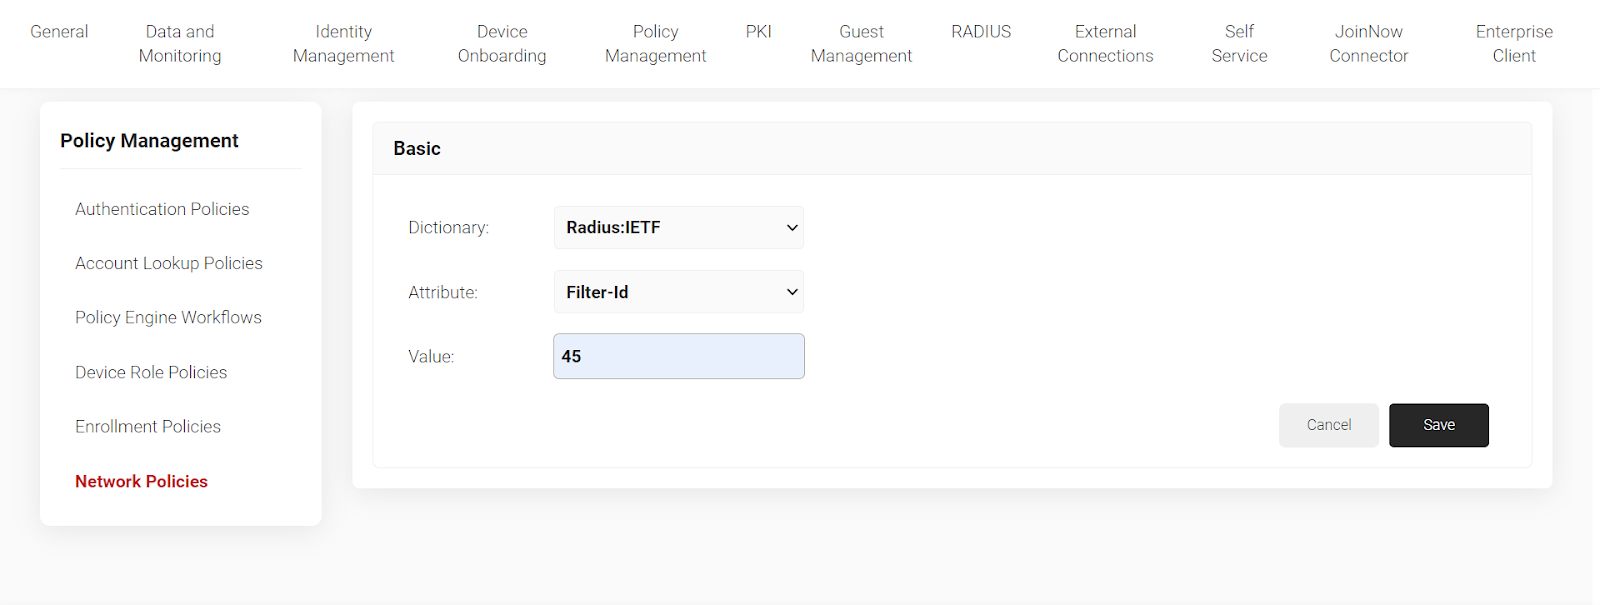
8. Click on “Settings” then“Add Attribute.” Select the attribute “Filter ID” and enter the value. Click “Save”.

This should help segregate BYOD devices per role policies in your workflow under the Identity Provider.
Creating Intermediate Certificate Authorities for Segmenting Trusted and BYODs
You can also segment devices by creating Intermediate Certificate authorities and configuring them on your RADIUS server. It’s considered best practice to have a separate Intermediate CA for managed and BYOD devices.
- Go to PKI. Click on “Certificate Authorities”.

- Scroll down and click on “Add Certificate Authority”.
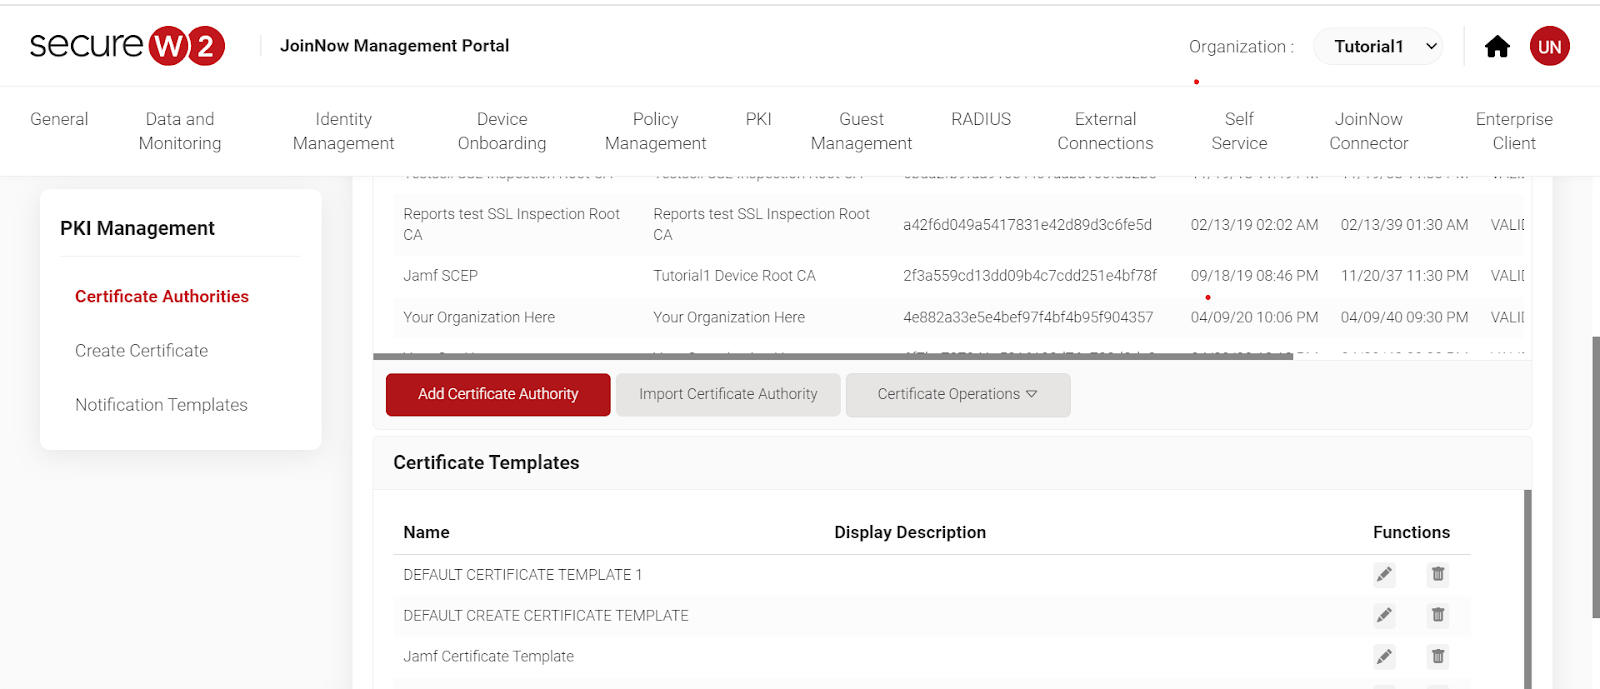
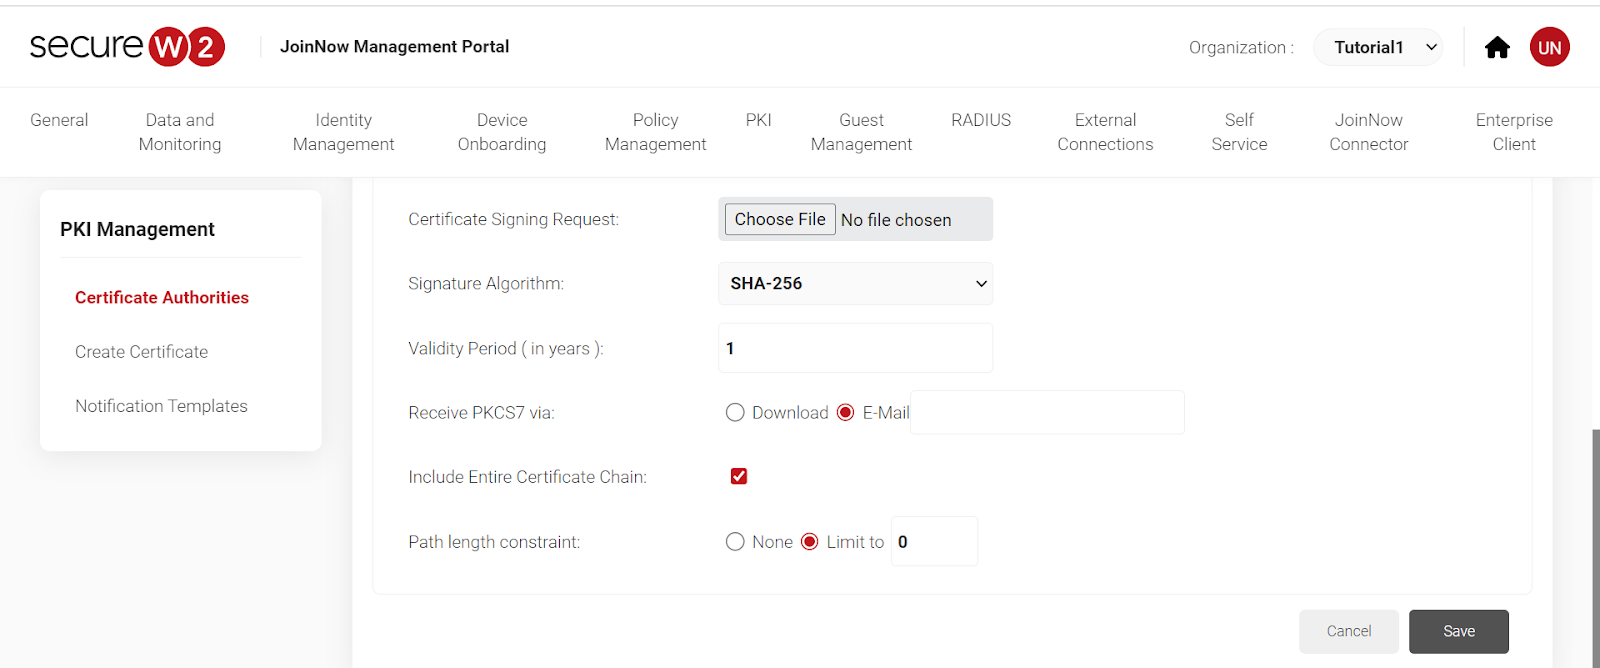
- Add the following details to the given columns.

- Enter a valid email ID and scroll down. Click “Save”.
7. Click on Network Policies. Select your network by name. “Add Rule” and click on “Roles”. Click “Save”.

8. Click on “Settings” then “Add Attribute”. Select attribute as Filter ID and enter the value. Click “Save”.

You can now download your unique digital certificate with assigned roles as per intermediate CAs, which will segregate your devices as per the assigned VLANs
Network Segmentation Of People From Different Locations
Location-based SSID authentication is adequate to protect your organizational network against remote vector attacks. An organization can physically separate users based on their locations, such as remote and office teams and different office locations, using different SCEP enrollment tokens under API Gateways.
- Go to Identity Management- API Gateways
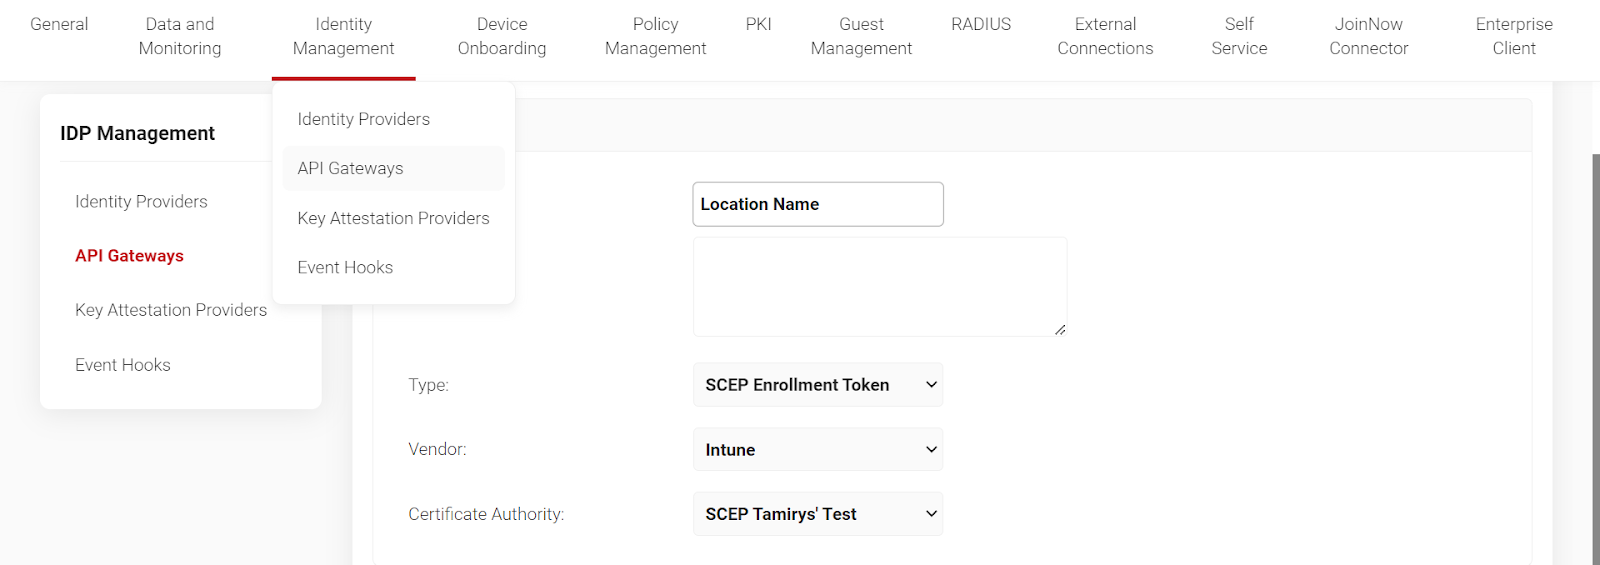
- Enter the Location Name. Next, select the Enrollment Token and your Identity Provider. Then, choose your CA. Your API token will be produced and can be used to download certificates for location-based authentication.
- Next, go to “Policy Management” and then “Device Role Policies.” Hover down and click on “Add Device Role Policy.” Add the name under Basic and click “Conditions”.
Segmentation of Users from Different Groups or Departments
Users can get robust network security when categorized according to specific groups, like students and staff. Some organizations create separate VLANs for groups to prevent compromise and to have separate limitations, such as a different bandwidth on a student VLAN.
Using Role policies
- Create an Identity Provider.
- Map it in the Policy Engine workflow.
- Complete the configuration in Network Policies.
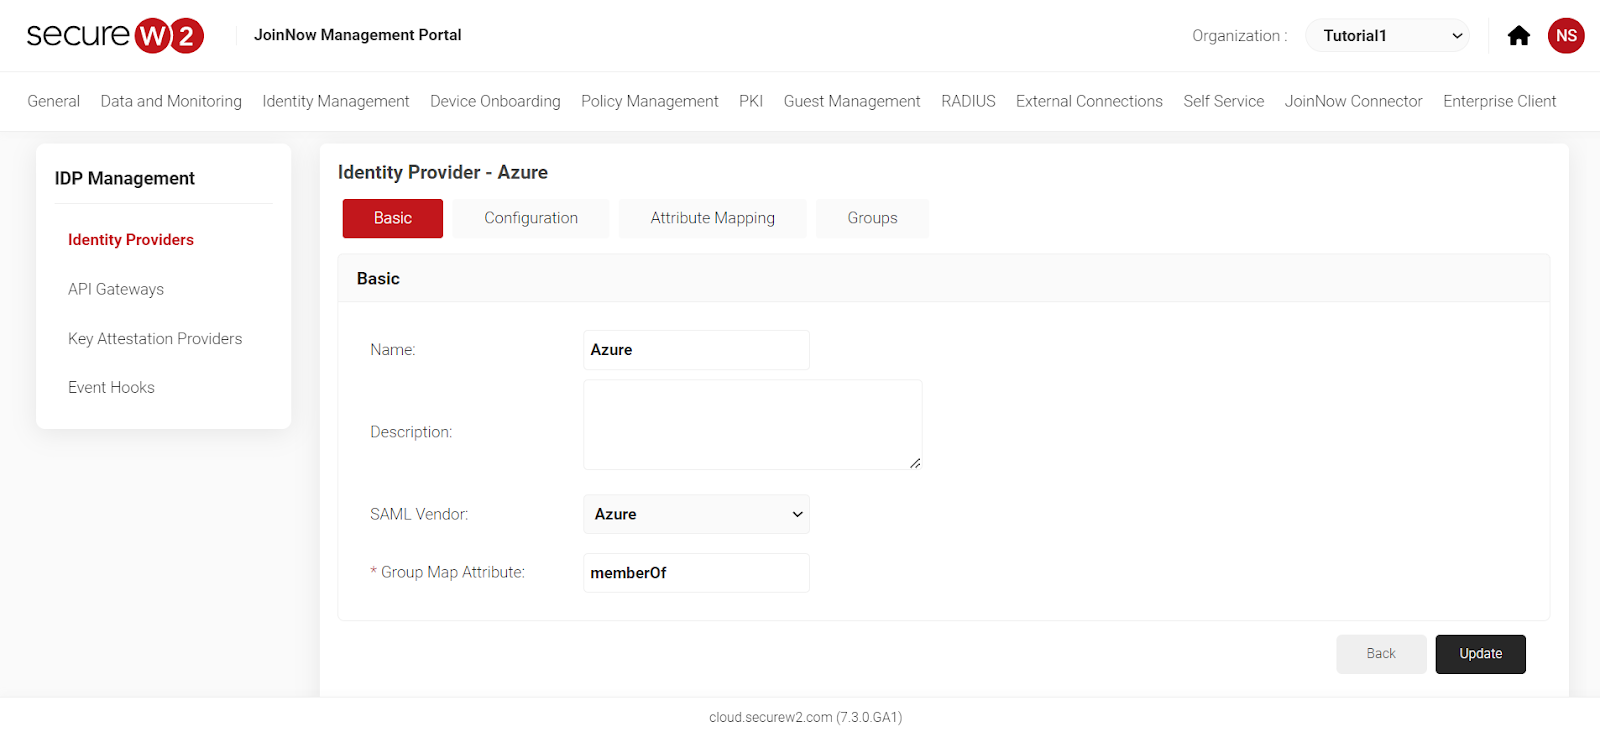
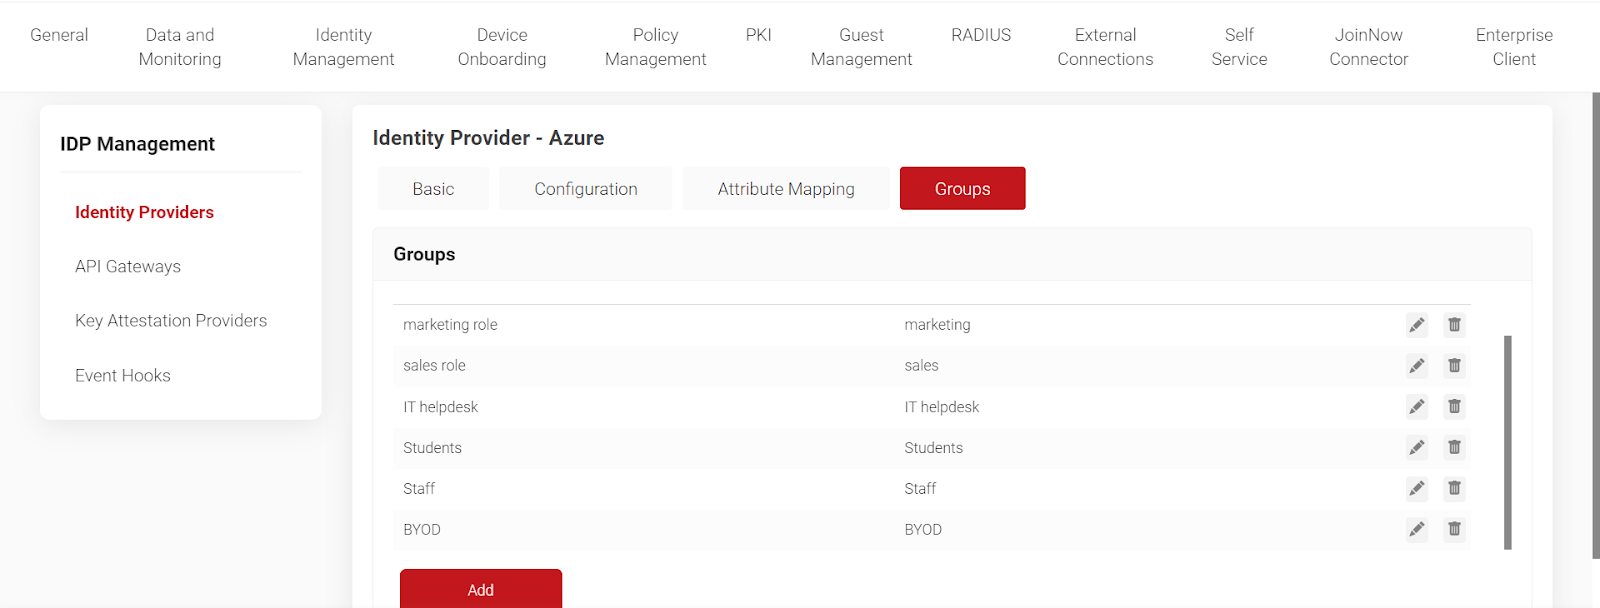
- Click on “Identity Provider” and select “Azure”.
- Click on “Groups” and select “Add”.
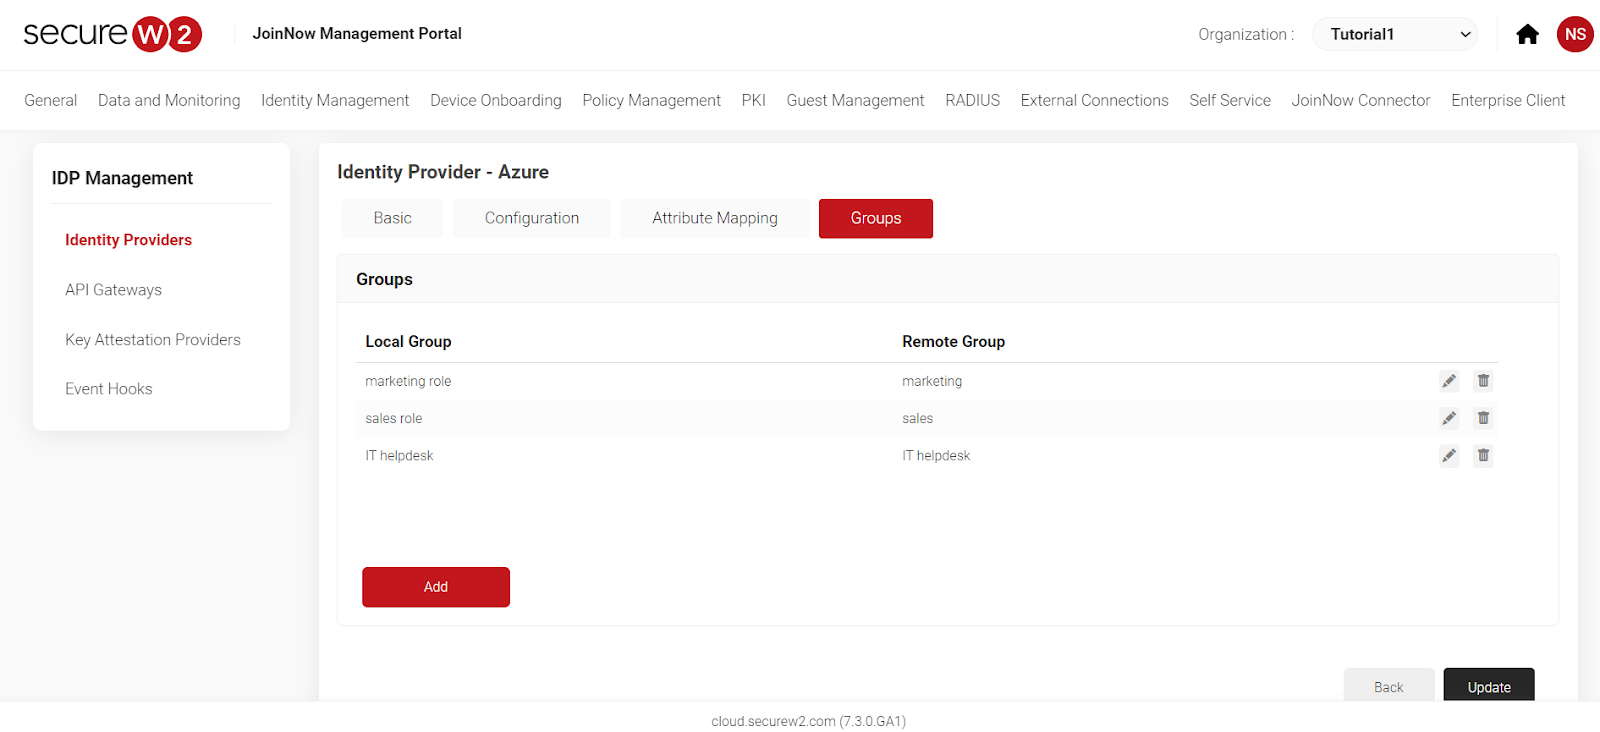
- Add a Local Group and Remote Group Name.
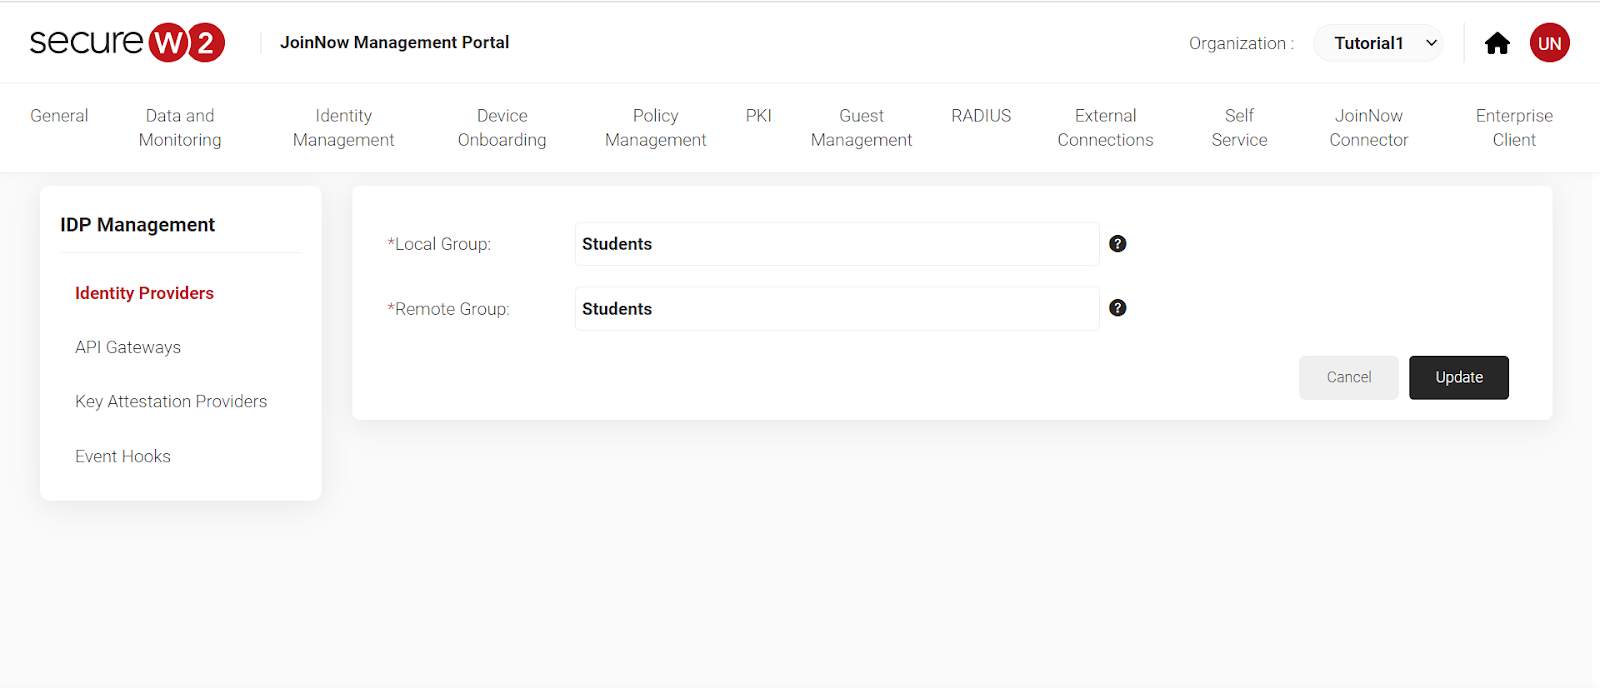
- To identify Students, we have named the group “Students”.
7. Click on Network Policies. Select your network by name. “Add Rule” and click on “Roles”. Click “Save.”
8. Click on “Settings” then “Add Attribute.” Select attribute as Filter ID and enter the value. Click “Save.”
Segmentation of Devices Based on Different Mobile Device Management Solutions
An organization mostly uses a Mobile Device Management (MDM) solution to assign role-based access to its Managed Devices. You can set different role policies in our Management Portal for Managed Devices using Policy Engine workflow and map these role policies to Network Policies.
- Select an Identity Provider from your list.

- Go to “Groups” and select thenamee you want to map to the Particular IDP.
- Click on “Network Policies”. Select your network by name. “Add Rule” and click on “Roles.” Click “Save.”

- Click on “Settings” then “Add Attribute.” Select attributee as Filter ID and enter the value. Click “Save.”

Now, you can classify devices based on a particular MDM.
Segmenting MAC authenticated devices on a Network.
Many devices connect to an organizational network daily, including printers, closed-circuit televisions, IoTs, etc. These devices don’t support certificate-based authentication, thus leaving the network vulnerable to malicious attacks. However, you can use MAC-based authentication that verifies IoT, printers, and other devices in a network.
MAC-based authentication is still not as secure as certificate-based authentication, so it’s best practice to segregate MAC authentication-based devices into a separate VLAN to reduce the chances of infiltration on the network. Let’s see how to segment devices based on MAC authentication.
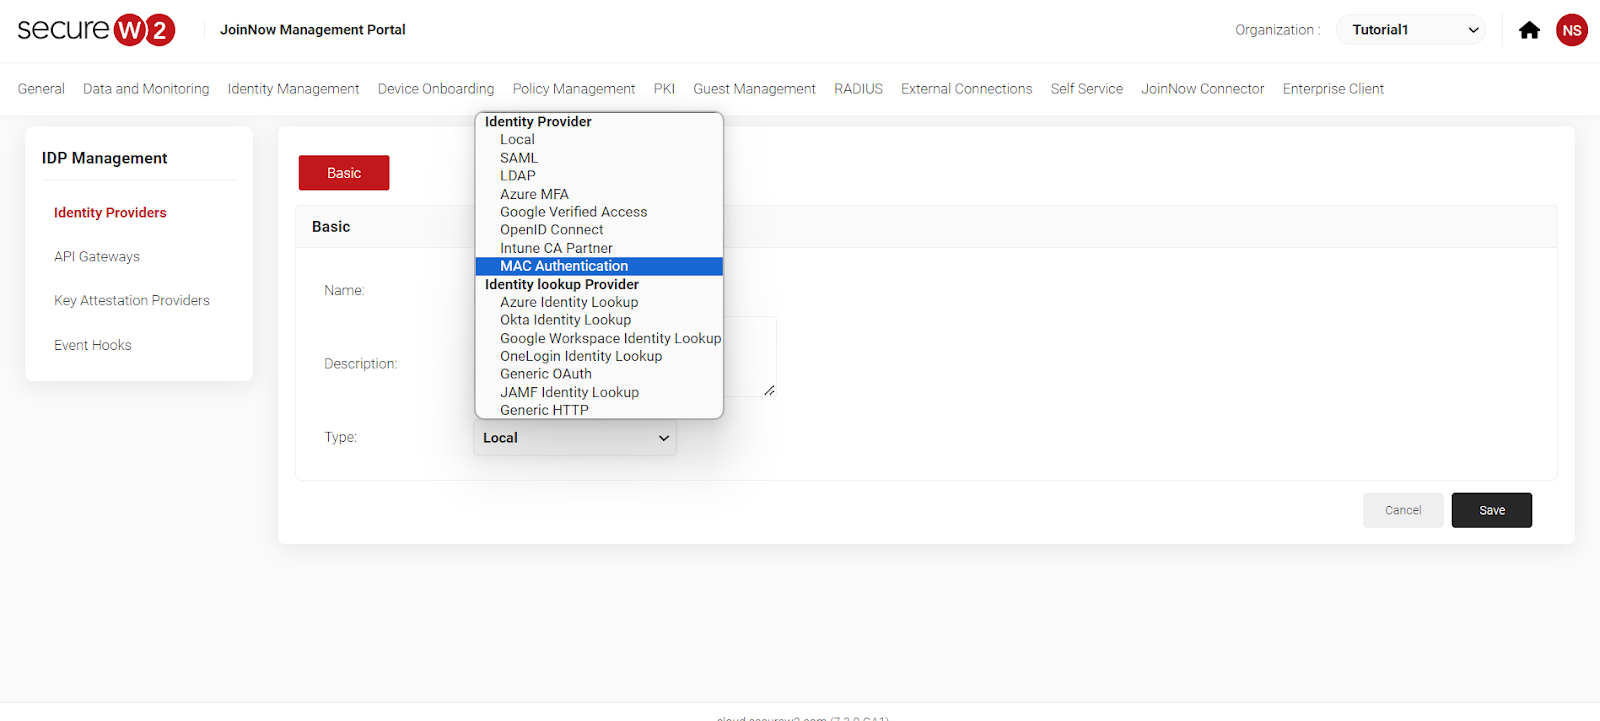
- First, create a new identity provider for MAC devices.
- Identity providers-> Add
- Select “MAC Authentication.”
- Either add device or upload the MAC devices in a file.
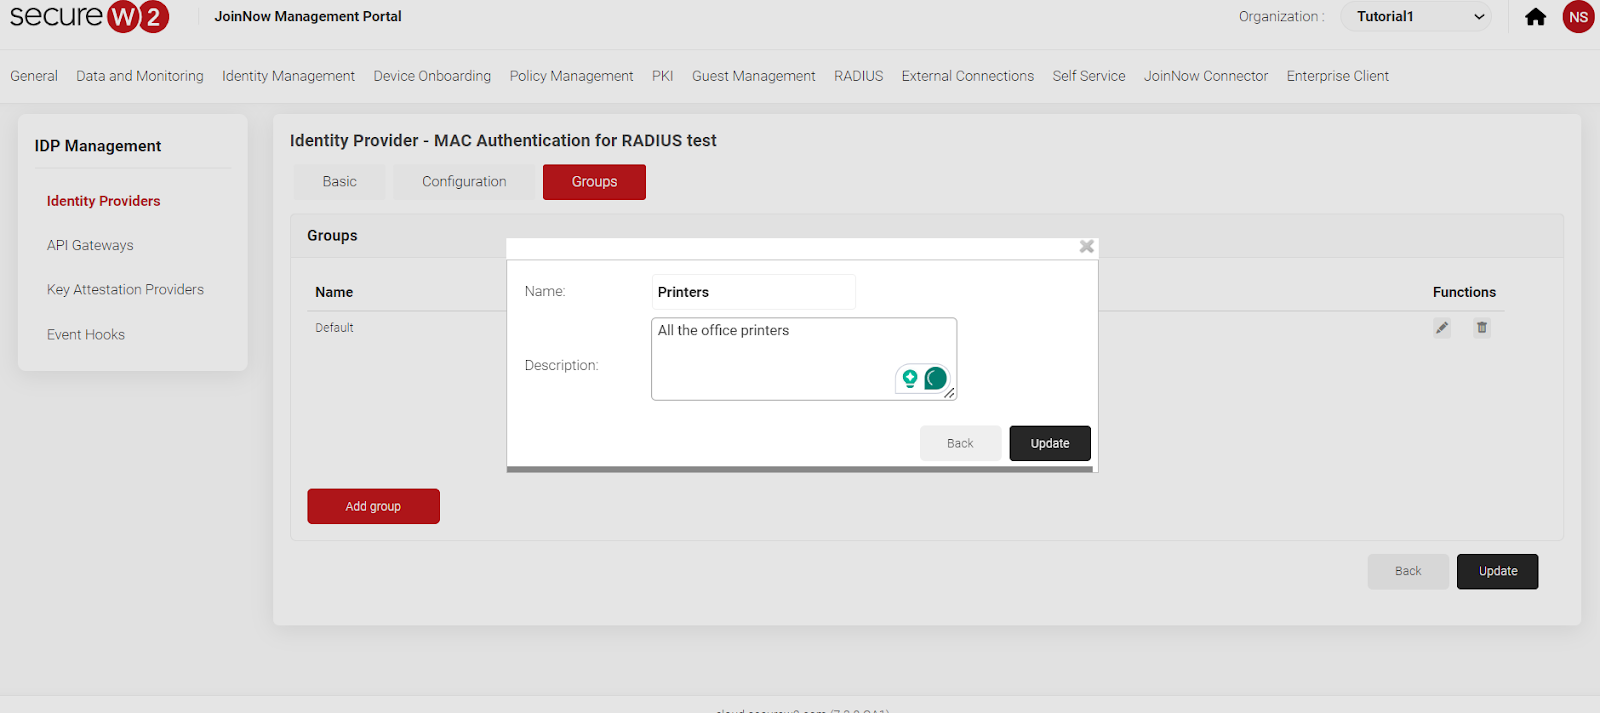
- Add a new role policy to Policy engine workflows for MAC devices.
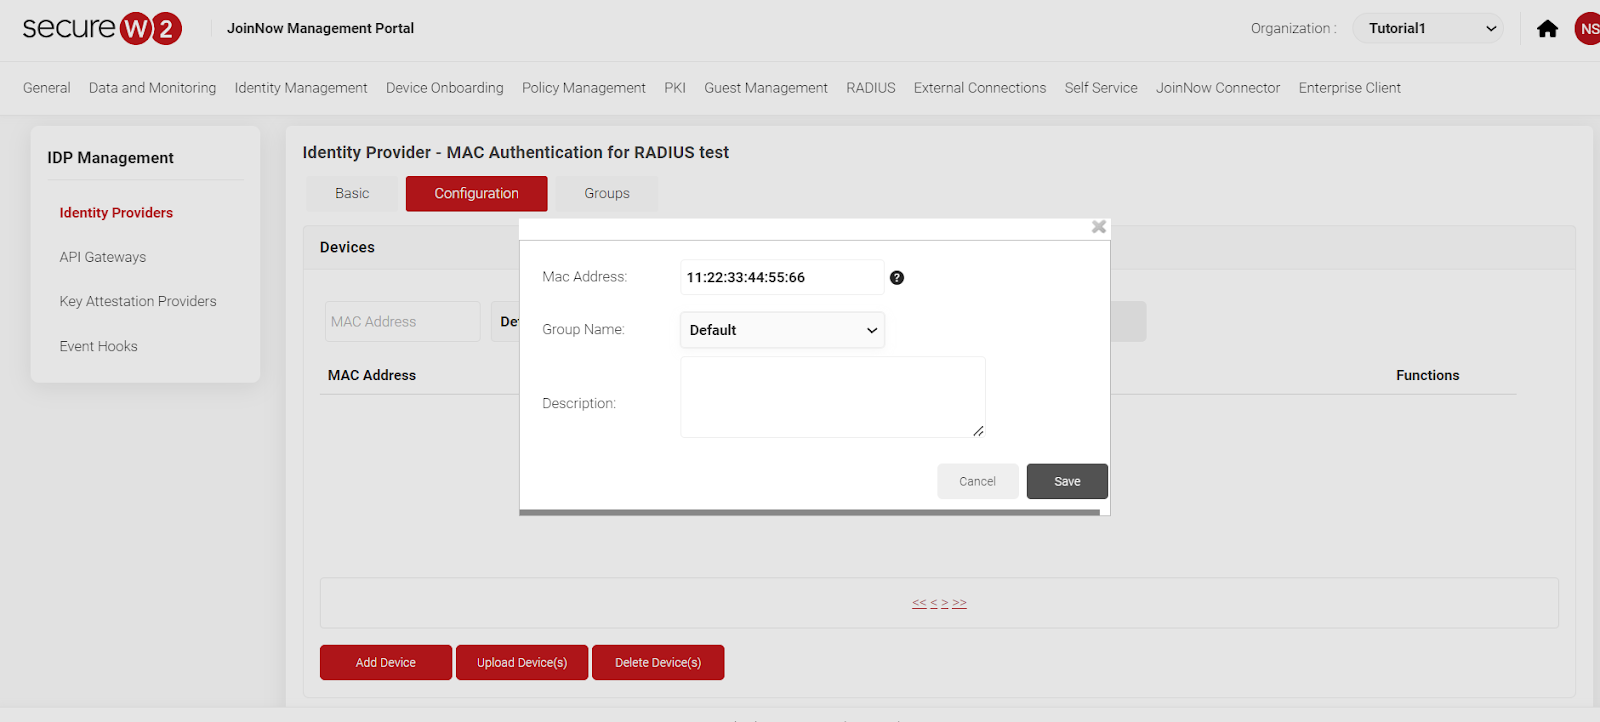
- Now, Create a Role Policy with Policy Engine Workflow
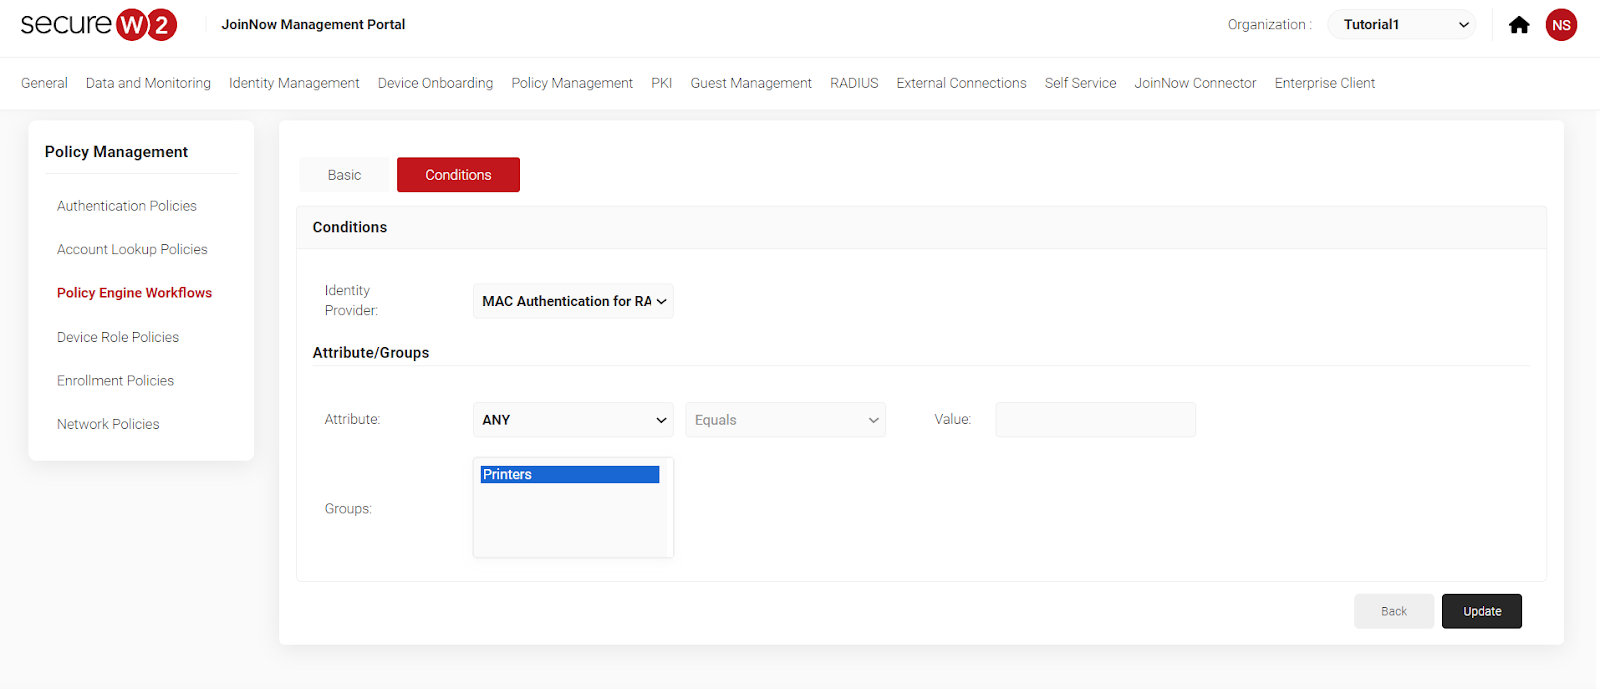
You can add devices based on your location through the device-based role policies.
Simplifying RADIUS Policy Configuration through SecureW2’s Cloud RADIUS Server
Network segmentation ensures you allow only authorized users to access your network. Digital certificates empower network access control initiatives even further by enabling you to enforce granular policies around device access and segmentation, as certificates are populated with detailed information about each connection to the network. Certificate-based authentication with Cloud RADIUS adds an extra layer of security to your wireless network through the identity context of certificates, where you can see who/what connects to your network every time a request is made. SecureW2s Managed PKI, along with our cloud-based RADIUS server, makes certificate-based authentication a breeze as it does not require extensive set-up and can be deployed immediately.
Check out our pricing to see how affordable and simple RADIUS server security can be for your organization.
