With a growing number of organizations utilizing Google Workspace for its solutions that improve collaboration and productivity, it is critical to ensure that network resources are accessed securely and effectively. Network security may be significantly enhanced using a solid authentication system like RADIUS (Remote Authentication Dial-In User Service) with Google Workspace. Centralized authentication, authorization, and accounting are made possible via a Google Workspace RADIUS server, which simplifies the administration of user credentials and access restrictions. Businesses may reduce the risk of illegal access and data breaches by integrating RADIUS with Google Workspace to guarantee that only authorized users can access vital network resources.
Furthermore, sensitive data is better protected because of cutting-edge security protocols like RadSec (RADIUS over TLS) integration in Google Workspace RADIUS solutions. RadSec protects credentials during the authentication process by encrypting communications between RADIUS clients and servers. Organizations may build a highly secure environment where every device must authenticate before entering the network by combining 802.1x, a network access control standard, with other security measures. In addition to strengthening network security, this layered security strategy—backed by SecureW2’s Cloud RADIUS solution—ensures smooth integration with Google Workspace and offers a scalable and trustworthy authentication framework for contemporary businesses.

Integrating SecureW2 with Google Workspace is necessary to simplify user authentication and improve network security. This section will show you how to use the Google Developer Console to configure SecureW2 with Google Workspace. Setting up OAuth consent and generating the required credentials guarantees smooth interaction with Google Workspace RADIUS and Google Workspace RadSec for reliable 802.1x authentication. Follow these precise instructions to effectively safeguard your organization’s network access.
Creating a New Project
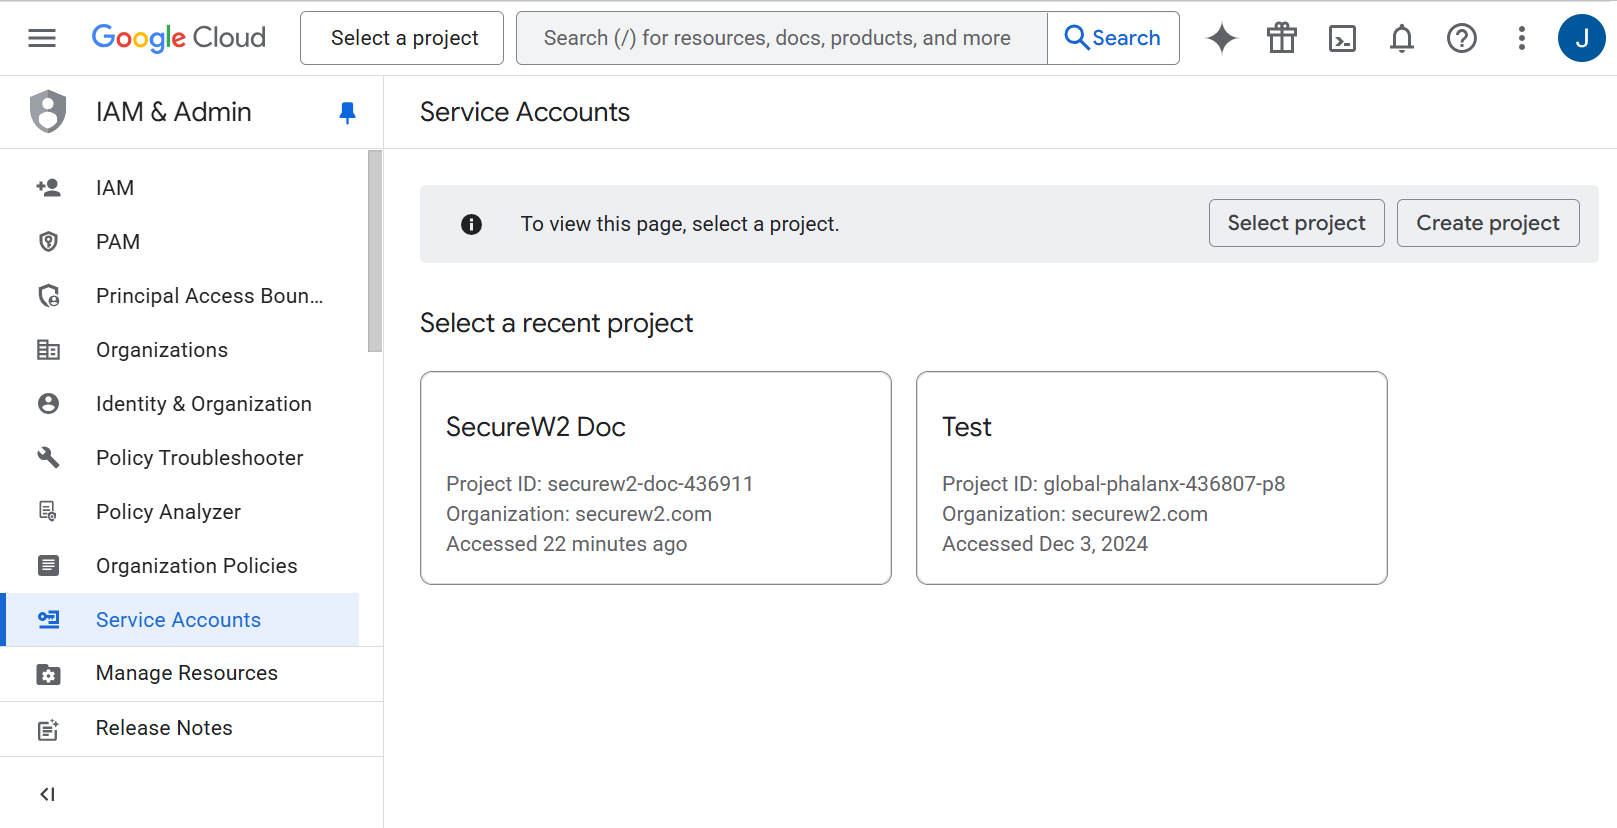
The Google Service Account must be created in the IAM & Admin console.
- Open your Google developer console: https://console.developers.google.com
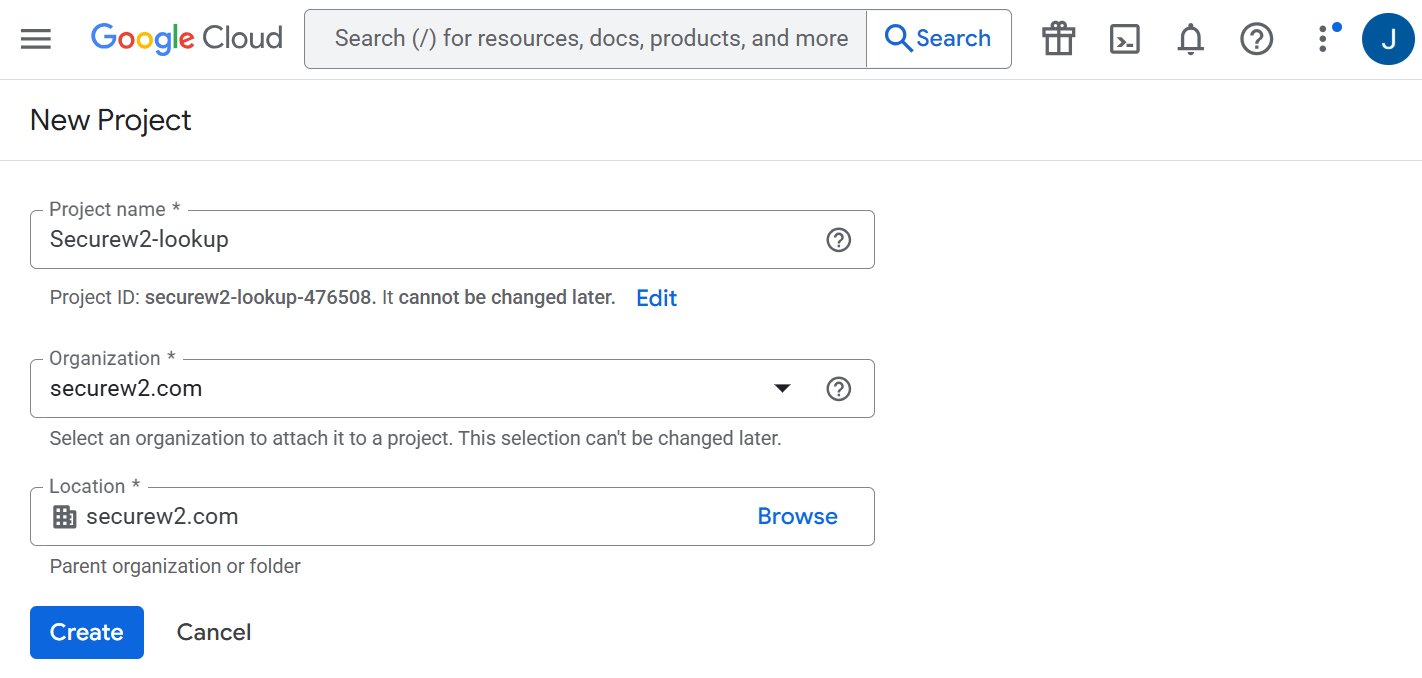
- Select the appropriate project, or create a new project as shown in the following screen.

- To create a new project in a Google service account:
- Click Create Project.
- In the New Project page, enter a name for the project in the Project name field.
- From the Organization drop-down, select the required organization for the project.
- From the Location drop-down, select the parent organization.

- Click Create.
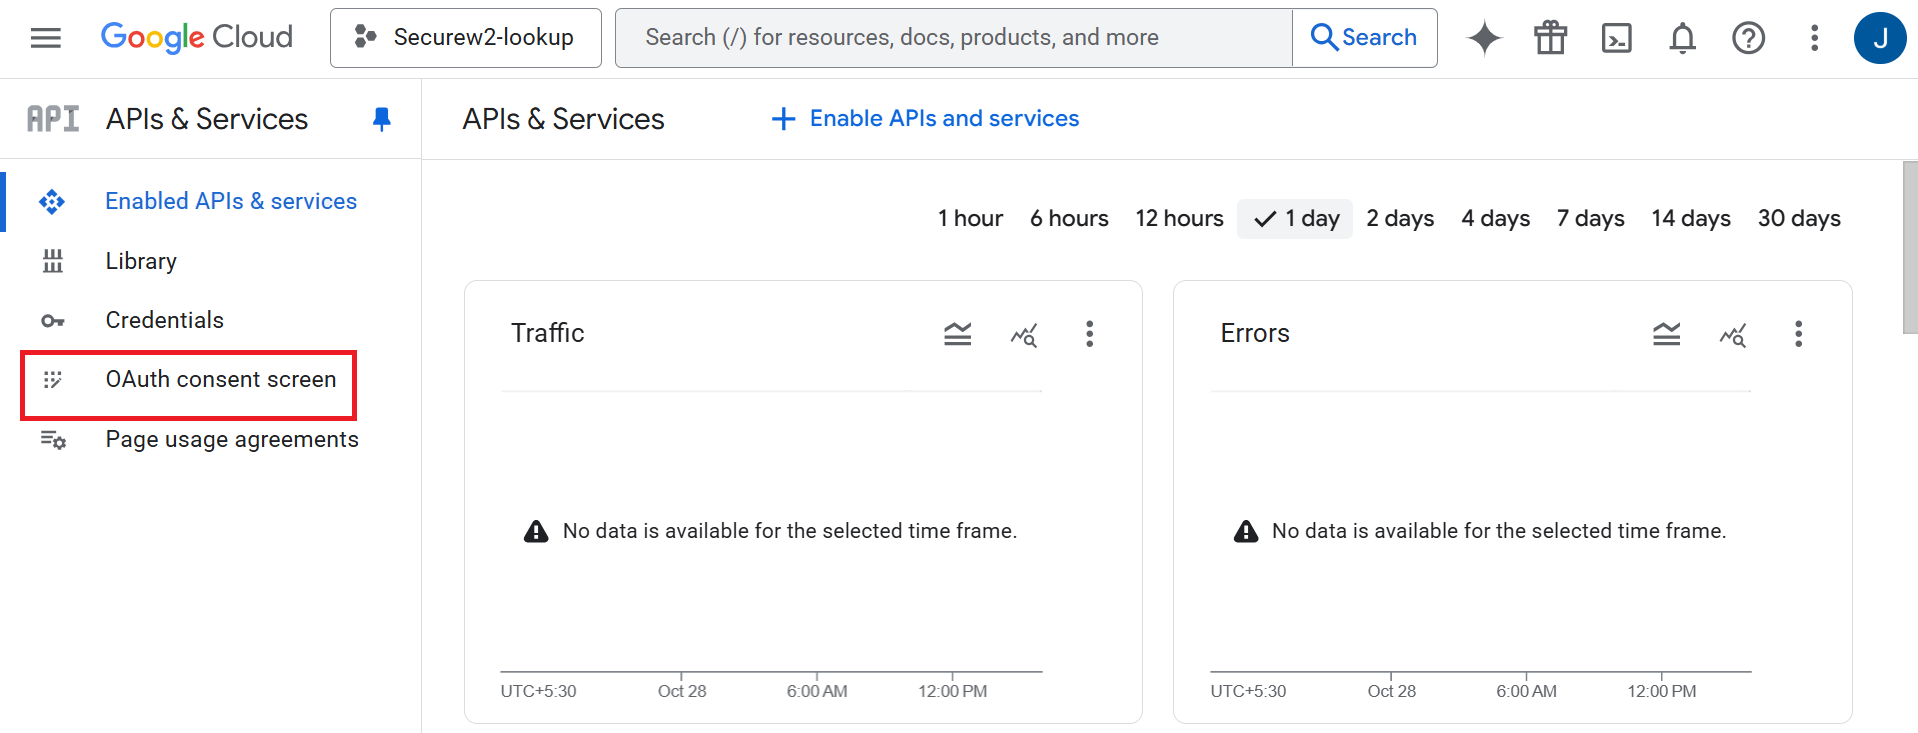
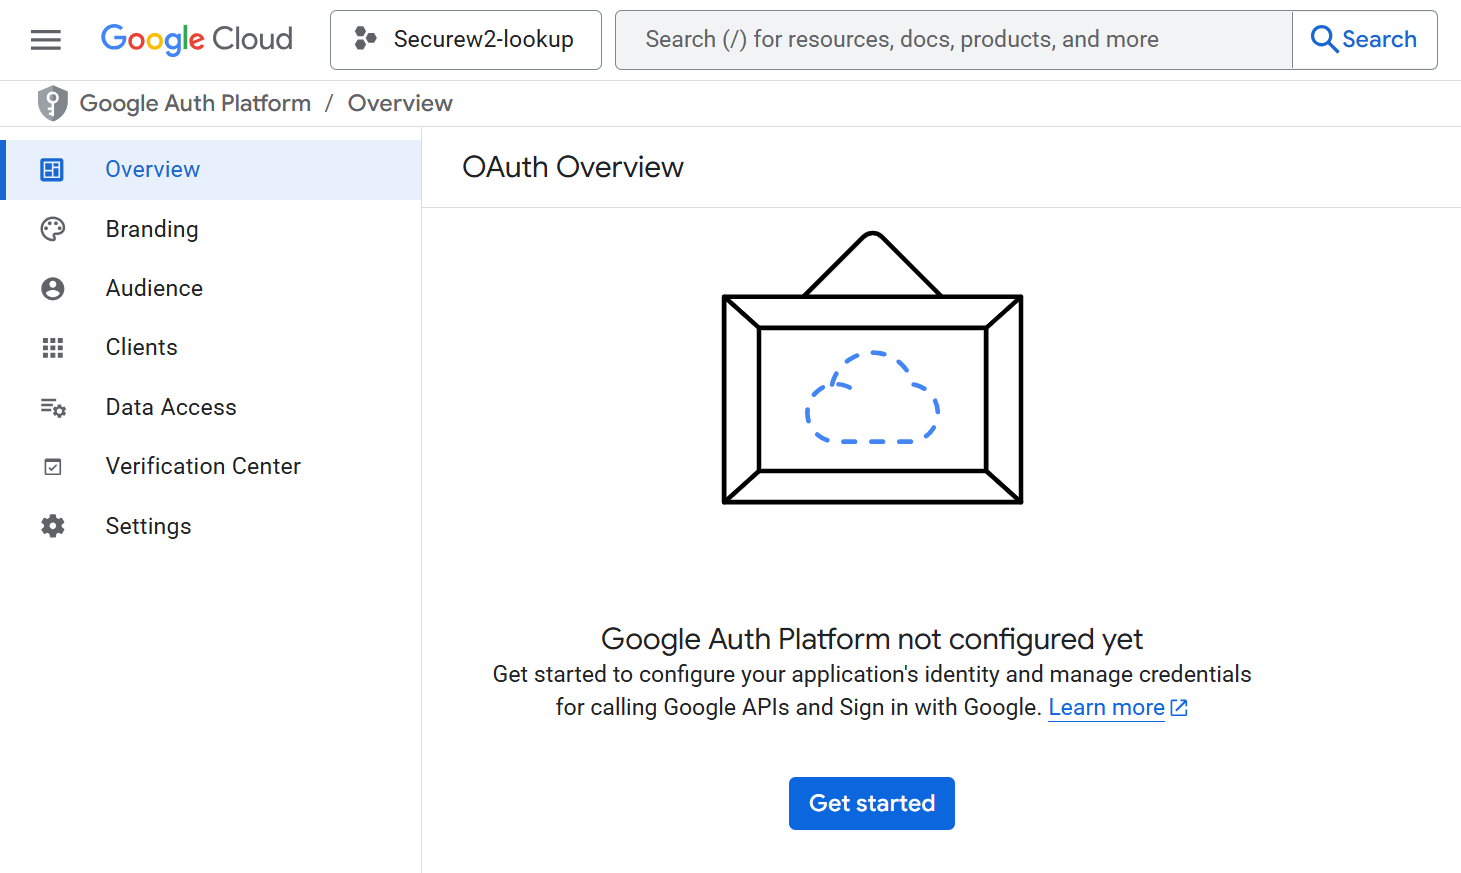
- To create an OAuth consent, click OAuth consent screen in the left menu. The following screen is displayed.

- Click Get Started.

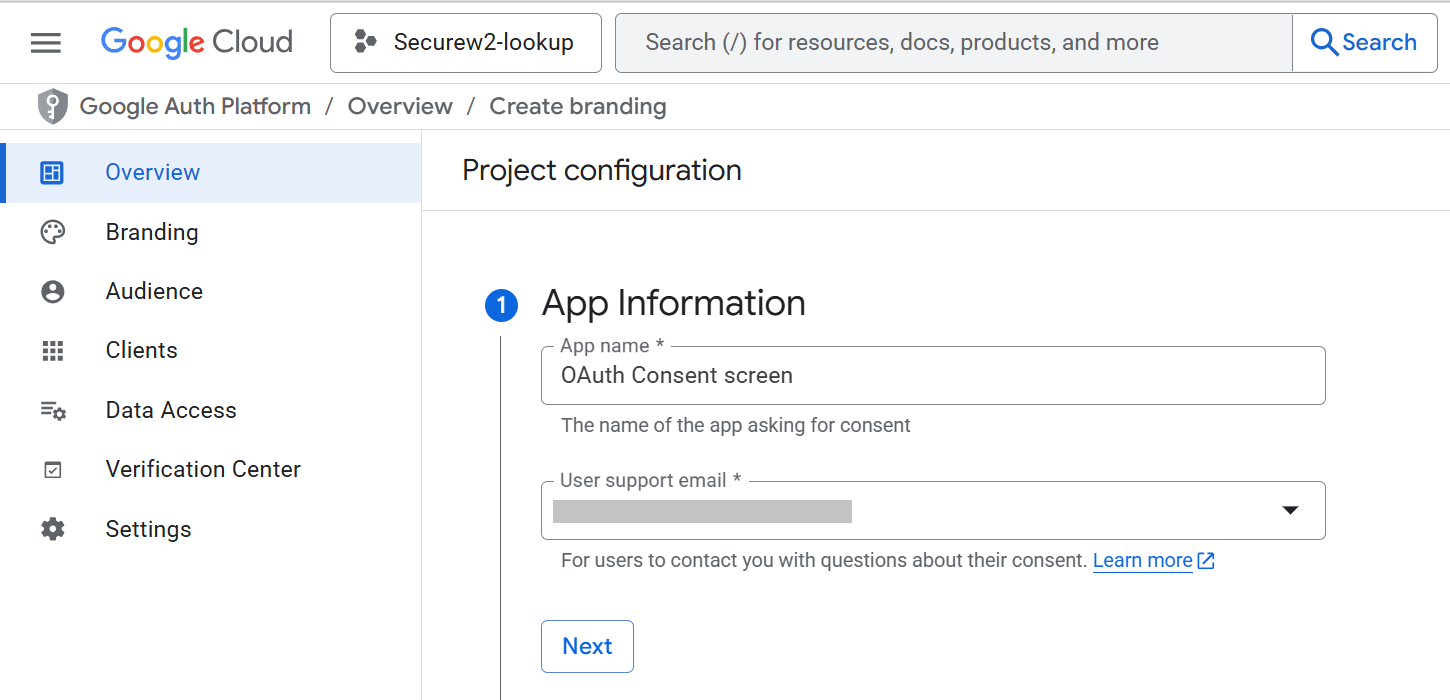
- In App Information, enter the application name in the App name field.
- From the User support email drop-down list, select the user and click Next.

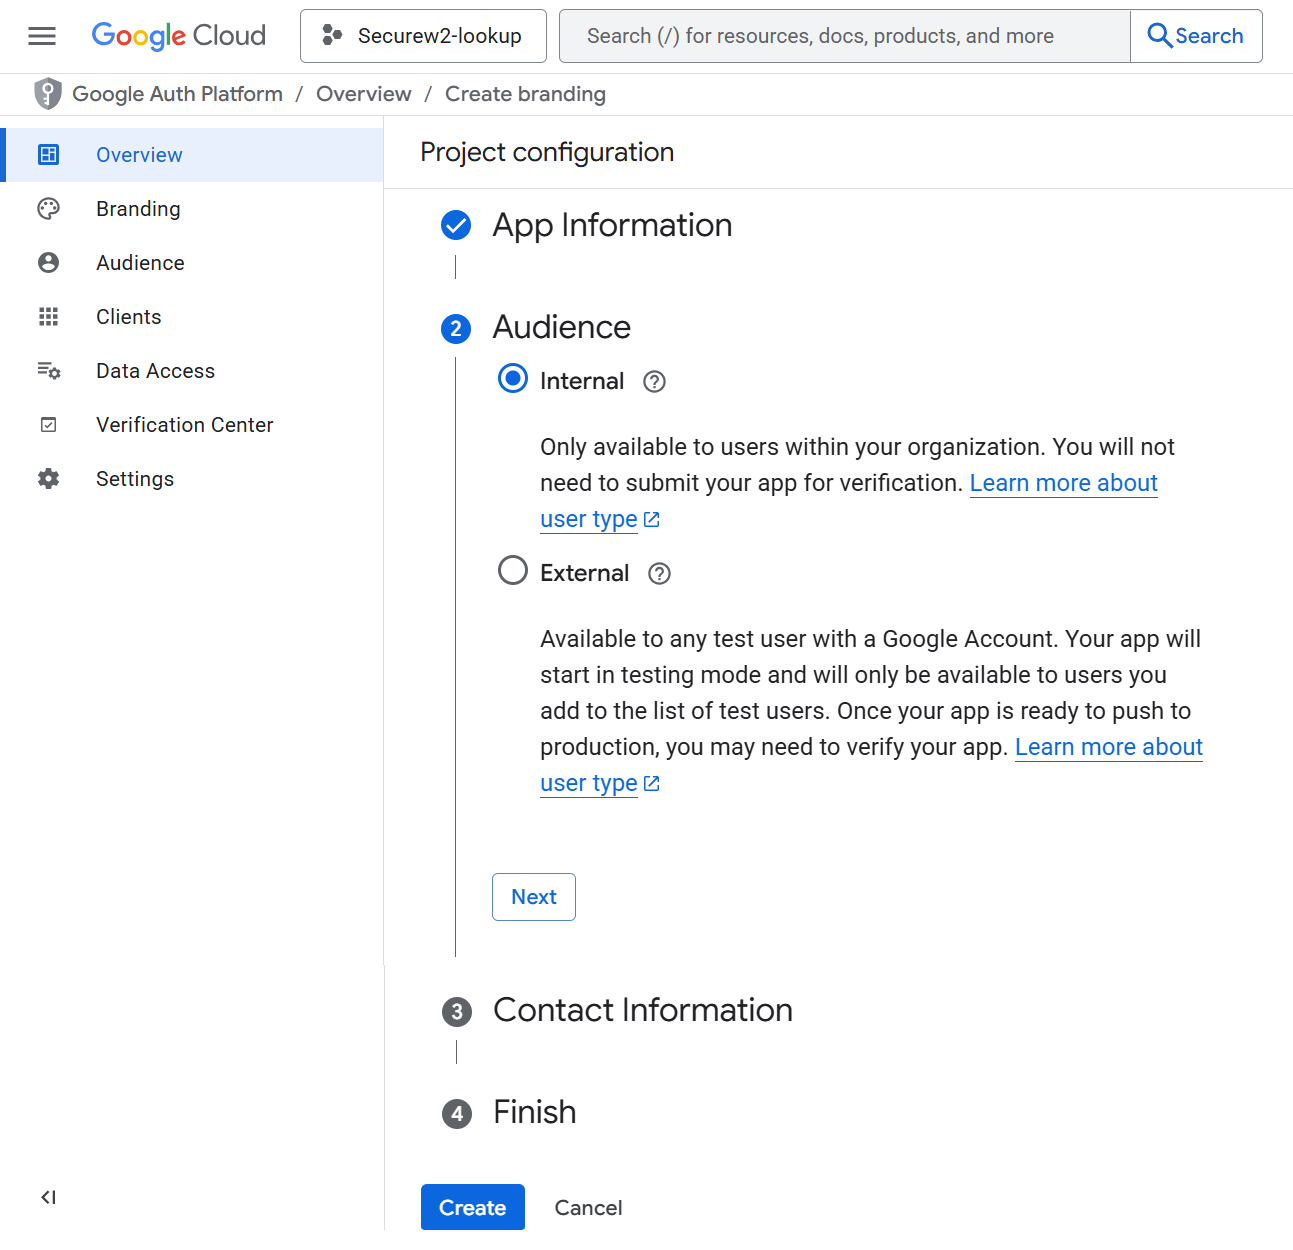
- In Audience, select Internal and then click Create. The following screen appears:

The Google Admin SDK API must be enabled to view and manage users, groups and devices present in the organization’s project.
To enable Admin SDK API:
- From the Projects menu, select the project created in the previous section: Creating a New Project.
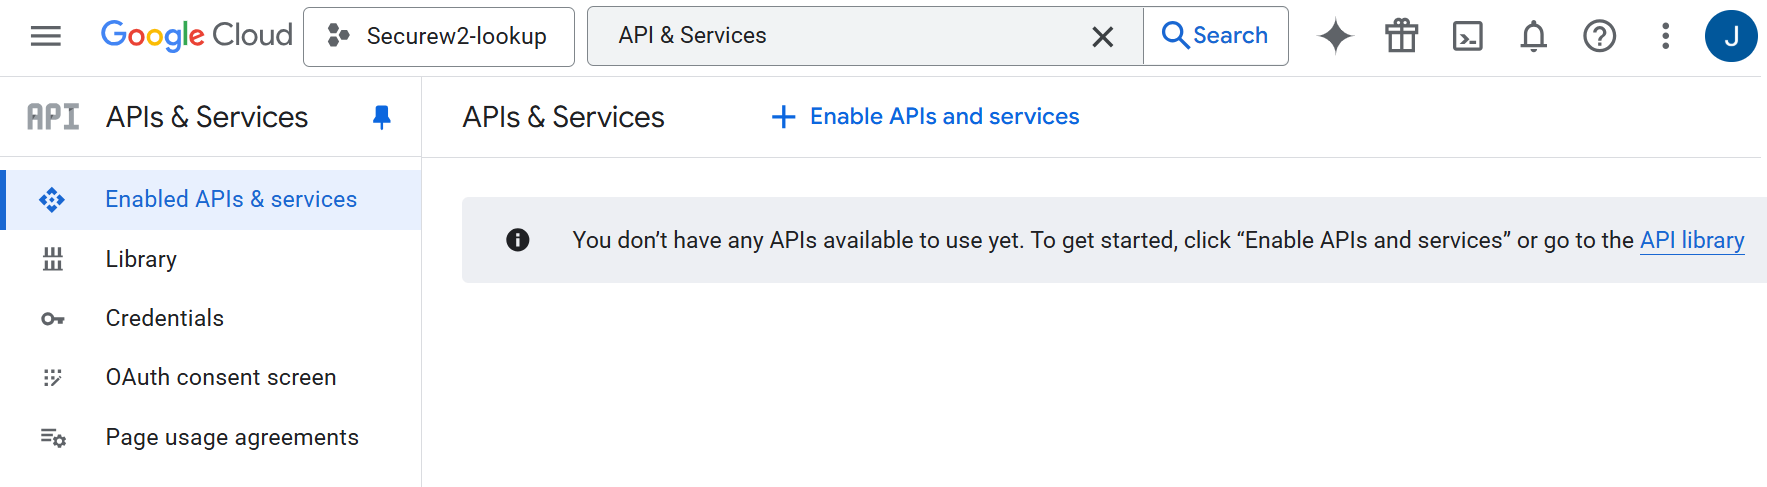
- Search for “API & Services”.
- Click Enable APIs and services.

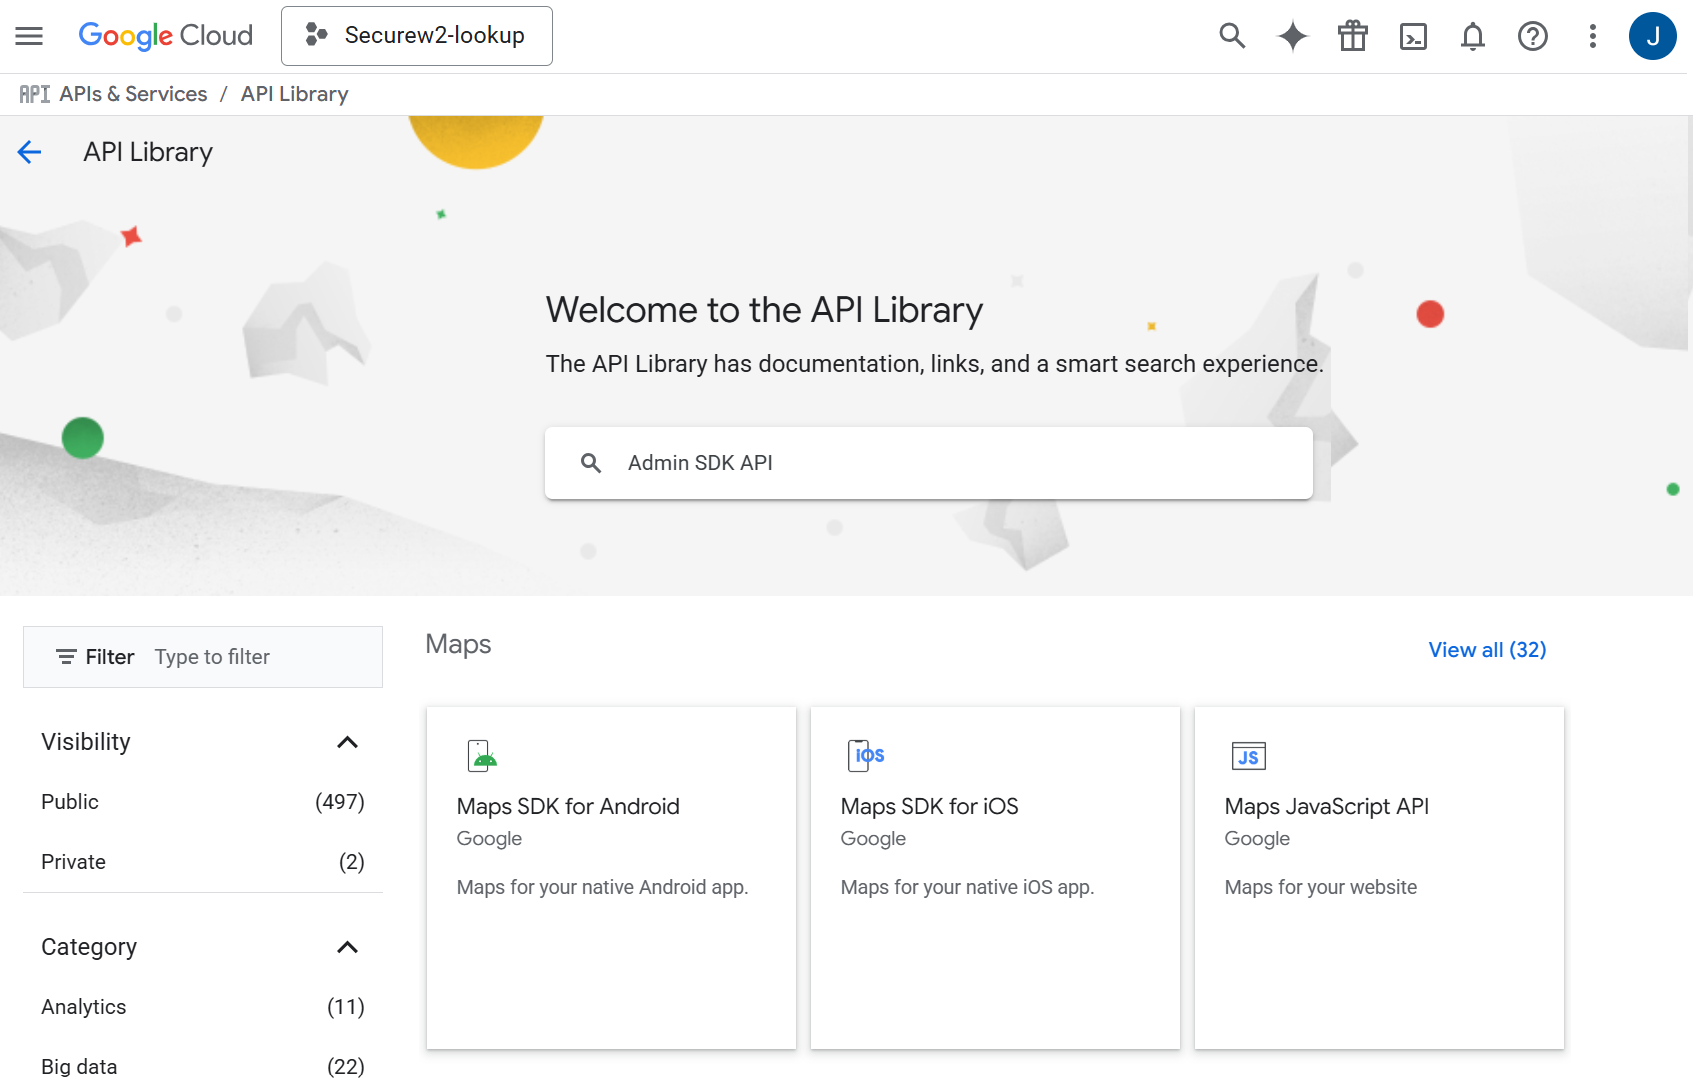
- On the API Library page, enter Admin SDK API in the search box.

- Search for Admin SDK API.

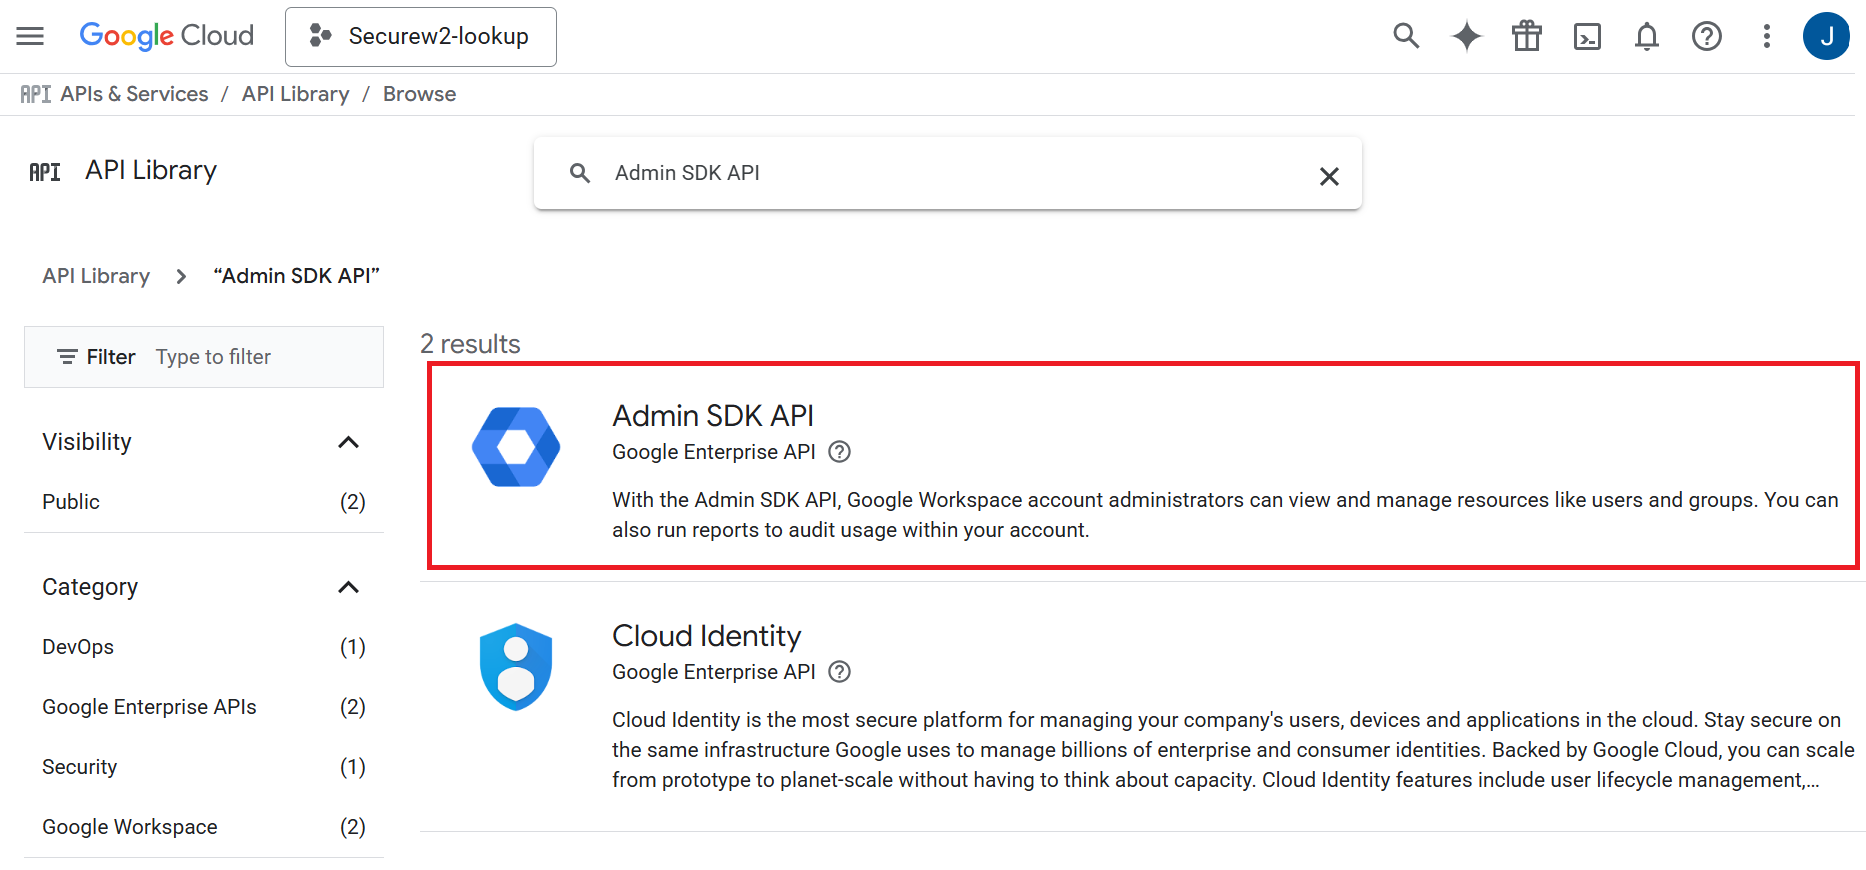
- Click Admin SDK API. The following screen appears:

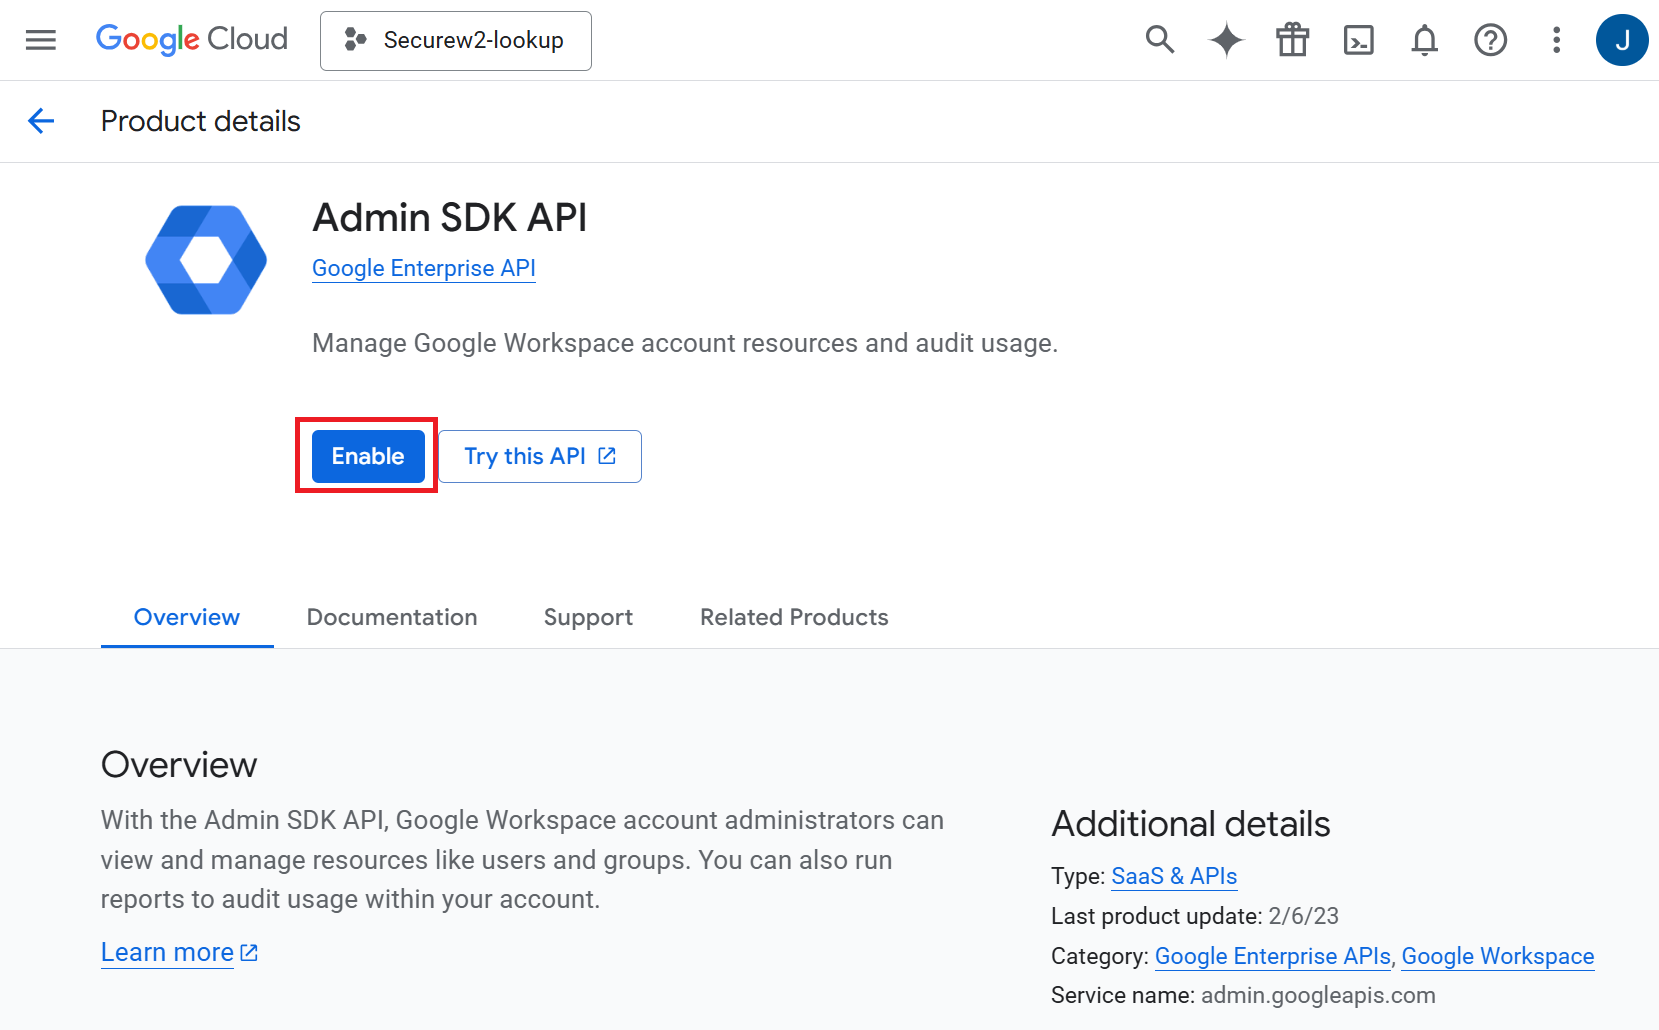
- Click Enable.
JoinNow needs a Google Service Account to authorize communication with Google to do a lookup operation on behalf of the service account. To create a Service Account in Google:
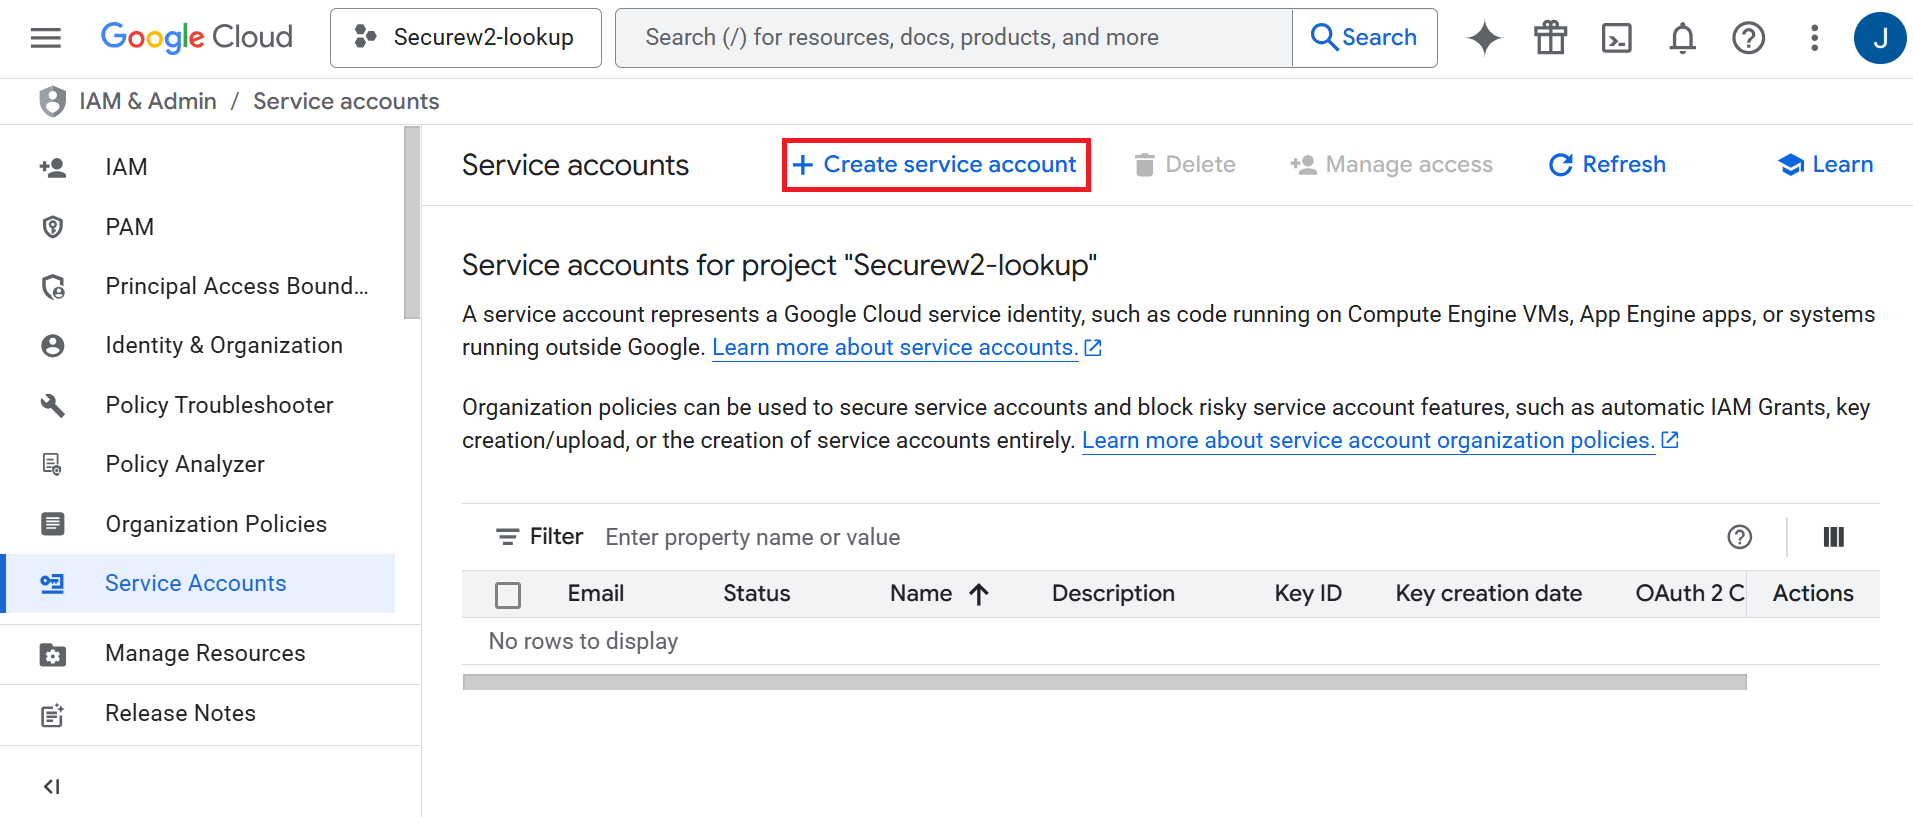
- Navigate to the IAM & Admin menu.
- From the left menu pane, click Service Accounts.
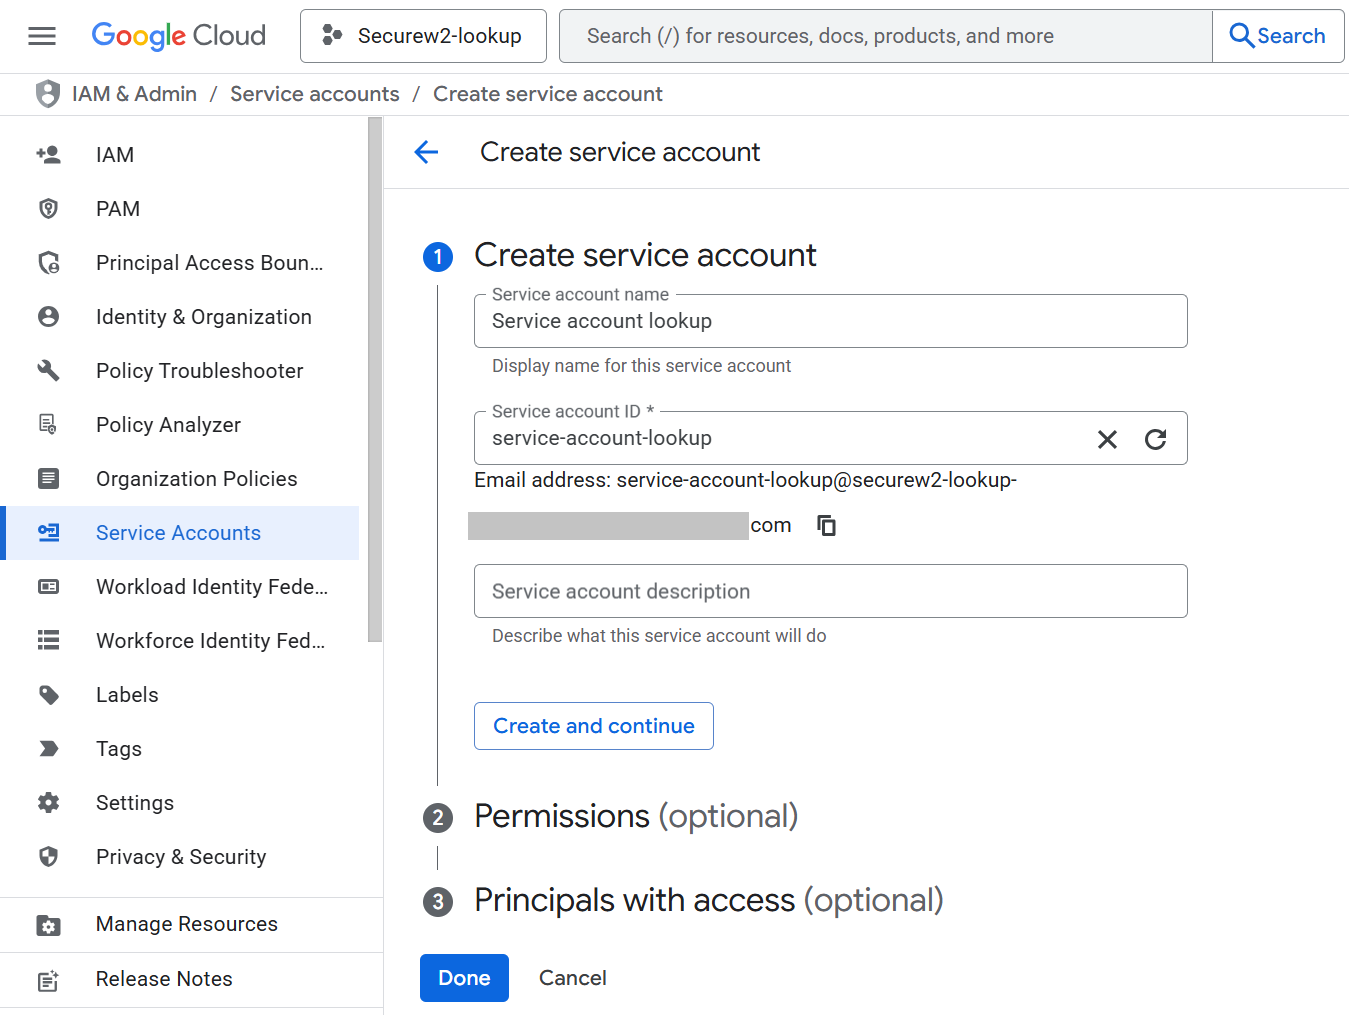
- Click + Create service account.

- In the Service account name field, enter a name for your service account.
- In the Service account ID field, enter an ID for the service account.

- Click Create and continue.
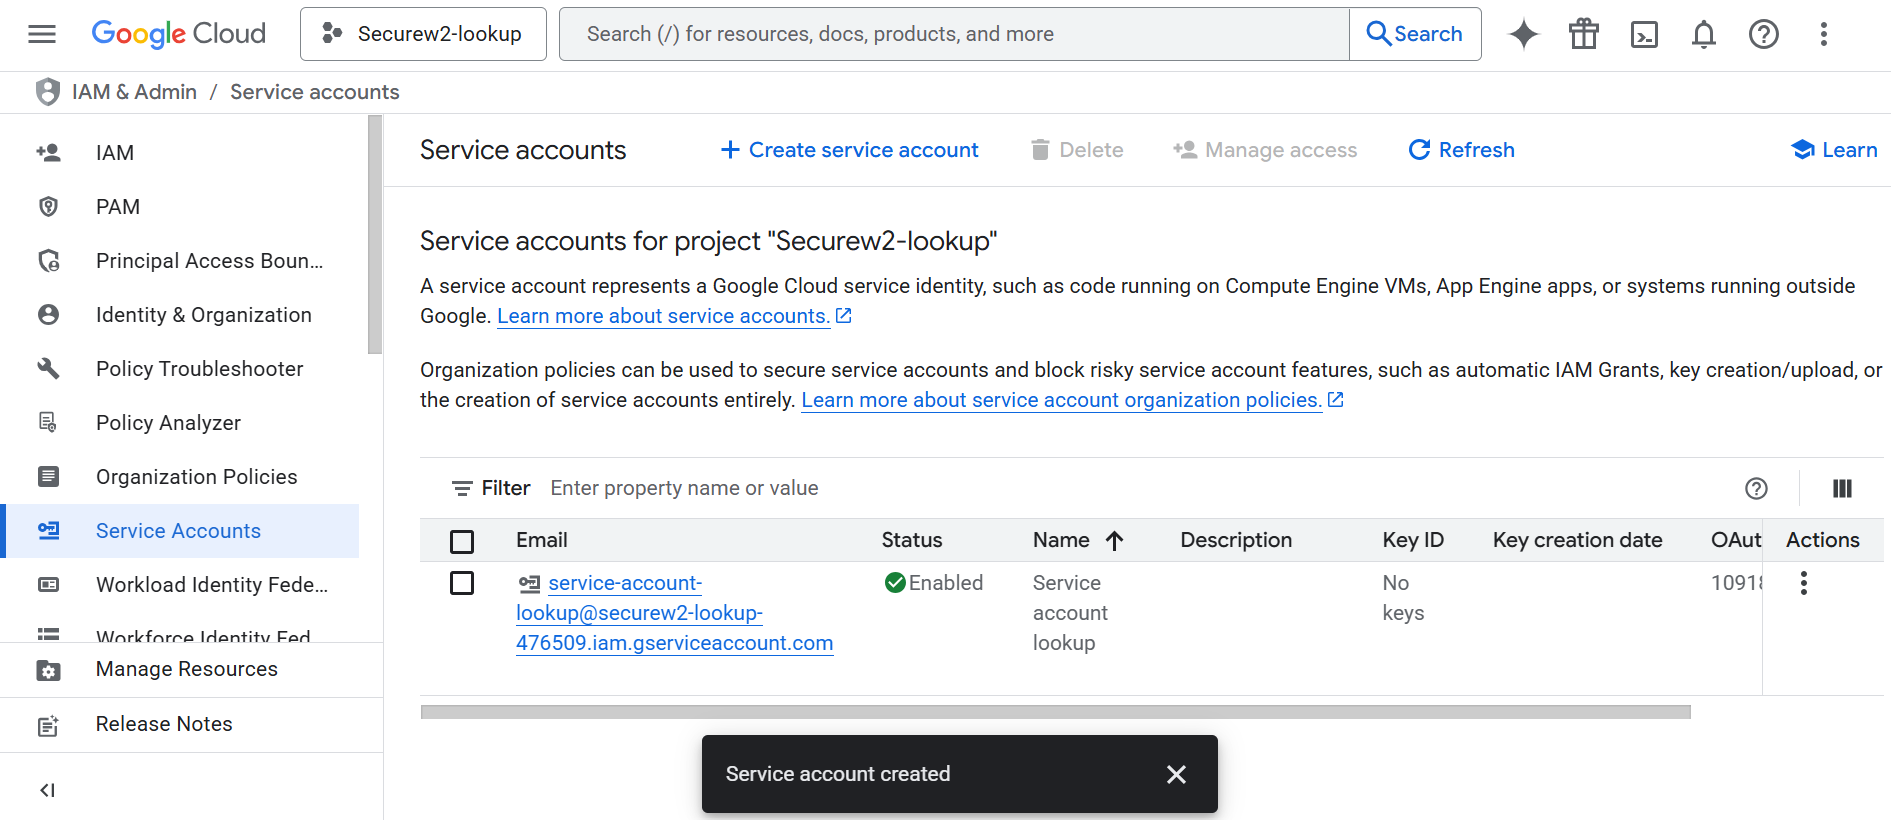
- Click Done. The required service account will be created. Click on the service account link.

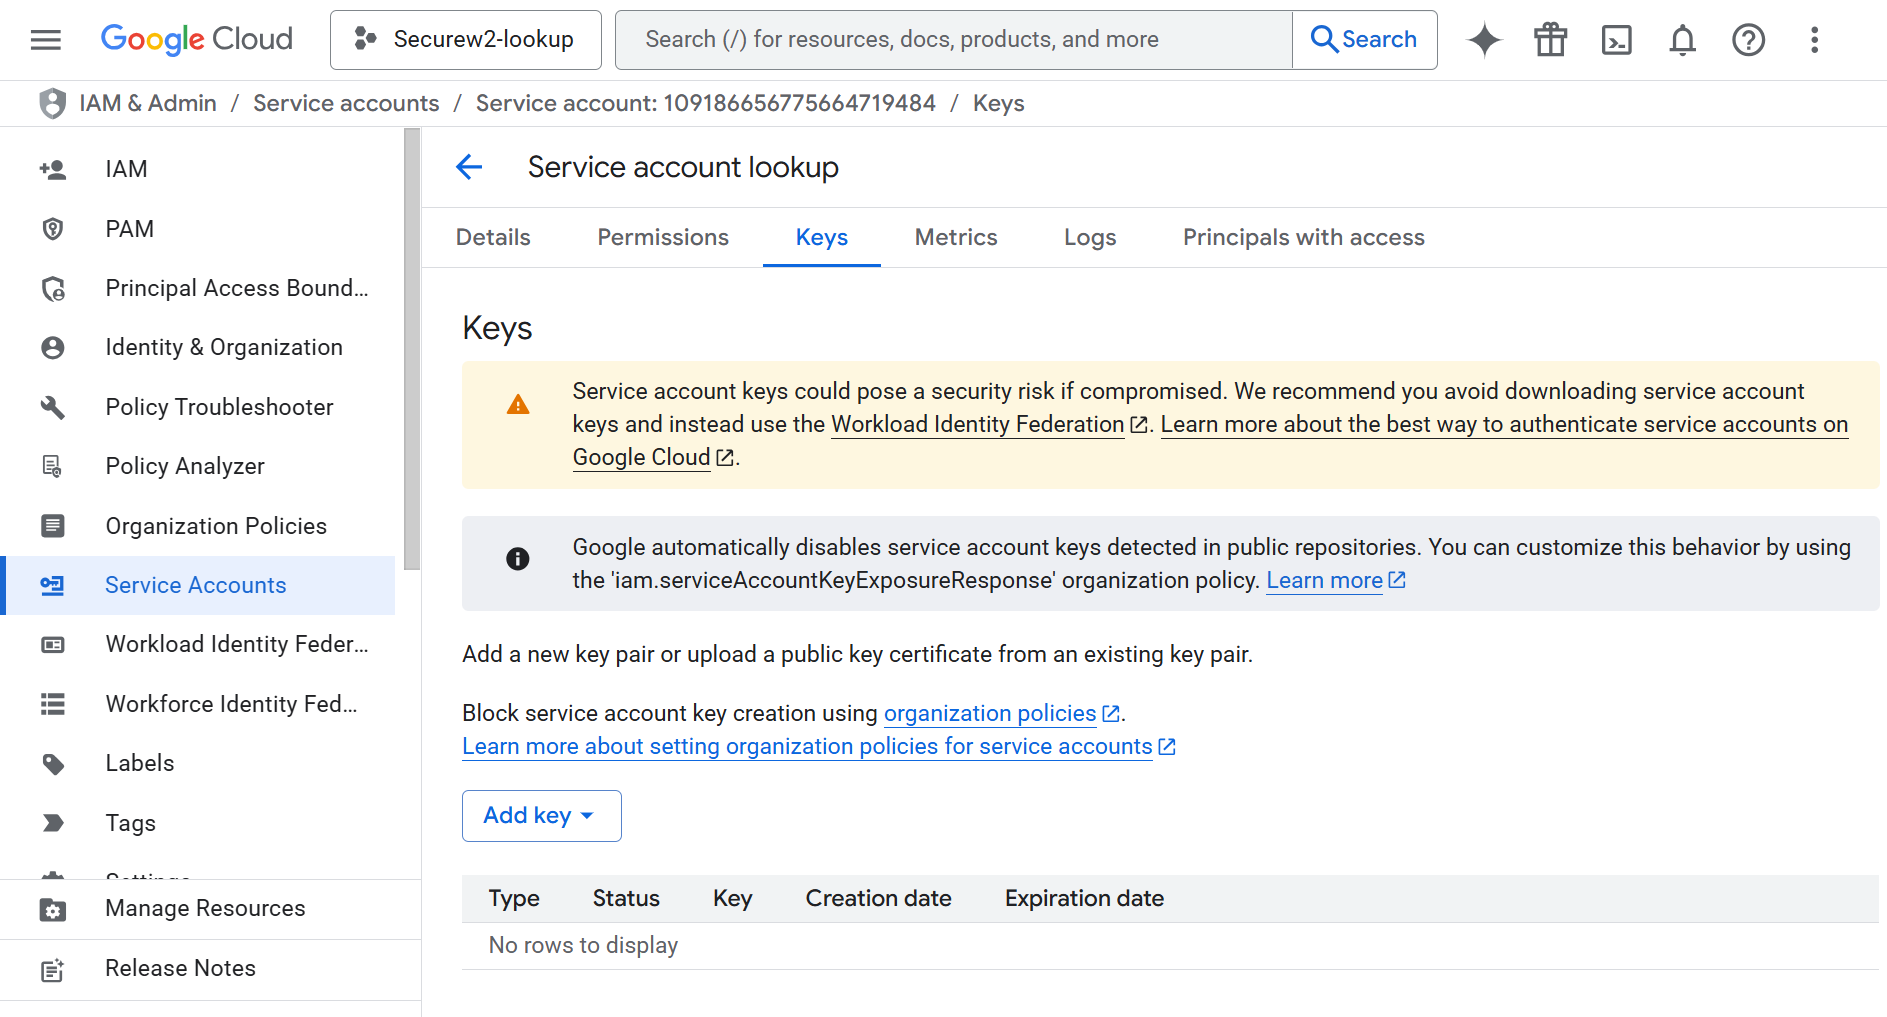
- In the service account page, click on the KEYS tab.

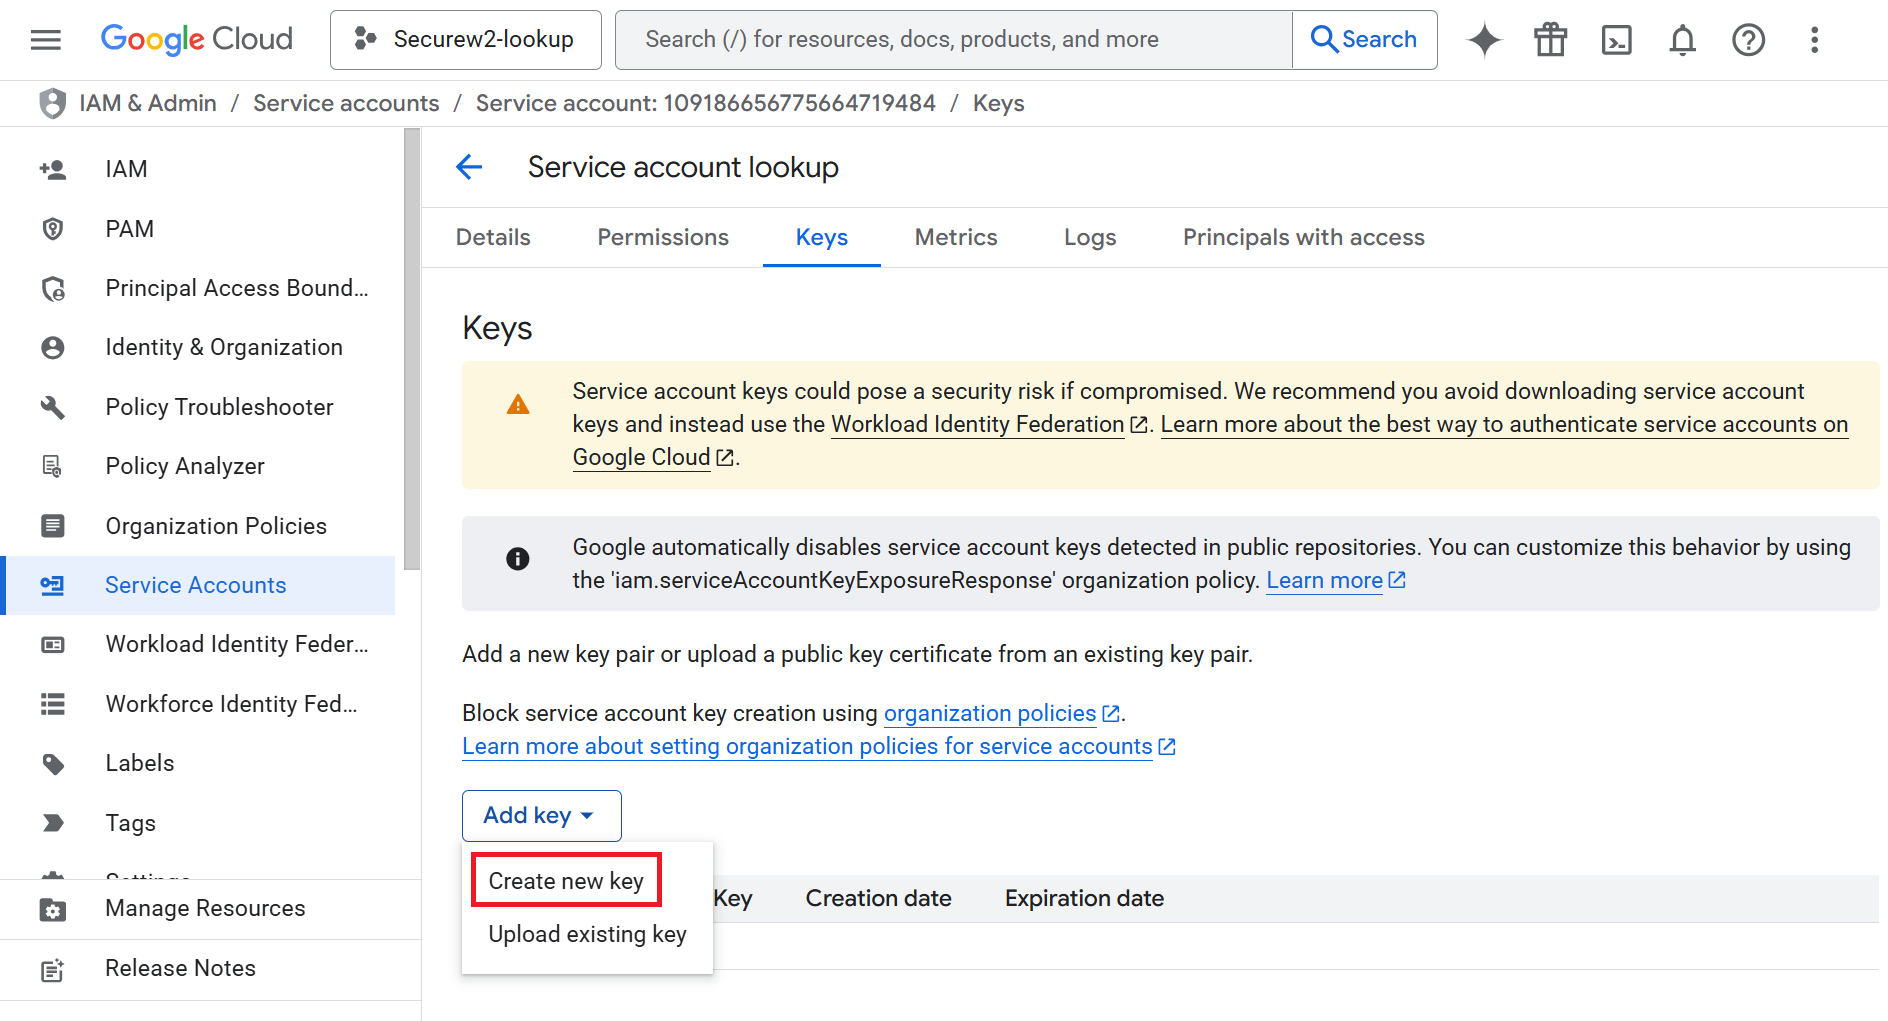
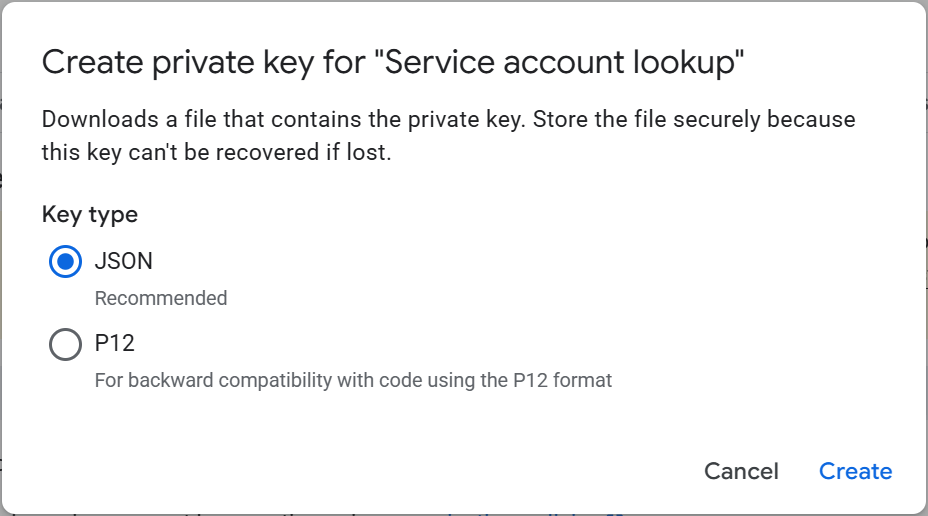
- From the Add Key drop-down, select Create new Key.

- In the Create private key pop-up, select Key type as JSON.

- Click Create. The JSON file will be downloaded to the device. Click Close.


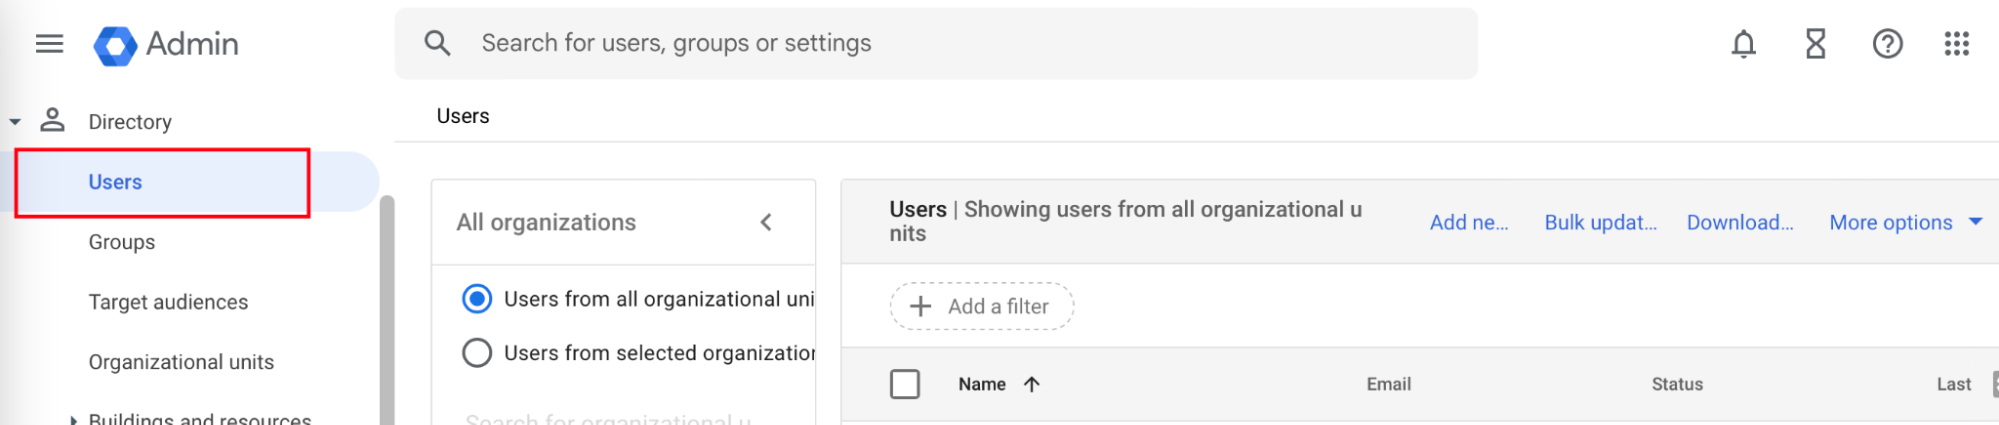
Google mandates the creation of a user to access information from the service account. To create a user in the Google Admin console:
- Navigate to Directory > Users.

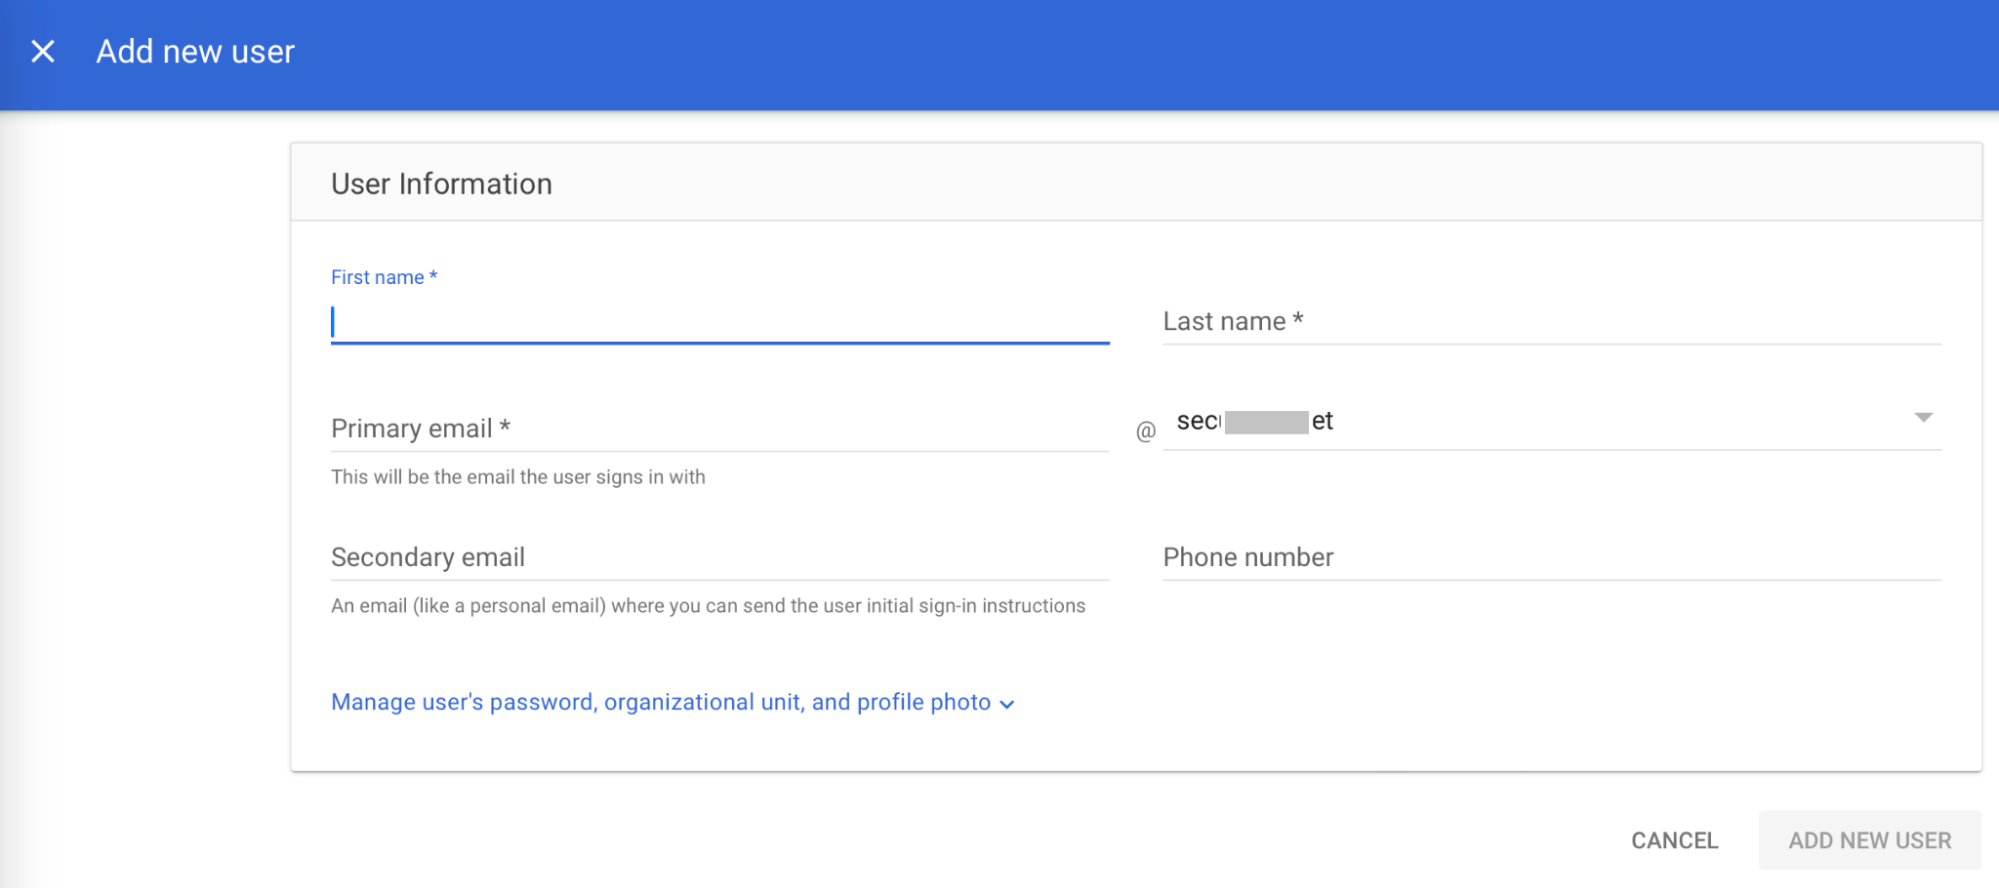
- Click Add new user. The Add new user form opens.
- In the First name field, enter a first name for the user.
- In the Last name field, enter a last name for the user.
- In the Primary email field, enter the organizational email of the user.
- Click ADD NEW USER.

The Getting Started Wizard creates everything you need for 802.1x. It will generate a RADIUS Server, Network Profiles, a Device Onboarding Landing Page, and all the default network settings you will need for 802.1x.
NOTE: If you have already configured SecureW2 for your network, you may skip this step.
- Log in to the JoinNow Management Portal.
- Navigate to Device Onboarding > Getting Started.
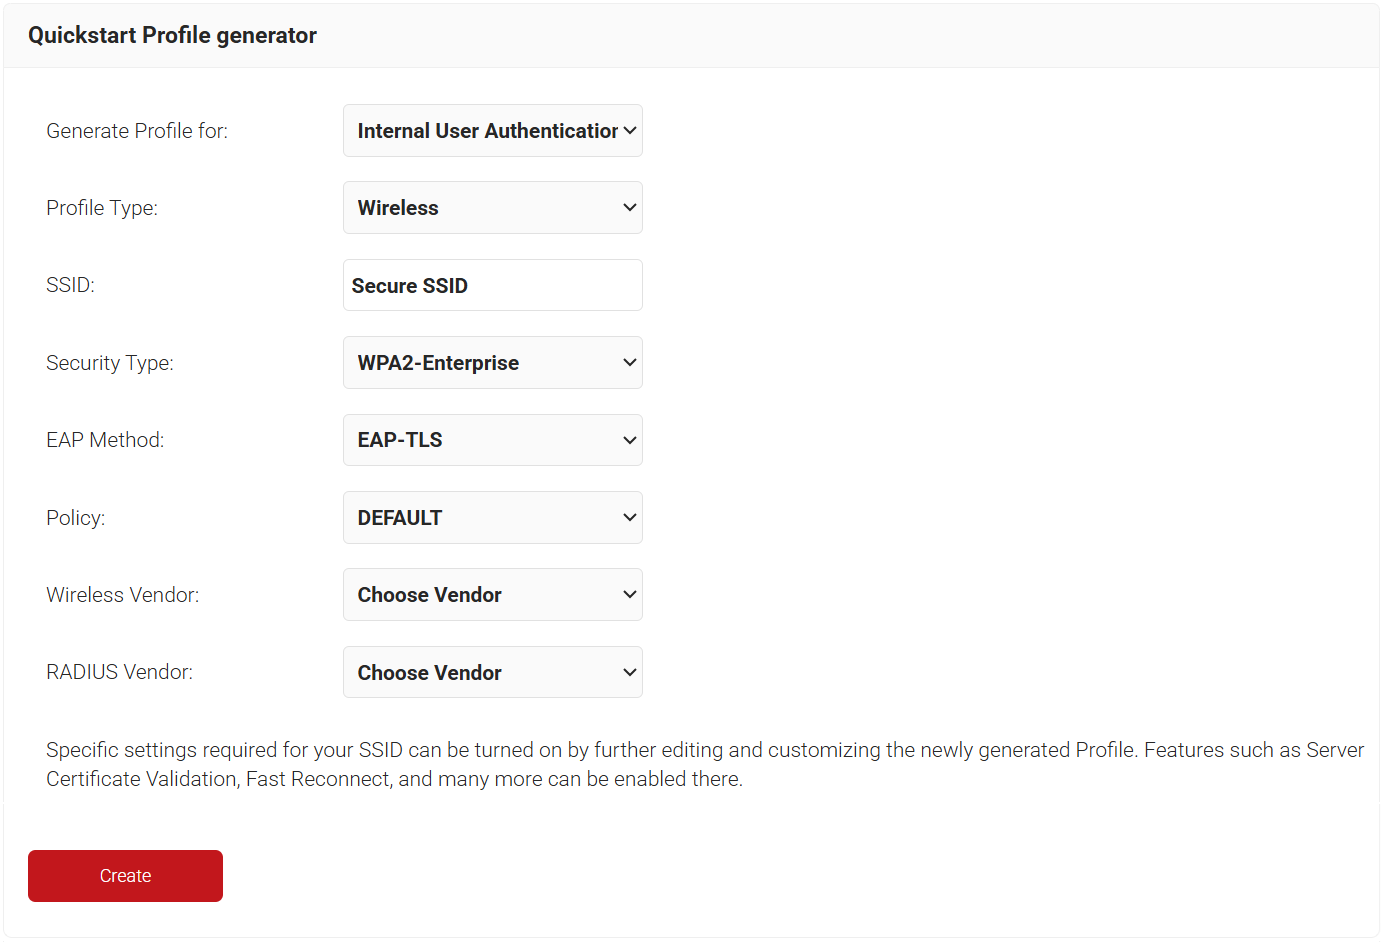
- On the Quickstart Network Profile generator page, from the Generate Profile for drop-down list, select Internal User Authentication.
- From the Profile Type drop-down list, select Wireless.
- In the SSID text box, enter the name of the profile.
- From the Security Type drop-down list, select WPA2-Enterprise.
- From the EAP Method drop-down list, select EAP-TLS.
- From the Policy drop-down list, retain the DEFAULT option.
- From the Wireless Vendor drop-down list, select a vendor.
- From the RADIUS Vendor drop-down list, select a RADIUS vendor.

- Click Create. The process takes 60-90 seconds to complete.
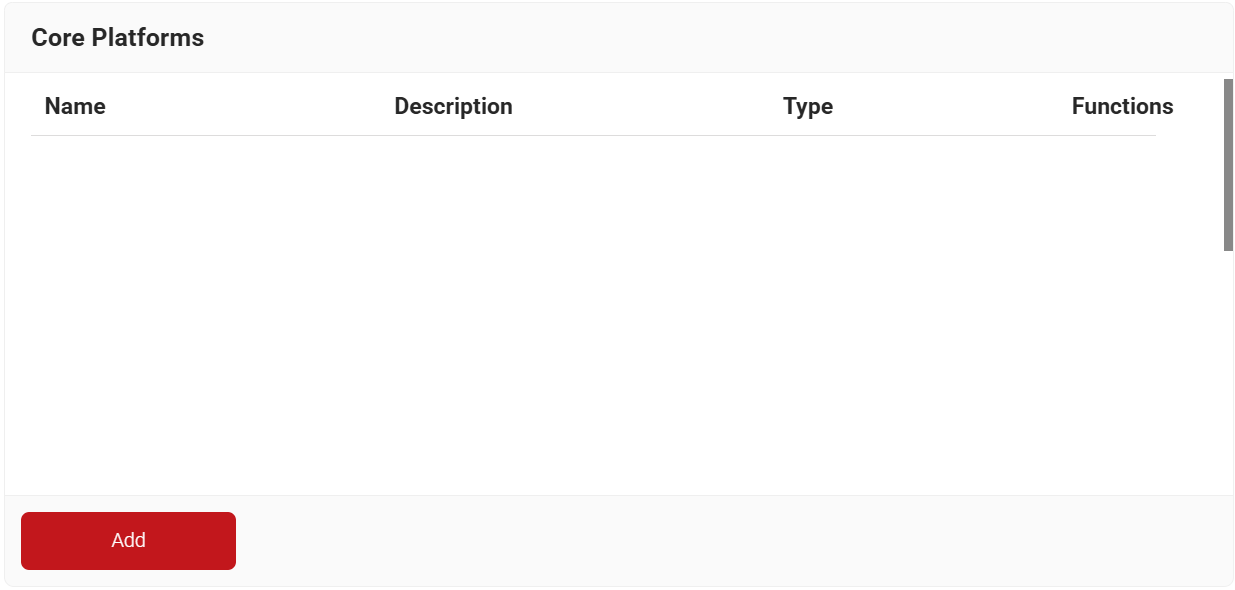
During the RADIUS authentication process, Identity Lookup validates that a user is active within the organization by checking the identifying information against the existing users in the Core Platforms. Here, we will create a Signal Source in SecureW2 so we can connect our Core Platform to lookup users, groups, and their devices.
- Navigate to Integration Hub > Core Platforms.
- Click Add.

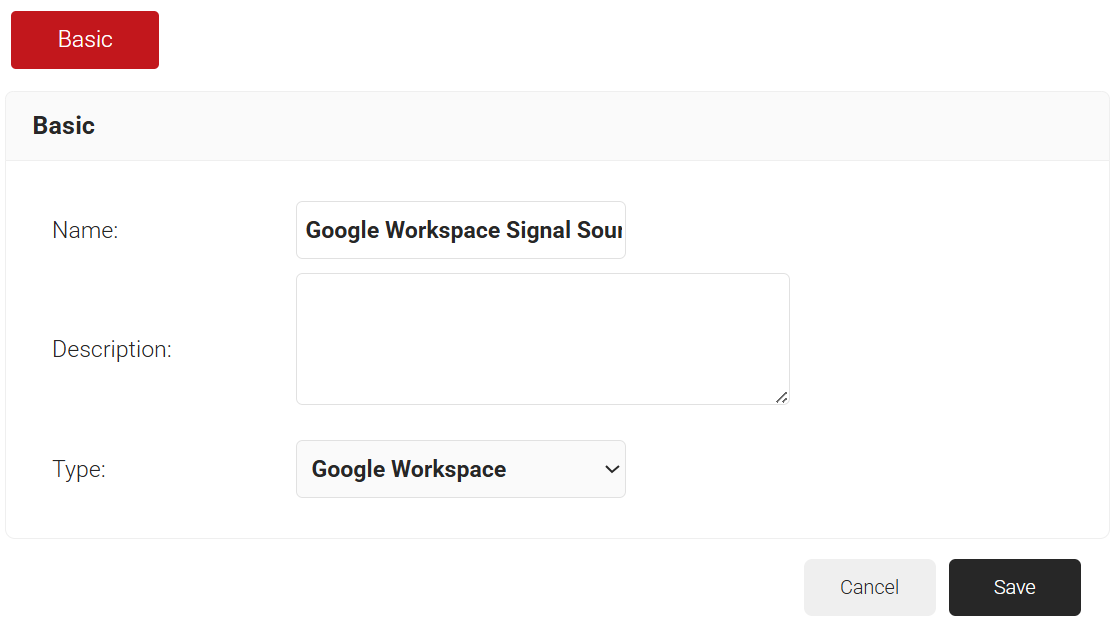
- In the Name field, enter the name of the signal source.
- In the Description field, enter a suitable description for the signal source.
- From the Type drop-down list, select Google Workspace.

- Click Save.
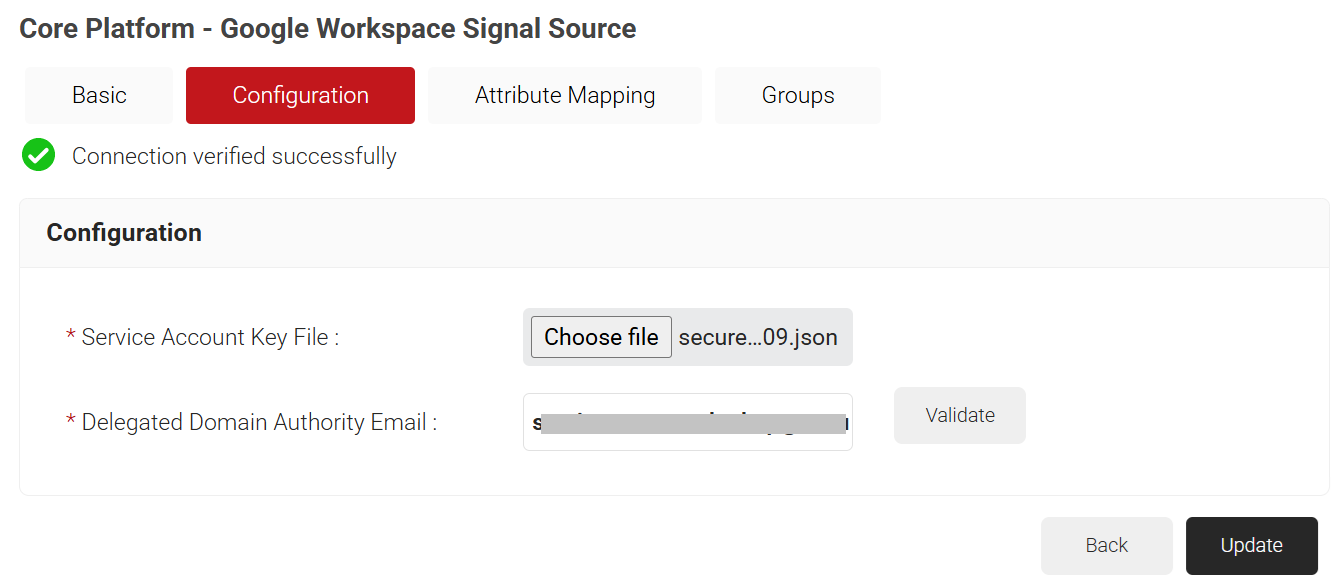
- The page refreshes and displays the Configuration, Attribute Mapping, and Groups tabs.
- Select the Configuration tab.
- Under the Configuration section, provide the following information.
- In the Service Account Key File field, click Choose File. Select the JSON Key file created in the Creating A Service Account and a JSON Key File section. Upload the file.
- In the Delegated Domain Authority Email field, enter the Primary email entered for the user in Creating a User in the Google Admin Console section.
- Click Validate to check the validity of the primary email entered.

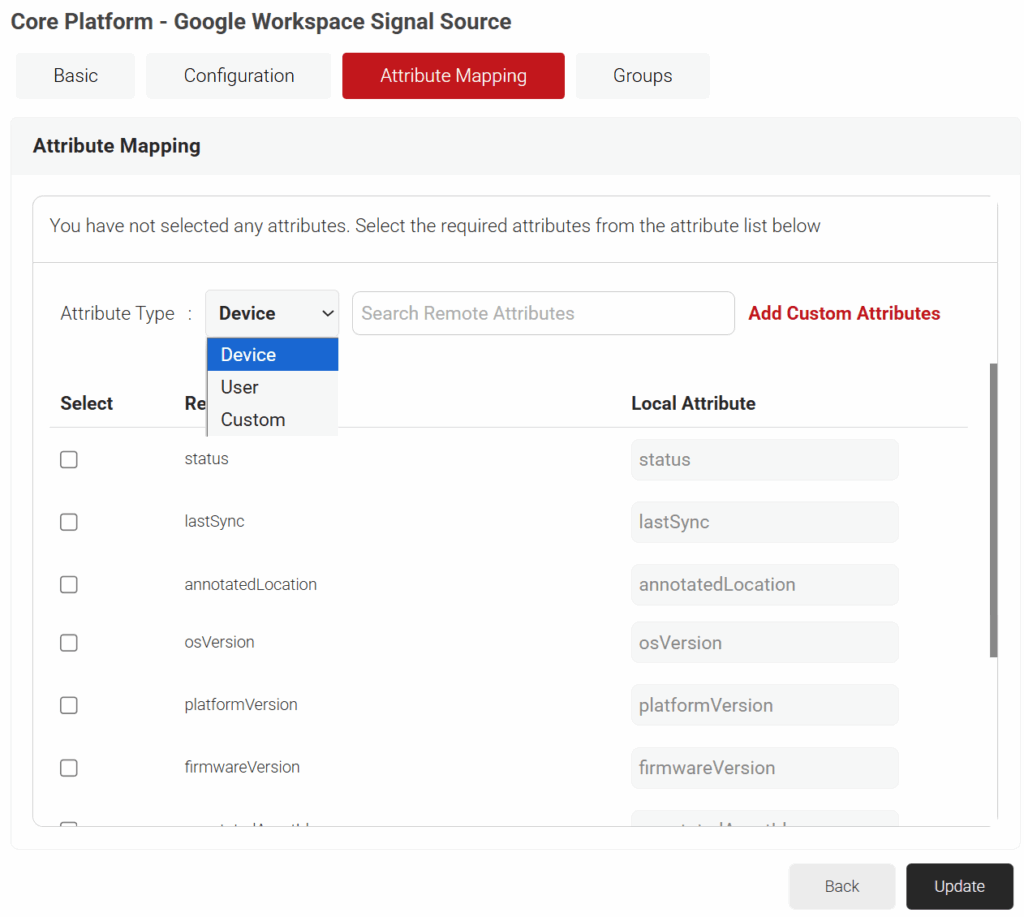
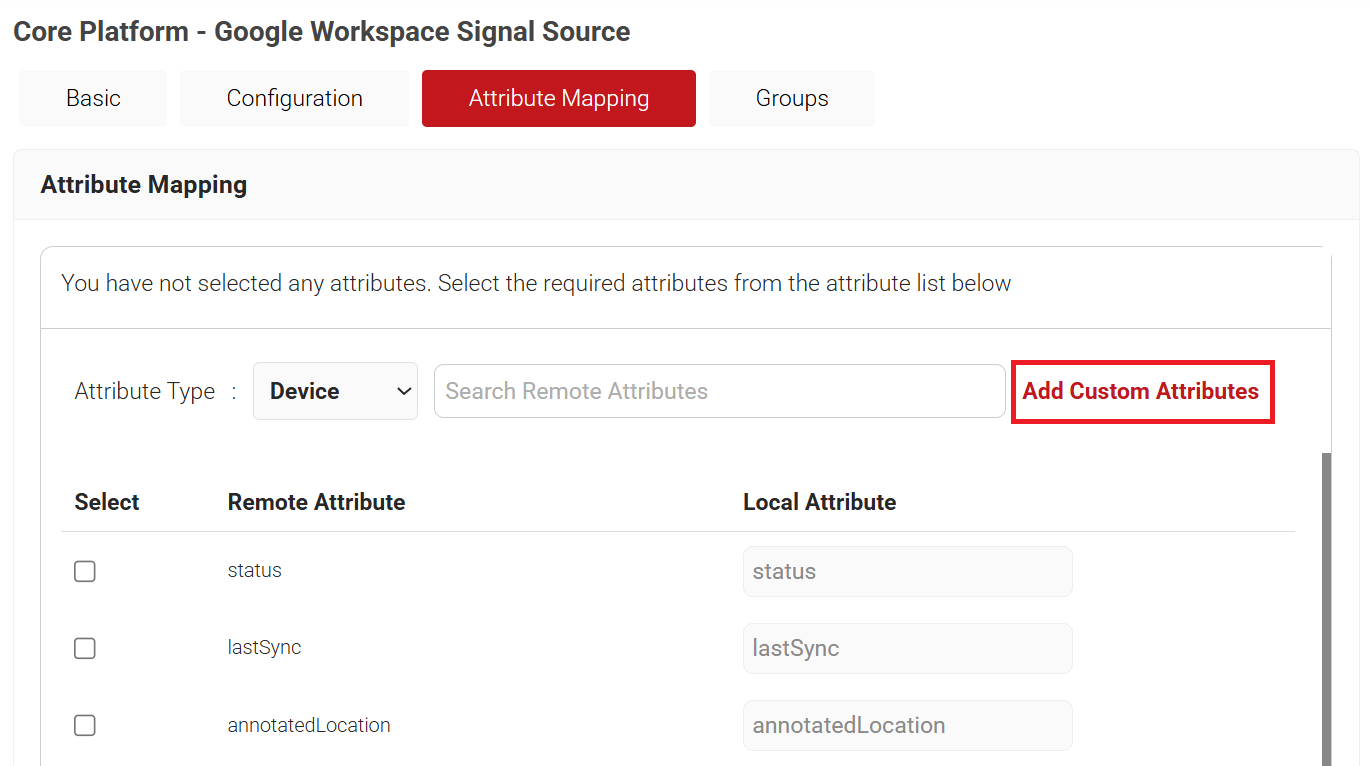
To add an attribute to the Signal Source, perform the following steps:
- Select the Attribute Mapping tab.
- From the Attribute Type drop-down list, select any one of the following options based on your business requirements.
- Device
- User
- Custom
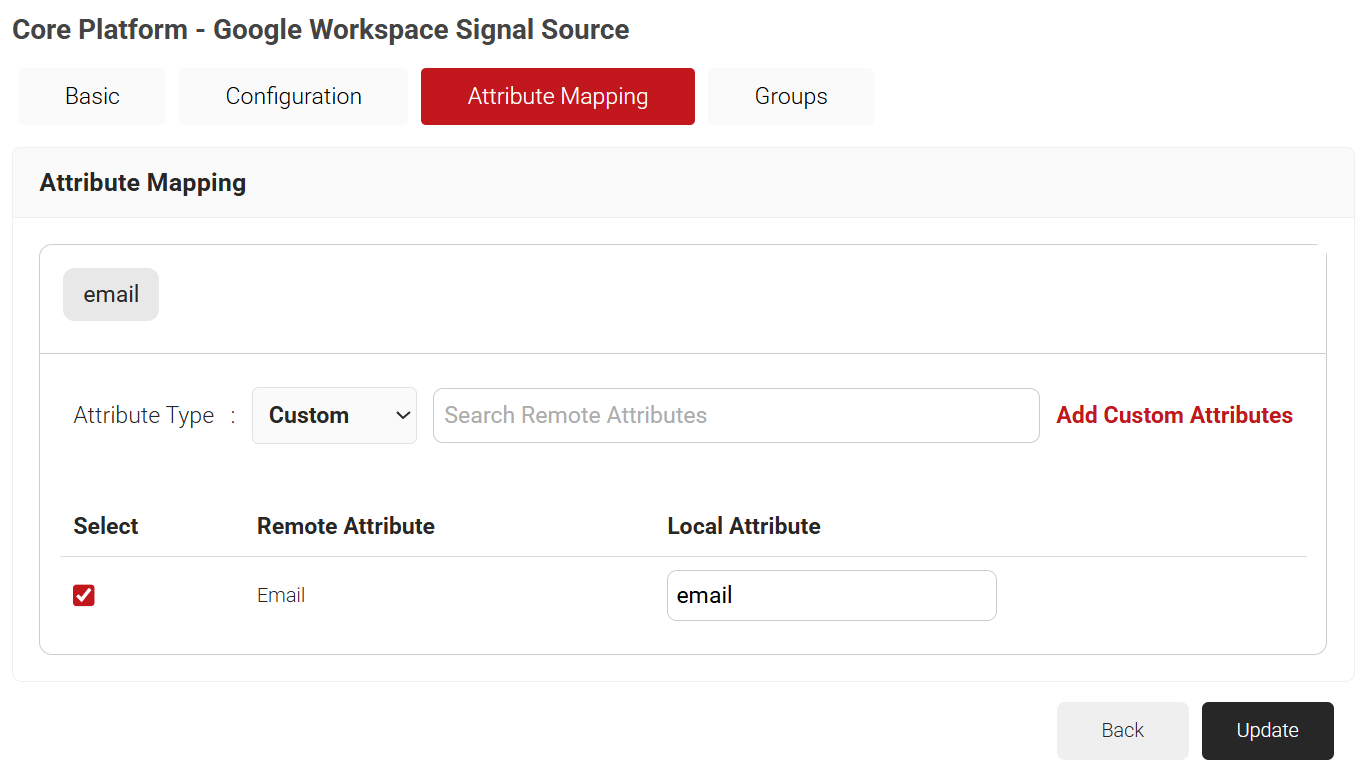
Admin can configure multiple Signal Source attributes by selecting the checkboxes next to the attributes.

- The Custom attribute displays the customized attributes configured by the Admin.
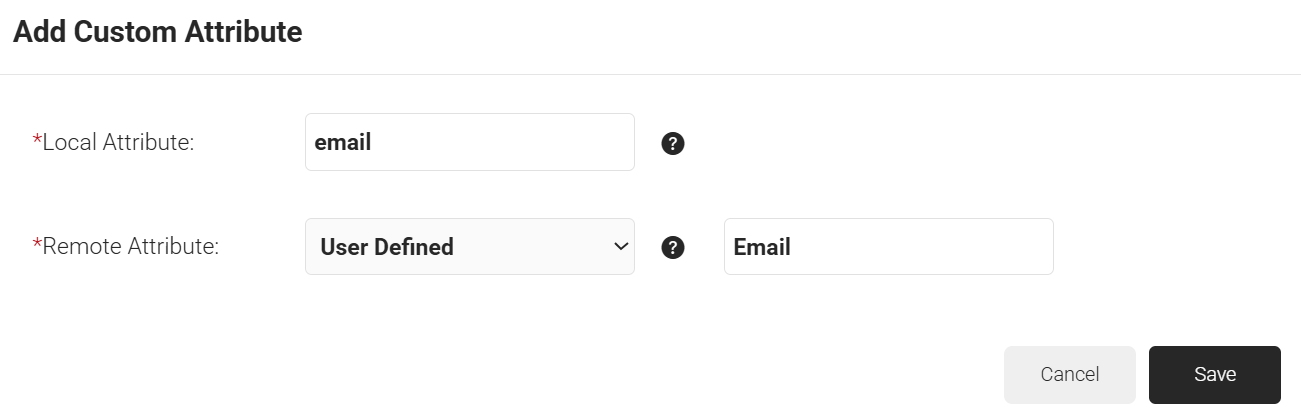
- To create custom attributes:
- Click the Add Custom Attributes link.

- In the Local Attribute field, enter the name to identify the attribute locally.
- In Remote Attribute, select the attribute to be mapped to the Local attribute. If you select User Defined, enter the attribute returned by the Core Provider that you want to map.

- Click Save.

- Click the Add Custom Attributes link.
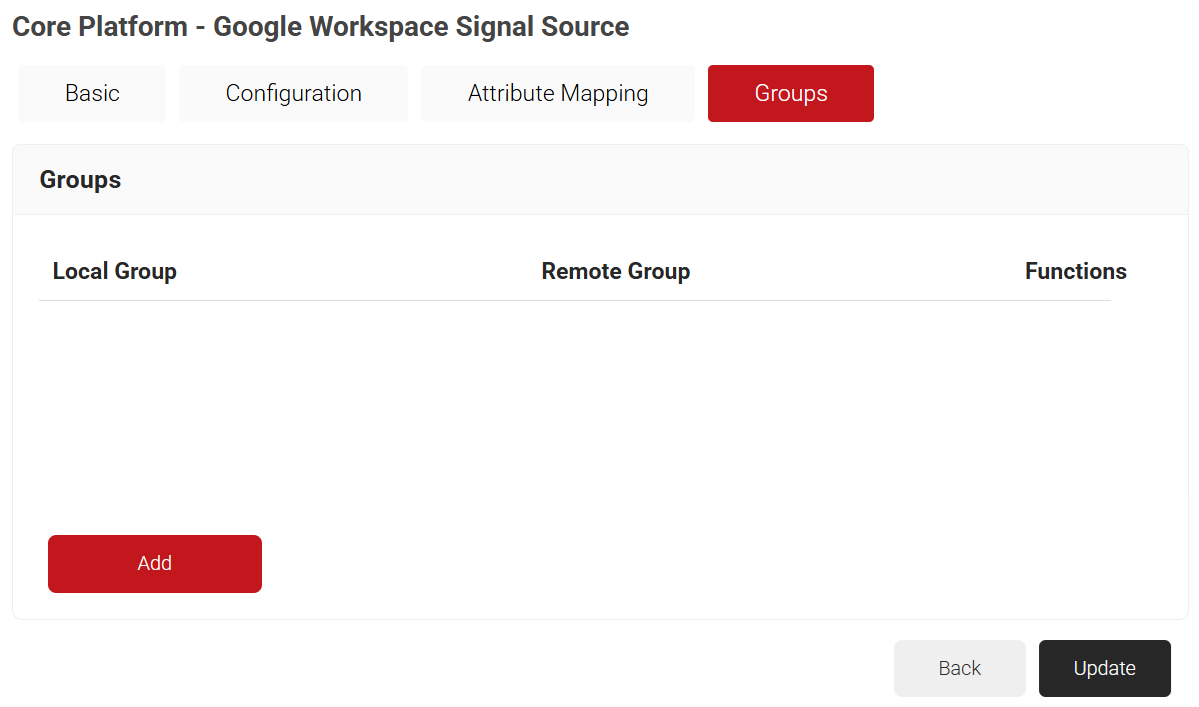
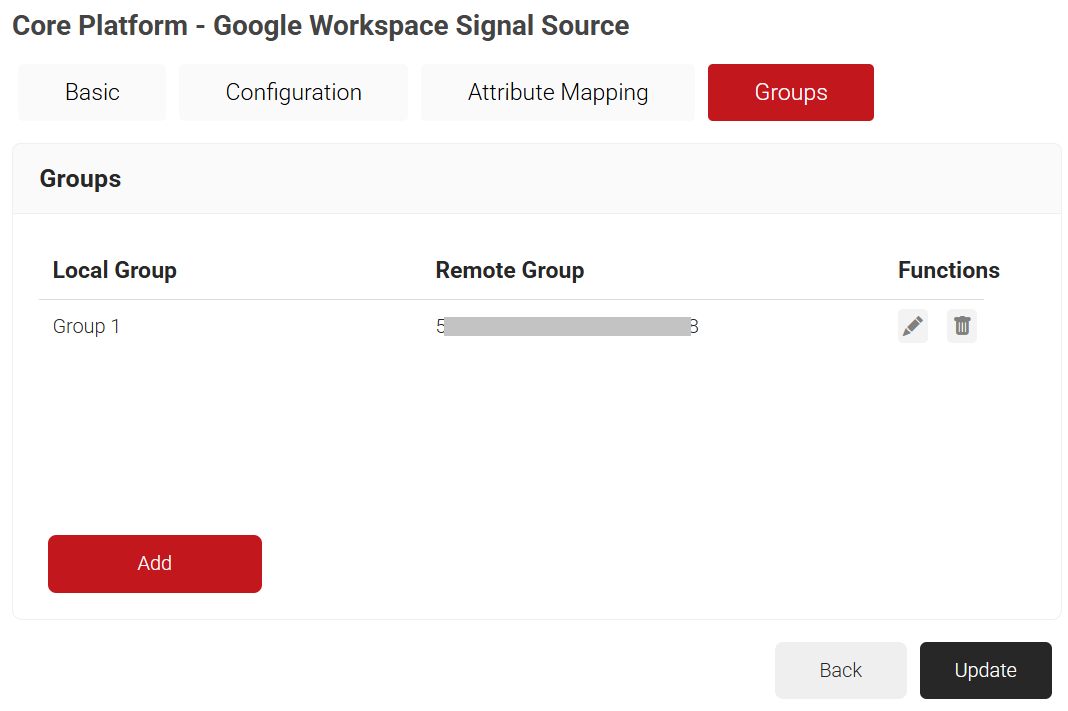
Cloud RADIUS can perform a user group lookup, enabling you to create network access policies based on the groups to which a user belongs. The process is the same as the one used to add attributes in the previous section.
- Select the Groups tab.
- Click Add.

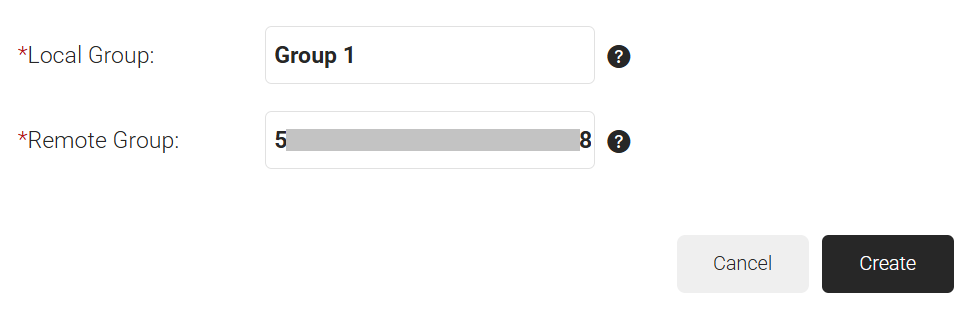
- On the displayed page, in the Local Group field, enter the name of the group.
NOTE: This name shows up later as your ‘Group‘ in the JoinNow MultiOS Management Portal when we configure policies. - In the Remote Group field, enter the name of your group as it is configured in the Google Workspace.

- Click Create.
- Repeat as necessary for any Group you wish to create Network Policies around.

- Click Update.
Lookup Policies are how we tie the new Signal Source to domains. Here, you create a condition that ties your domain to the new Signal Source you just created in the previous section.
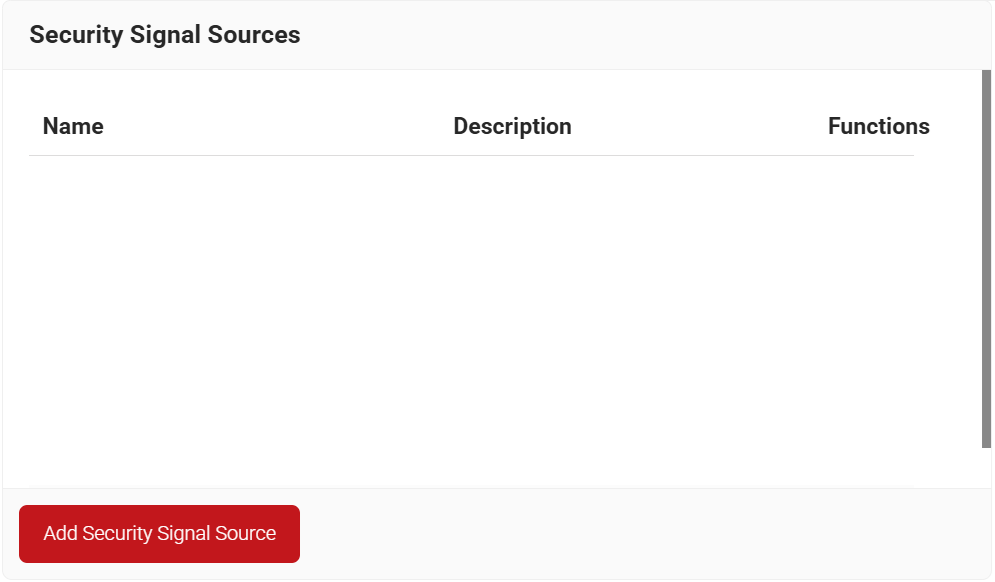
- Navigate to Policy Management > Security Signal Sources.
- Click Add Security Signal Source.

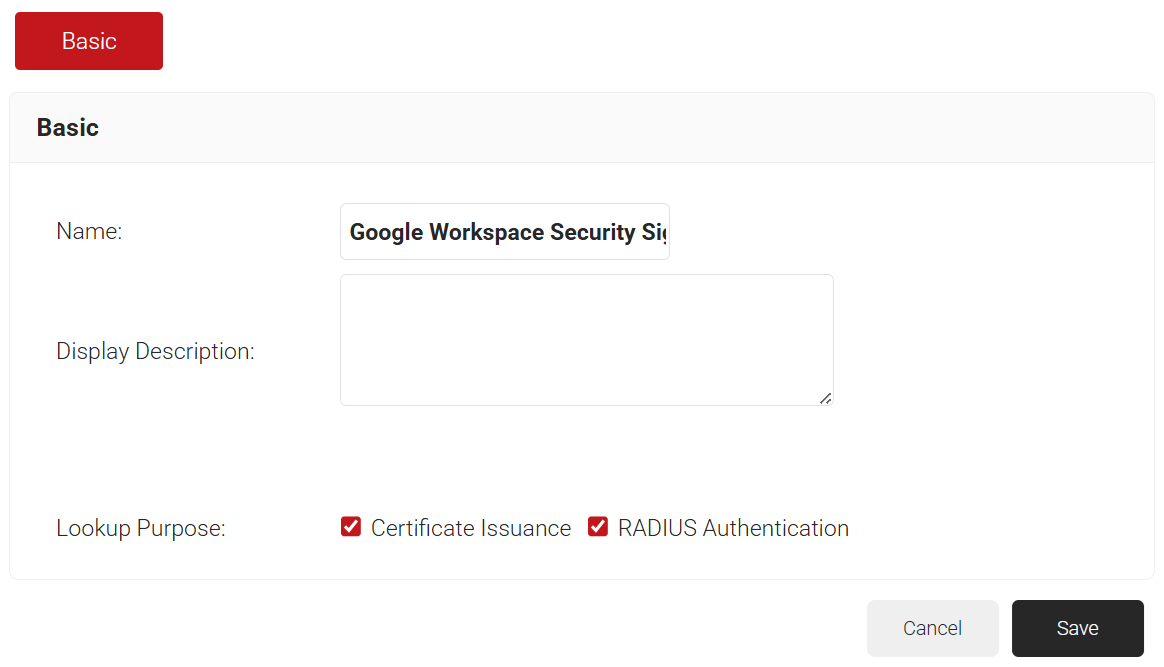
- In the Name field, enter the name of the Security Signal Source.
- In the Display Description field, enter a suitable description for the Security Signal Source.
- Lookup Purpose – Purpose of Account Lookup
- Certificate Issuance – To lookup user/device account during Enrollment.
- RADIUS Authentication – To lookup user/device account during RADIUS Authentication.

- Click Save.
- The page refreshes and displays the Conditions and Settings tabs.
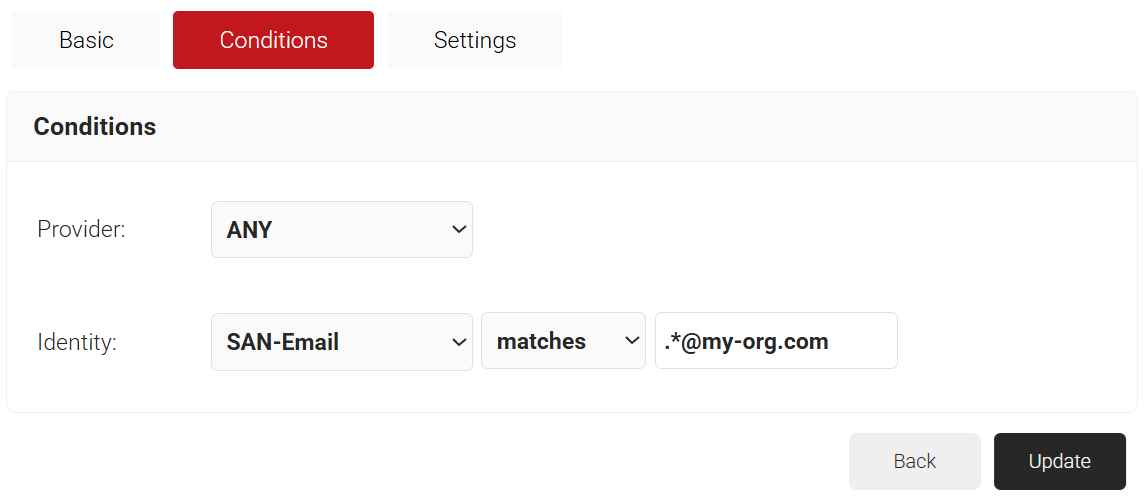
- Select the Conditions tab.
- From the Identity drop-down list, select the required identity attribute for lookup.
- Configure Regex to match the values of your devices configured in the Identity field.

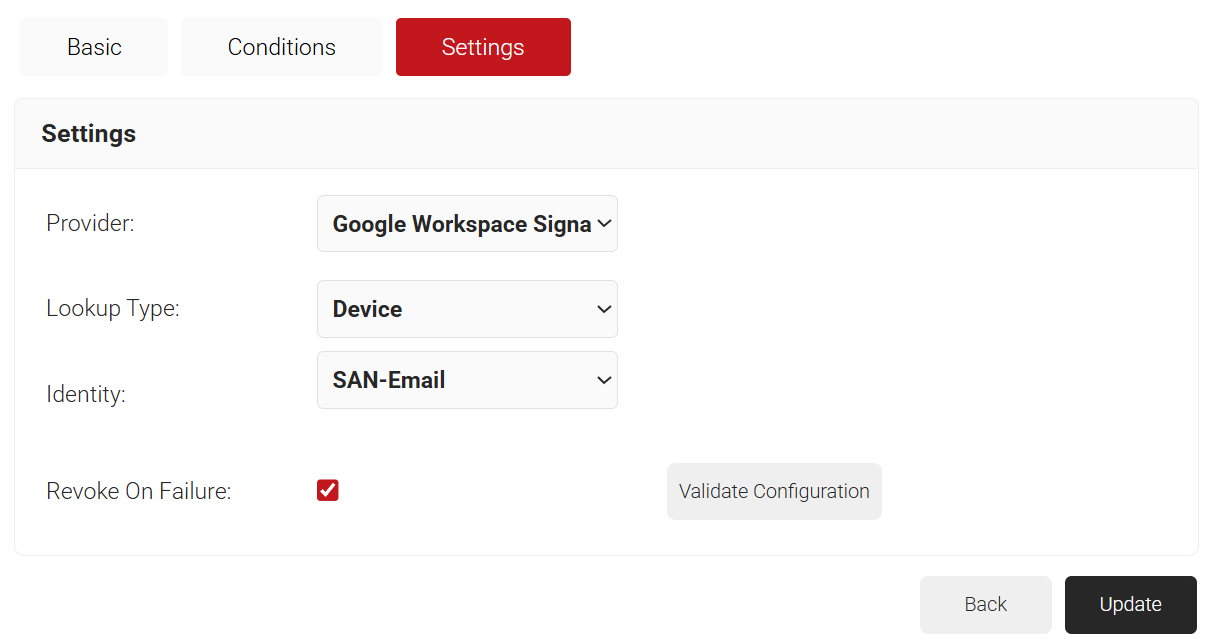
- Select the Settings tab.
- From the Provider drop-down list, select the Google Workspace Signal Source you created earlier.
- From the Lookup Type drop-down, select any one of the following options:
- Auto
- Device
- User
- From the Identity drop-down list, select the Identity attribute mapped for lookup.

- Select the Revoke On Failure checkbox.
- Click Update.
The first User Role Policy you need to create is one for enrollment. This is what MultiOS will use when end users are enrolling themselves for certificates. JoinNow MultiOS will not use the application you previously created in Google; instead, it requires a separate SAML Application in Google.
Refer to one of our SAML Core Provider configuration guides if you have not set this up already. Once you have your SAML Core Provider, start here:
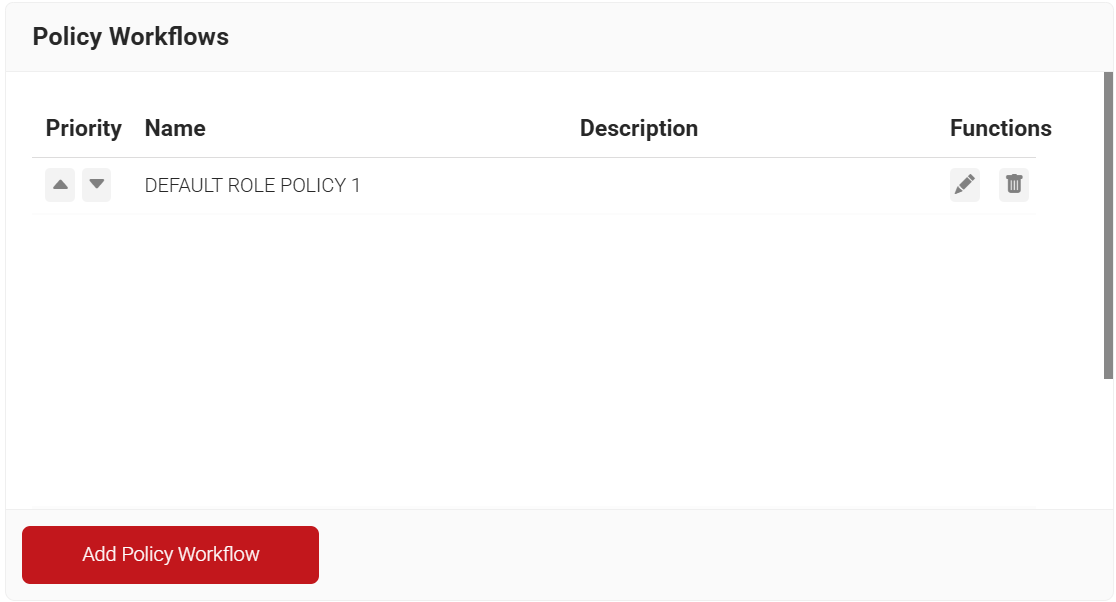
- Navigate to Policy Management > Policy Workflows.
- Click Add Policy Workflow.

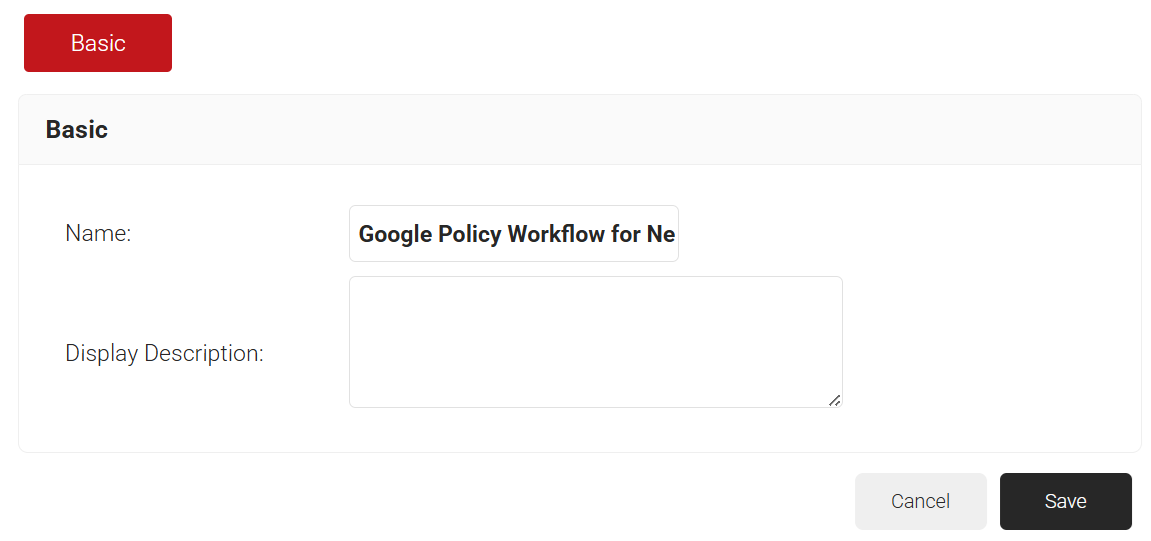
- In the Name field, enter the name of the policy workflow.
- In the Display Description field, enter a suitable description for the policy workflow.

- Click Save.
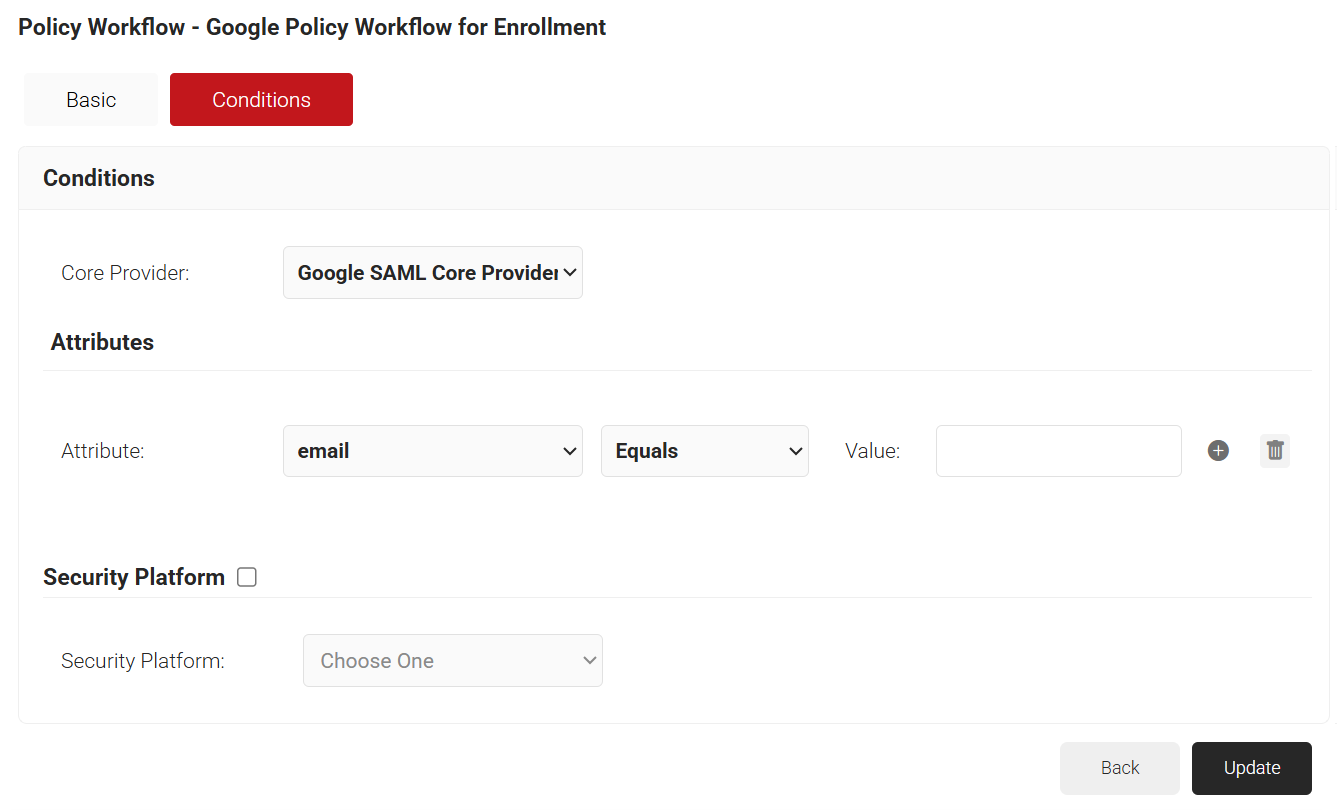
- Select the Conditions tab.
- From the Core Provider drop-down list, select the Core Provider you created earlier.

- Click Update.

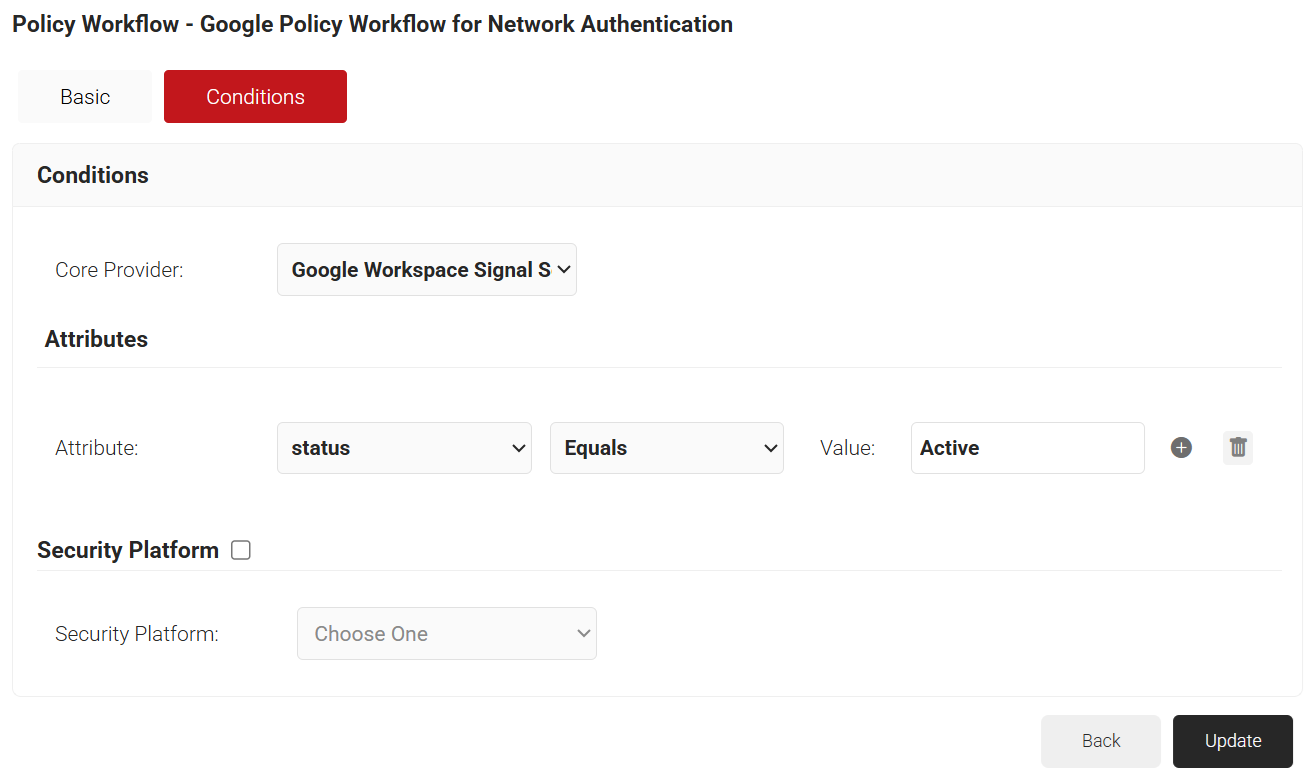
Next, create a User Role Policy for Network Authentication. This policy will be used by Cloud RADIUS Dynamic Policy Engine to look up user status at the moment of authentication. Then Cloud RADIUS can dynamically apply Network policies, which need to be configured next.
- Navigate to Policy Management > Policy Workflows.
- Click Add Policy Workflow.
- In the Name field, enter the name of the policy workflow.
- In the Display Description field, enter a suitable description for the policy workflow.

- Click Save.
- Select the Conditions tab.
- From the Core Provider drop-down list, select the Google Workspace Signal Source that you created earlier.

- Click Update.
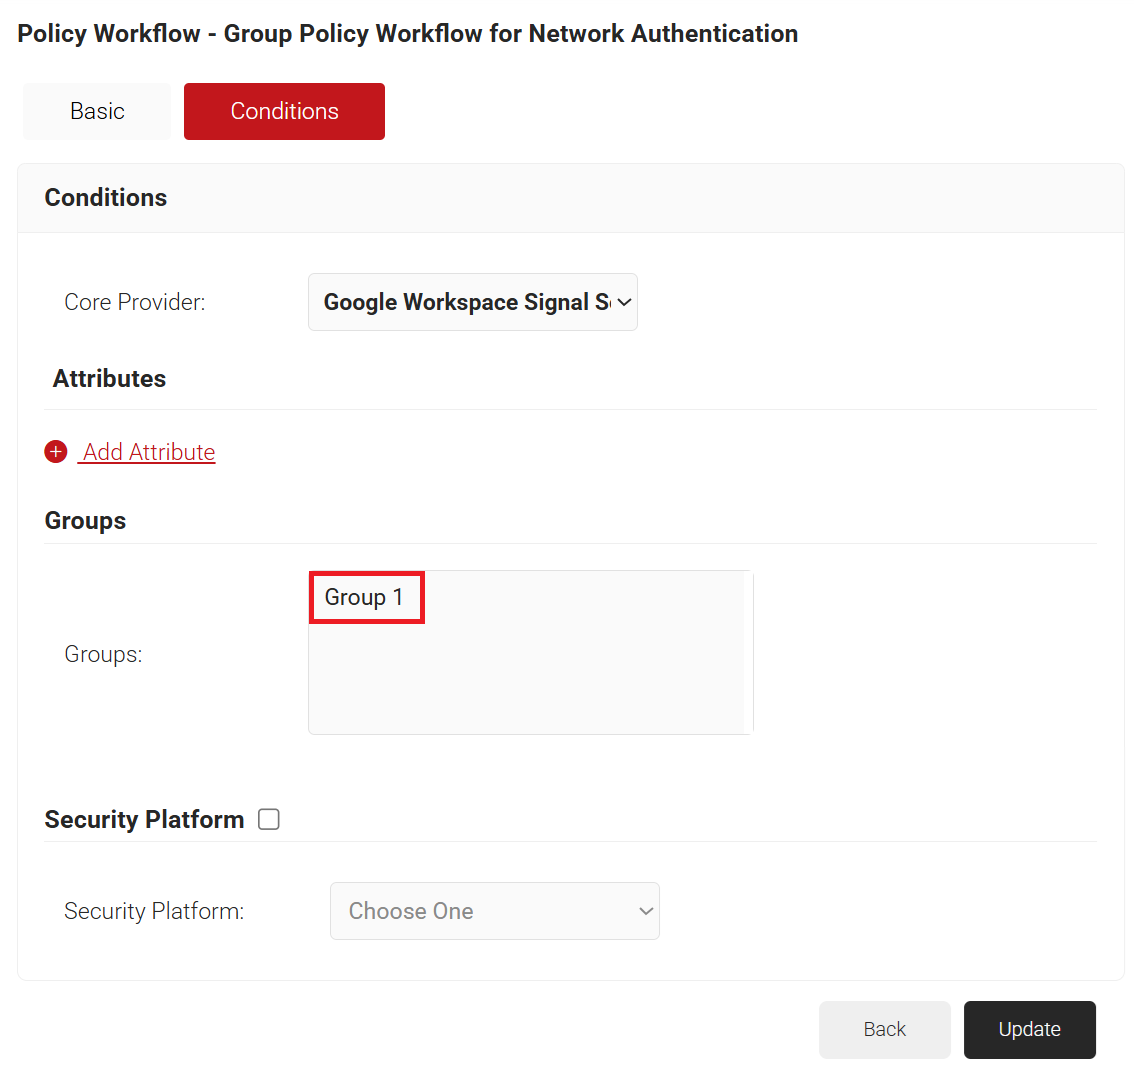
Finally, create Role Policies for any Groups that we want to give differentiated network access. We can then leverage Cloud RADIUS Dynamic Policy Engine to send unique RADIUS attributes based on the Group users belong to with our Network policies.
- Navigate to Policy Management > Policy Workflows.
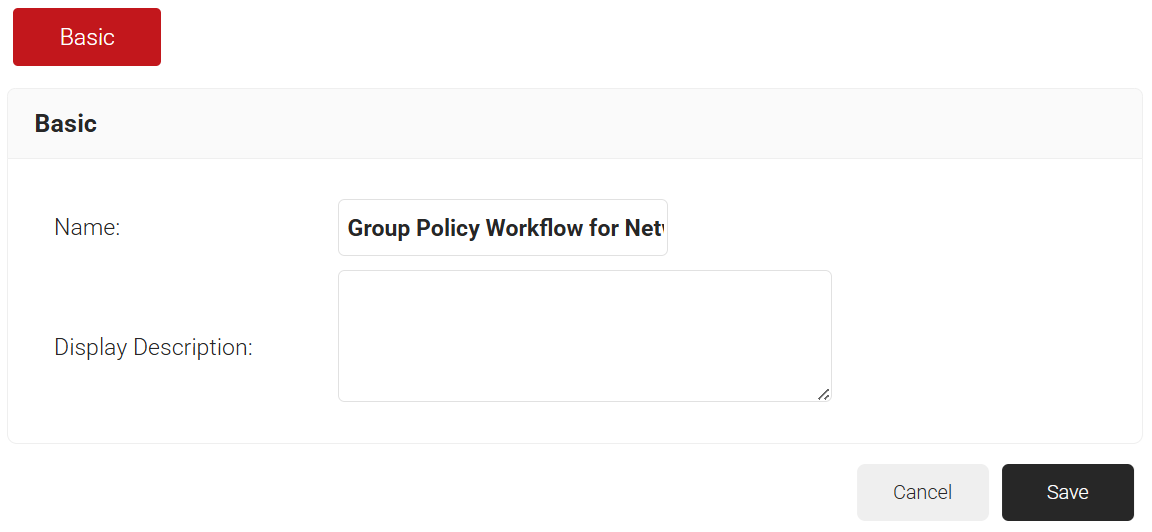
- Click Add Policy Workflow.
- In the Name field, enter the name of the policy workflow.
- In the Display Description field, enter a suitable description for the policy workflow.

- Click Save.
- Select the Conditions tab.
- From the Core Provider drop-down list, select the Google Workspace Signal Source you created earlier.
- In the Groups field, select the group you want to apply this Policy Workflow to. The group names that show up here, are the Local Groups you configured in your Signal Source.

- Click Update.
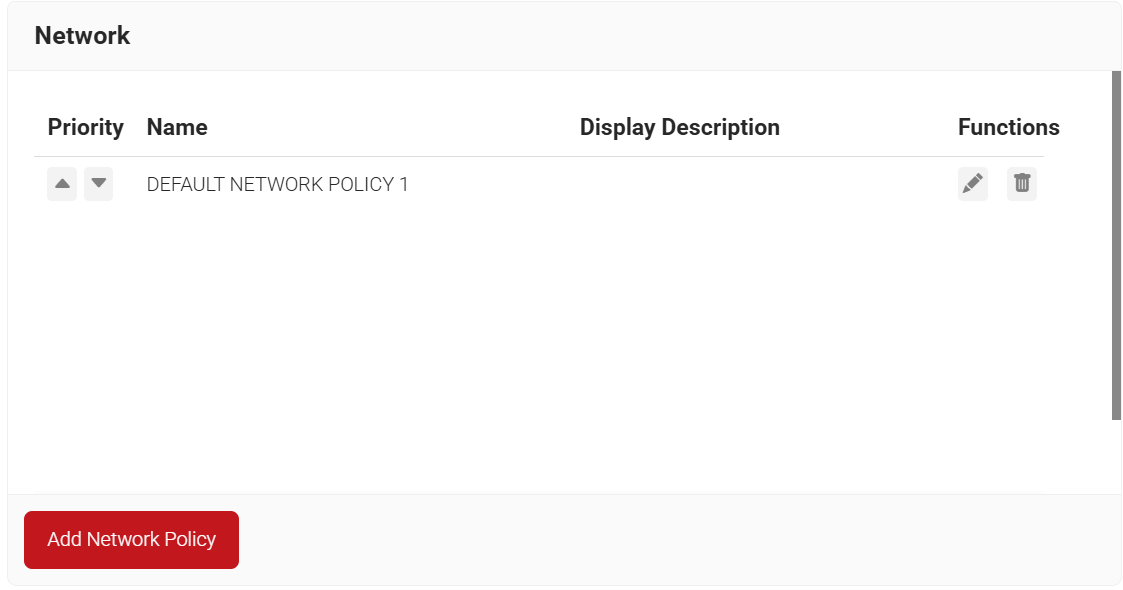
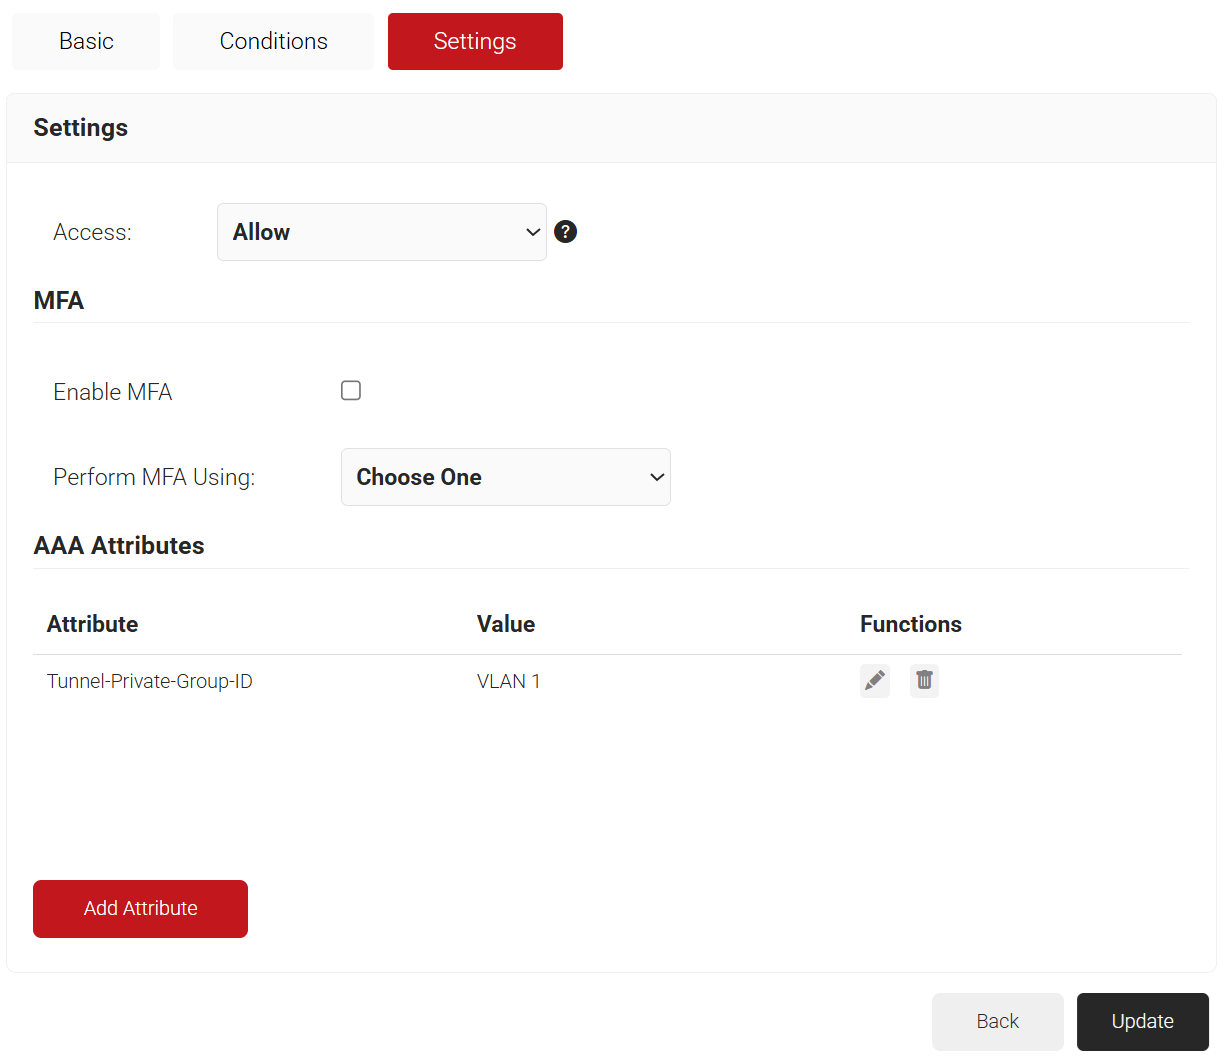
The purpose of a Network Policy is to specify how Cloud RADIUS will authorize access to a particular User Role. A typical Network Policy would say something like: “If User Role = Staff, authorize access and assign them to VLAN 2”. You can configure any RADIUS Attribute to be sent to the wireless controller. If you leave the attribute section blank, it will just send Access Accept. To create and configure the Network Policy, follow the steps below:
- Navigate to Policy Management > Network.
- Click Add Network Policy.

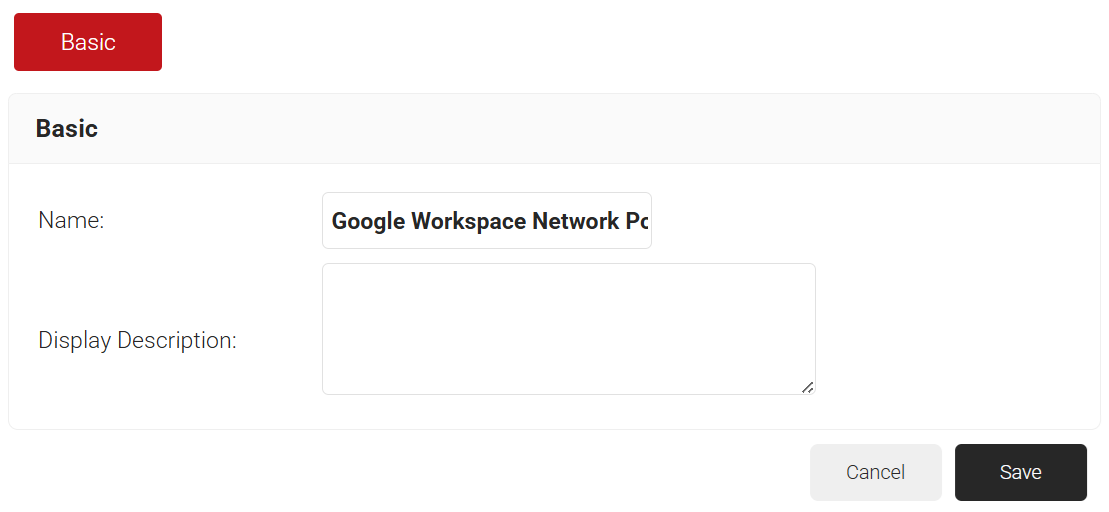
- In the Name field, enter the name of the network policy.
- In the Display Description field, enter a suitable description for the network policy.

- Click Save. The Conditions and Settings tabs are displayed.
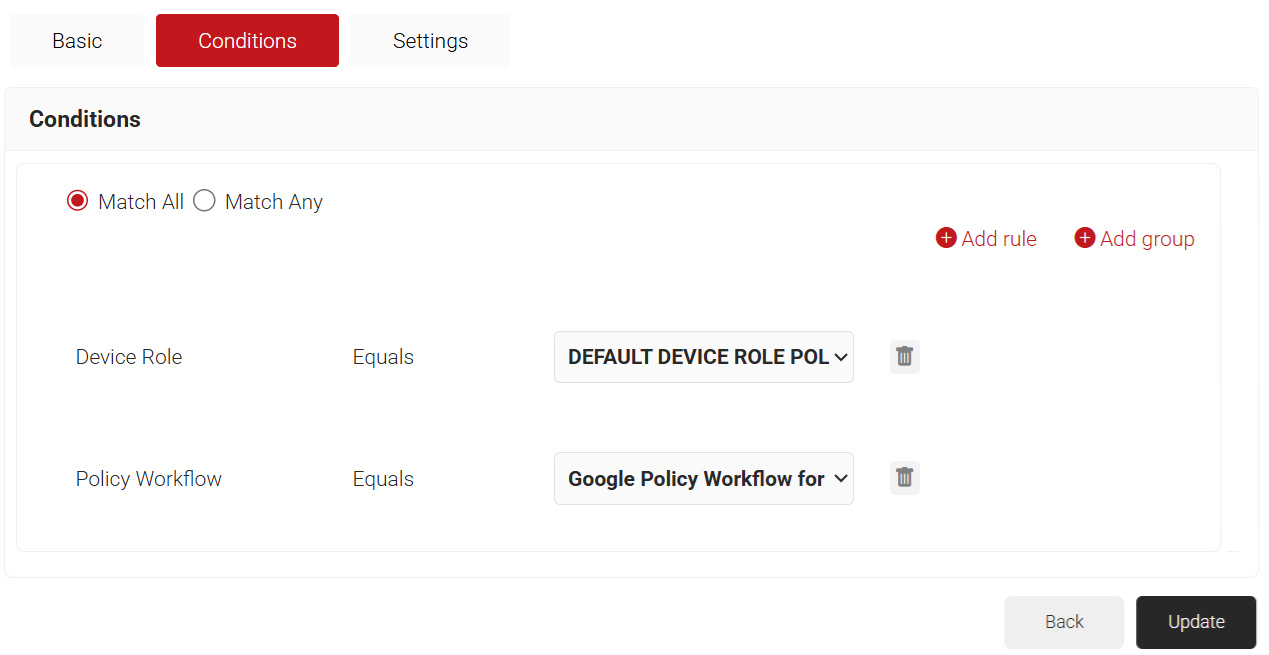
- Select the Conditions tab.
- Click the Add rule and select the policy workflow you want to assign to this network policy. It is essential to select the appropriate policy workflow, as it triggers the network policy. This menu offers various rules that you can select based on your business requirements.

NOTE: You can assign a network policy to multiple user roles. - From the Policy Workflow Equals drop-down list, select the role policy you created earlier (refer to the User Role Policy for Enrollment section). You can select multiple User Roles to assign to a Network Policy.
- Select the Settings tab.
- From the Access drop-down list, select any one of the options to allow or deny authentication requests. The default value is “Allow”.
- To configure MFA, select the checkbox to enable MFA.
- From the Perform MFA Using drop-down list, select a Core Provider for MFA.

- Click Add Attribute.
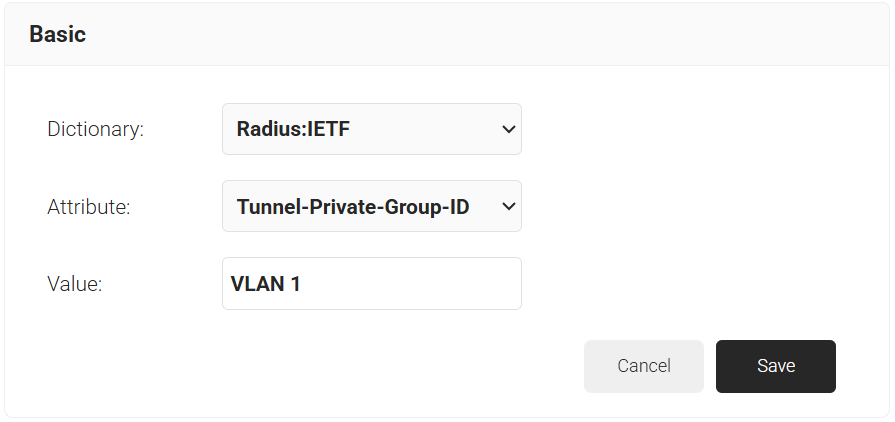
- From the Dictionary drop-down list, select an option:
- Radius: IETF – This is what we will use for the following attributes, as we are using standard RADIUS attributes for VLAN assignment.
- Custom: Used for any VSAs (Vendor-Specific Attributes).
- From the Dictionary drop-down list, select an option:
- From the Attribute drop-down list, select an option.
- Framed-Protocol
- Framed-IP-Address
- Framed-IP-NetMask
- Framed-Routing
- Filter-Id
- Framed-MTU
- Framed-Compression
- Reply-Message
- Framed-Route
- Framed-IPX-Network
- State
- Class
- Session-Timeout
- Tunnel-Type
- Tunnel-Medium-Type
- Tunnel-Private-Group-ID
- Framed-Pool
- User-Name
- In the Value field, enter the appropriate value for the attribute.

- Click Save.
- Repeat for any other RADIUS attribute you would like to send. For reference, here is what is commonly required for VLAN Assignment:
- Tunnel-Medium-Type: IEE-802
- Tunnel-Private-Group-ID: {VLAN Name}
- Server Tunnel-Type: VLAN
- Click Update.

NOTE: Repeat the process for all the attributes you want to send to the User Role.